
Upgrading your RV with a solar system requires an understanding of some key components.
By Brandon Hatcher, F437547, & Eric Udell
May 2018
It seems everyone is talking about solar power lately. We hope to help you better understand its benefits and limitations, and how it works with your RV.
At the most basic level, solar power is nothing more than a fancy battery charger. Solar panels take energy from the sun and convert it into electricity to charge the batteries in your RV. If you find that you are frequently in places where you are living off of your RV’s batteries, solar power may be right for you.
Benefits
Solar power offers a number of advantages.
- It’s almost maintenance-free. You must keep the panels clean and top off the water in any flooded lead-acid batteries. That’s about it. In comparison, generators typically consume a half gallon of fuel an hour, need oil changes every 100 to 150 hours of operation (if you use the generator three hours a day, that could be as often as every month), and can require other more expensive maintenance and repairs as they age.
- You’ll keep your batteries happy. Batteries like to be charged; it makes them last longer. Since your panels are working whenever sunlight falls on them, your batteries will be charging whenever it’s light out.
- You’ll have more opportunities for off-grid camping, known as boondocking. Depending on your solar capacity and other factors we’ll discuss in this article, it’s possible to park somewhere interesting for a week or more without worrying about power.
- You can enjoy peace and quiet. Your neighbors (even if they’re a hundred yards away) will thank you, and you don’t have to listen to your own generator run while enjoying time in the middle of nowhere.
- You’ll save money. In addition to spending less on generator fuel, you’ll find yourself camping off the grid more, and avoiding campground fees.
The Downside
Solar power is great for an RV, but it’s not perfect.
- On cloudy and rainy days, it will generate little to no power. On low solar days, a generator is still useful.
- For the vast majority of RVers, running an air conditioner on solar power isn’t practical because of the power requirements, difficulty, and expense.
- Batteries
RV solar systems have five main components. The most important is the battery bank. All RV house batteries are deep-cycle batteries, which can be deeply discharged using most of their capacity. That differs from car batteries, which are designed to supply a short surge of power to start the engine. Following are the types of deep-cycle batteries.
Flooded lead-acid: Most new RVs come with this type of battery, because they are inexpensive and do a good enough job. One downside is that they produce gases, so they must be in a vented compartment. The gases can cause the tops of the batteries to corrode. Flooded batteries require monthly maintenance to check water levels and refill with distilled water as needed.
Absorbed Glass Mat (AGM): This type of battery is sealed and under normal operating conditions does not produce gas like a flooded battery. Because they are sealed, they require no maintenance other than keeping them charged. This is a very popular option for many solar systems. The batteries are the same size as flooded batteries and can go into the same locations.
Gel: Like AGM batteries, gel batteries are sealed, but the battery acid is in gel form. Gel batteries must be charged at a slower rate and a lower voltage than flooded-cell batteries, and overcharging can permanently damage the cells. The popularity of these batteries has waned among RVers.
Lithium: They pack a lot of power in a small package and last much longer than lead-acid batteries. They can be great if you use a great deal of energy or if you need a lot of power in a small space, such as a camper van. One major limitation: They can’t be charged when they are very cold. If your current battery compartment is exposed to the outside air, you may cause damage to the batteries if they are charged when the temperature is below 32 degrees Fahrenheit. Another drawback is that they are expensive up front. But over the long term, when you consider the amount of power they produce and how long they last, they aren’t that drastically different from other options.
The batteries you choose will be determined by your intended use and budget. If you have easy access to your batteries and are good at keeping up with maintenance, lead-acid batteries may work fine for you. If you don’t want to worry about battery maintenance, or have batteries that are difficult to access for maintenance, AGM batteries may be the way to go. If you need a lot of capacity or you have limited space for batteries, lithium may be the right choice.
In RVs, 12-volt batteries and 6-volt batteries are the two common types. Six-volt batteries, which have thicker internal plates, often are preferred because they provide more reserve capacity and they typically last longer. When 6-volt batteries are used in place of 12-volt batteries, they are wired in series to act as one 12-volt battery bank.
When multiple batteries are combined in an RV, they always should be the same age, type, and capacity to achieve maximum performance.
Battery Monitor
A battery monitor is another major component of an RV solar system. Unfortunately, the standard factory-installed RV battery monitor is not a very accurate way to keep tabs on battery capacity. Such monitors look only at the battery voltage. The problem is that battery voltage varies depending on the load and whether the battery is being charged. As a result, a battery could appear to be low while there is a load on it, or it could seem fully charged because the voltmeter is displaying the voltage that the charger is putting into the batteries.
A good battery monitor displays the amps going into and out of the batteries and uses that information to calculate the batteries’ state of charge, which provides a more accurate representation of the battery capacity by percentage. The most accurate battery monitors include a shunt connected directly to the negative terminal on the batteries, so it can measure the actual flow in and out of the batteries.
Solar Panels
A third major component of the solar system are the solar panels. Things to consider are whether to choose monocrystalline or polycrystalline panels; panel size; whether to mount panels on the roof versus the ground; and whether to tilt the panels. Also, when choosing rigid panels, make sure they are built with tempered glass.
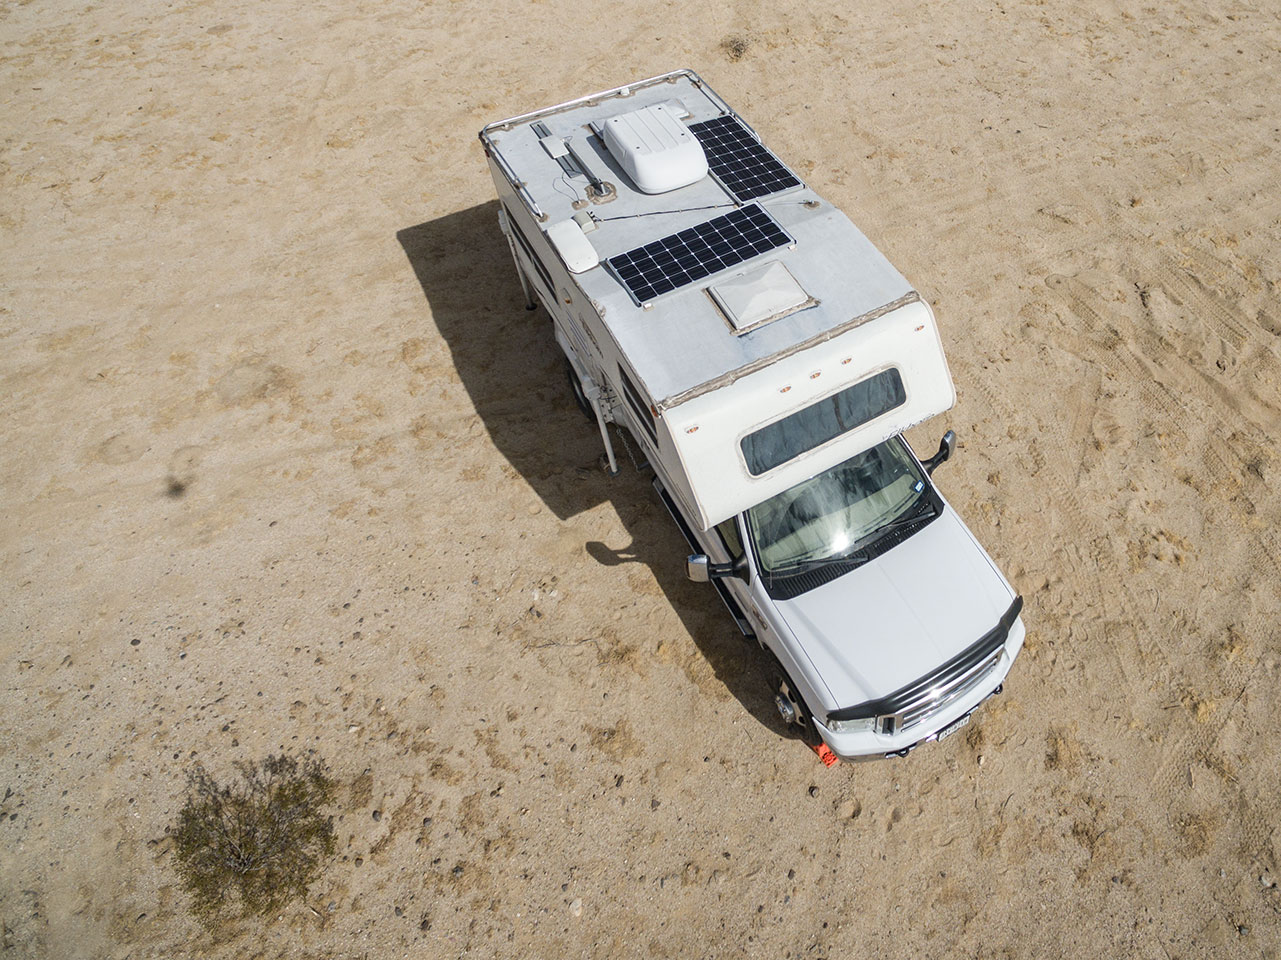
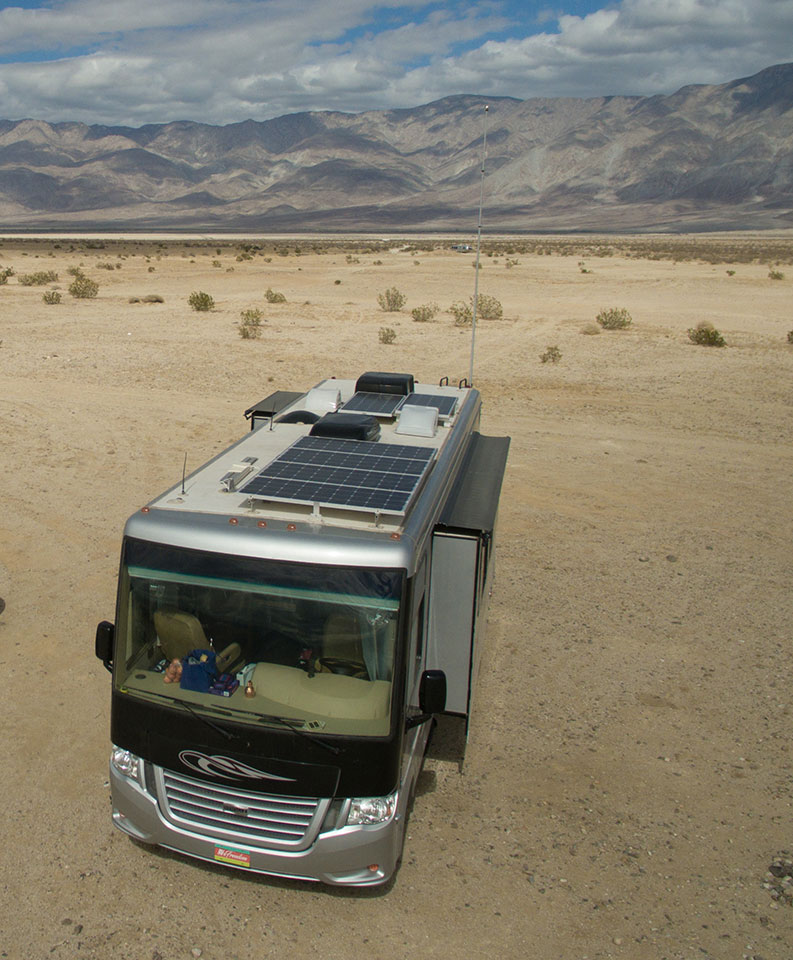
If there is space, the RV roof can be a good place to mount solar panels, but they won’t work as well when you park in the shade.
Monocrystalline, or mono, and polycrystalline, or poly, are types of solar cells made from crystalline silicon. A mono panel and a poly panel both rated at 100 watts will deliver about the same power. The difference is the mono panel will be smaller and more expensive per watt. The smaller size is an advantage if you have limited space, or you are trying to get the maximum amount of solar power out of the space you have.
Solar panels are available in a variety of sizes for RVs. Most such panels produce approximately 100 to 175 watts and easily fit on the roof around air conditioners, vents, and antennas. They also are not too heavy to tilt. Much larger panels with higher output are available. If you have the roof space, that could be a good option.
Roof-mounted panels are always up there working. But if you park your RV in the shade, they won’t work as well, if at all.
Ground-deployed panels allow you to park in the shade and place the panels in the sun where they can work more efficiently. You also can maximize efficiency by angling the panels toward the sun. The downside is that the panels must be protected from wind blowing them over or from people tripping on them. You also must set them up and store them when you move.
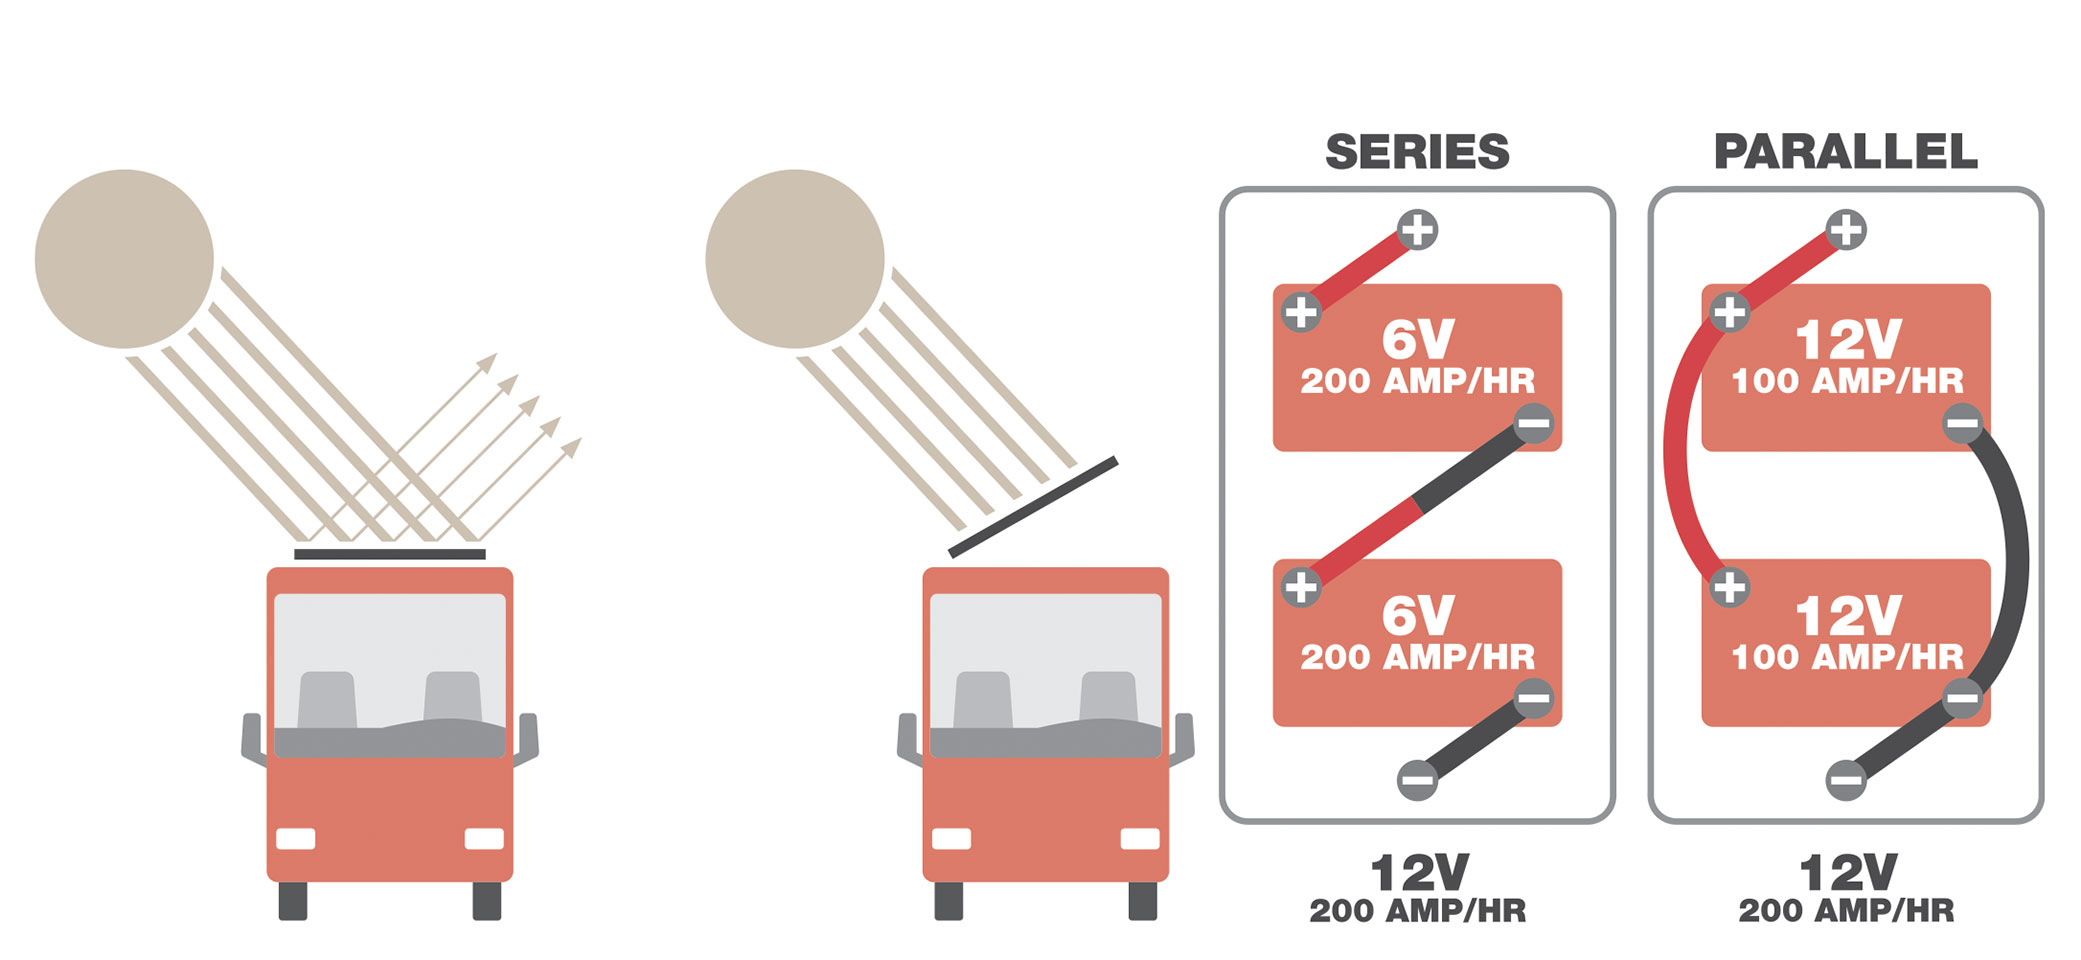
Tilted solar panels collect sunlight more efficiently, because less sunlight reflects off the glass; 6-volt batteries, when used instead of 12-volt batteries, are wired in series to act as one 12-volt battery bank.
When tilted, solar panels collect sunlight more efficiently, because less sunlight reflects off the glass. It’s common to see roof-mounted panels tilted toward the sun, as well as ground-mounted systems that owners can move throughout the day to follow the sun. Tilting the solar panels when the sun is low in the sky can increase their output by up to 15 percent. The output can be increased further by turning the panels to follow the sun, which is easier to do with ground-deployed panels.
If it’s too difficult for you to frequently climb up on your RV’s roof to tilt panels, you could add a couple more panels on the ground to follow the sun in the winter months; or, add a couple more panels to the roof so you have extra capacity to make up the difference.
Solar Controllers
A fourth component of solar systems, the solar controller, converts the power produced by the solar panels into the correct voltages to charge the RV batteries. The controller efficiently regulates the power going to the batteries to avoid overcharging, which can damage them. There are two types of solar controllers.
Pulse Width Modulation (PWM): This is the simplest type of controller that is commonly available for RVs. It is inexpensive and smaller in size than its counterparts. The downside is that the solar panel output voltage must be close to the charging voltage of the batteries.
Multi Power Point Tracking (MPPT): This is a more advanced solar controller. It can operate at higher voltages than the RV batteries and can change the excess voltage into amps that can be used to charge the batteries. An MPPT controller can boost a solar system’s efficiency by up to 30 percent. However, such controllers are more expensive and usually larger than a PWM controller.
In a larger RV solar system, an MPPT controller is the preferred type. In the case of a smaller solar system with only one panel, a PWM controller can be adequate.
Solar controllers are available in various sizes to handle different current outputs of solar panels. The larger the solar array on an RV, the larger the solar controller should be to handle the load. For example, if your solar panels produce 30 amps of 12-volt power, then you need a controller that can handle at least 30 amps.
If you think you may want to add more solar panels in the future, you may want to choose a solar controller that is large enough to handle the future load.
Solar controllers can be combined to regulate power on separate solar arrays on an RV. For example, you might decide at some point to add more panels to an existing system, or you might add ground panels to an RV that already has roof-mounted panels. Ideally, controllers should be able to communicate with each other to stay in sync. Using independent controllers won’t hurt anything, but efficiency will diminish a little.
Inverters
This last major piece of a solar system is optional. Many of us who frequently camp off the grid find inverters invaluable. An inverter changes the 12-volt-DC power from the batteries to 120-volt-AC power to run appliances.
If you want to watch TV, use the microwave oven, or plug things into wall outlets while you are on battery power, you will need an inverter. Many motorhomes come with inverters, but fifth-wheels and travel trailers often do not. Even if an RV comes with an inverter, you must figure out what it is connected to. On some RVs, the inverter is connected only to the televisions or residential refrigerator, and it’s not connected to all the RV’s wall outlets.
Make sure you select an inverter that is capable of handling your needs. An inverter’s power output is listed in watts. The watt output of the inverter should exceed the watt draw of the highest-load appliance (which in an RV is often the microwave oven) plus the watt draw of other items that would normally be on (and connected to the inverter).
A pure sine wave inverter is highly recommended; modified sine wave inverters can cause harm to sensitive electronics.
If you require only a small amount of 120-volt power for a television or a laptop computer, you may want to buy a low-wattage pure sine wave inverter equipped with a cigarette lighter adapter. However, most cigarette lighter outlets can deliver 120 watts or less, so be careful not to exceed that limit, regardless of the inverter’s wattage. Also take note that some dash cigarette lighters are connected to the vehicle’s starting battery, not the house batteries.
Installing an inverter in an RV that does not have one can be a big job and can add to the cost of a solar installation.
Installation Cost
The cost of a solar installation varies widely depending on the components you choose, the complexity of the RV, and whether you opt to install the system yourself. A do-it-yourself installation of a couple of panels, a budget controller, and some inexpensive batteries could cost less than $1,000. A professional installation of multiple solar panels, a larger battery bank, and an inverter can range from $8,000 to $10,000. It all comes down to what you need, how much you plan to use it, and what you want to spend.
Gauging Solar Needs
Your solar needs will depend in large part on your lifestyle and your RV. If you are out of your RV during the daylight hours and not using electricity, you will need less solar to recharge the batteries before the sun sets. If you are in the RV running the TV or computers off of the batteries while the solar system is charging them, you will need more solar capacity. If your RV has a residential refrigerator (and assuming you have an inverter), you will need more solar and battery capacity than someone with a gas fridge.
The best way to determine your solar needs is with an energy audit. Following are several ways to measure the power use in an RV.
Kill A Watt meter: Plug in this inexpensive device between an appliance and an outlet to measure how much energy the appliance uses over time. You can then determine how much power is used each day and how much solar is needed to create that power.
Battery monitor: A quality battery monitor with a shunt will accurately tell how much power is being drawn off the batteries when they are not connected to power. This provides a good measure of how much you are using and how much you need to recover with solar each day.
Estimation: All appliances list their energy use — often in watts — somewhere on the device or on the power adapter. For example, a laptop charger may be around 90 watts. Amps multiplied by volts equals watts. Therefore, we can calculate the current draw of the 90-watt charger on the 12-volt battery system. Divide 90 by 12 and you will see that the charger uses about 7.5 amps. You also will need to add about 15 percent to that number to account for the inefficiency of the inverter. Thus, a 90-watt laptop charger will use about 8.6 amps when plugged in. If it is plugged in for one hour, it will use 8.6 ampere-hours of battery capacity.
Rule Of Thumb
Most people will be self-sufficient with about 150 watts of solar power per RV battery.
For example, if your RV has two batteries, 300 watts of solar panels is a good start. If your RV has four batteries, you will need closer to 600 watts of solar panels to be self-sufficient.
This all depends on your usage. If you like to use many 120-volt electronic devices, you may need more panels. If you don’t use much electricity, you may get by with less.
Upgrading your RV with solar power can be a game changer for your camping lifestyle. If you seek the freedom of camping in wide-open natural spaces in peace and quiet, solar may be just what you need. Understanding the basics of a solar system and determining your needs will give you a head start when you look to install a system.
Basic Electricity Terms
Ampere, or amp: In simple terms, a unit that measures the flow rate of electric current.
Volt: The force that causes current to flow through a conductor or wire. Because there is less force in a 12-volt-DC system, it takes more current to do the same amount of work that a 120-volt-AC system can do.
Watt: A measure of electrical power. Amps multiplied by volts equals watts. This is useful to know, because appliances often list their power requirements by watts, and solar panels are listed according to their watt output. You can divide watts by volts to calculate the amp use.
Ampere-hour: A measure of the batteries’ capacity. This number reveals how many hours a battery will last when there is a continuous 1-amp draw on the battery. The higher the amp-hours of a battery, the more capacity it has and the longer it can go before recharging.