

By Gary Bunzer, Technical Editor
August 2019
Step-Well Cover

A Winnebago electric step-cover motor usually is hidden from view.
I am looking for information on how to fix the inoperable step-well cover on my 2006 Winnebago Tour motorhome. The cover has a cable-operated 12-volt motor.
— Leroy ● Via email
I had a similar question earlier this year regarding a failed step cover just like yours. I found quite a few makers of the mechanism that moves the cover into place. Some are air-operated, and some are powered by 12 volts DC, like yours. Even among the battery-powered covers, there are quite a few supplier manufacturers. So, a lot depends on which maker produced your step-cover mechanism. The two most popular appear to be Lippert Components and Power Gear (which is now owned by Lippert), so chances are your Tour is equipped with a Lippert or Kwikee (i.e., Power Gear) step motor. By the way, Winnebago posts all their prints and manuals online so you can peruse and download them.
The 2006 Tour has a few different electrical prints, so have your motorhome’s serial number handy when you visit the Winnebago resource page. Chances are the motor and drive mechanism are hidden behind an access panel above the generator. The accompanying photo shows what the motor might look like. The only way I know to reach it is to extend the generator and then crawl under the RV into the void where the generator sits when retracted. There also may be an access to the step-cover motor directly under the step.
As with the other question I received, I’m guessing the most logical cause of the problem with your step-well cover is a corroded electrical connection at the motor. In most cases, a two-wire multiplug connects to the motor (the yellow and red wires in the photo). Exposure to the elements can cause these connections to become fouled. Once you gain access, clean the contacts and plug the wires back into the motor housing. I recommend a product called DeoxIT for all electrical connections where a wire terminates or connects to another wire.
All this is contingent on the motor not operating at all. If you hear the motor running but the cover doesn’t move, there’s a chance the pin that connects the mechanism actuator to the motor shaft has sheared. If that is the case, installing a more robust pin likely will eliminate that from happening again. However, it may be necessary to drill a slightly larger hole through the shaft and the mechanism. In rare cases, the motor itself may have failed.
If I’m totally off base, download the exact manual and electrical diagram from the Winnebago site. Remember, you’ll need to choose the print based on the serial number of your coach.
Water Heater Pours Water
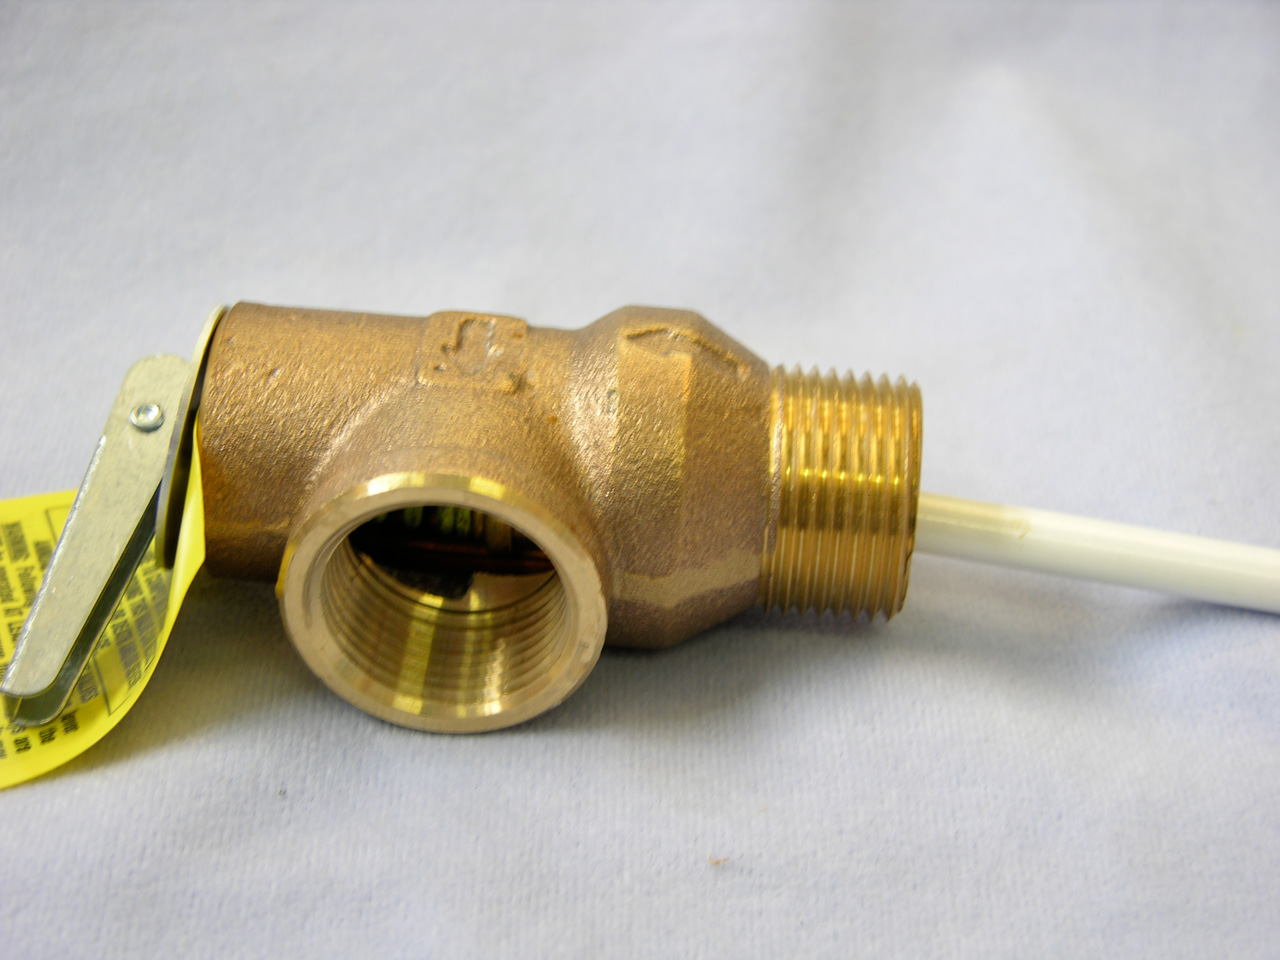
A water heater temperature and pressure relief safety valve.
I hooked up my RV to a direct water source and water started pouring out of the water heater overflow. Why would it do that, and how do I fix it?
Randi Vincent ● Via email
If you’re talking about the temperature and pressure relief valve (T&P valve), as shown in the accompanying photo (page 18), chances are it has failed. However, the same scenario can exist if the valve has been inadvertently left open.
Look closely at the silver lever mounted on top of the brass valve. It should be flat to the valve rather than sticking straight out. It’s fairly common for this valve to be left open if the RV was winterized. If the valve is indeed closed and water is still pouring out, it has failed.
It is normal for water to drip from the valve during every heating cycle, but only a couple of teaspoons will exit. In some cases, however, mineral residue can cause the seal not to close completely, depending on the age of the heater and how well it has been maintained. You might try opening the valve and snapping it shut a few times, but do this before the water has been heated. Water will exit under pressure, but it just might flush out stuck deposits. But if water simply pours out, nonstop, it will be necessary to replace the T&P valve. A certified technician can do that easily and quickly. It can be awkward for the do-it-yourselfer, since it requires a special wrench in most cases.
No Flashing Lamps
We have a 2003 Monaco Executive motorhome. The turn signals and the emergency flashers do not work. How do I fix this?
— Jimmy Hudgins ● Via email
As with anything electrical, it is a matter of isolating and reducing the problem to the smallest segment; in your case, the circuits in question. Since in most cases the same lamps are activated with both the turn signals and flashers, it shouldn’t be too difficult for a good tech or a do-it-yourselfer with electrical troubleshooting experience to determine the problem.
The obvious first check should be the fuse for each circuit. Be sure you have voltage on both sides of the fuse. Often, a fuse that looks good may be open.
Barring a break in a wire somewhere along its length, the only other major component is the flasher mechanism. Actually, there are two: one for the turn signals and one for the flashers. They fail from time to time. Look for a pair of silver-colored, cylindrical devices mounted directly on the fuse block for the chassis electrical system. When operable, they open and close the internal contacts, thereby completing and interrupting the circuit to the lamps. If you cannot hear (or feel) them vibrate as they open and close the circuit, chances are they have failed. They can be purchased at automotive accessory stores. I suggest buying a heavy-duty flasher for each circuit.
Though both circuits are initiated with a switch, rarely, if ever, do both switches fail at the same time. Other than an open circuit in a wire leading to the lamps, or perhaps a faulty ground connection, both circuits are pretty straightforward.
Dragging The Rear
The rear of my 2018 Coachmen motorhome drags on any slope. Some people say a better set of springs is needed, or perhaps I should add casters or maybe even air shocks. What’s the best remedy?
— Bill Hobaugh, F494099 ● Oklahoma City, Oklahoma
I believe in fully evaluating a motorhome chassis before adding individual parts to alleviate a problem. Shops may be quick to recommend replacement or upgraded parts simply because they have them in stock. True diagnosis is required before parts are replaced. Adding or replacing a component without determining the exact condition of the whole may alter how other suspension/steering components work in concert thereafter.
Yes, chances are that beefier springs will help, but how will that added weight — now shifted to the steer axle — affect the handling of the motorhome? The solution may be a combination of springs and an air-ride suspension. Personally, I’ve never liked the idea of installing casters to the rear. If you bottom out, even with casters, the risk of more damage is higher, plus it really doesn’t address the root problem.
I recommend weighing the motorhome, plus a thorough inspection of all the components associated with ride height, alignment, steering, and suspension, as well as shocks and track bar, etc. Only after a complete diagnosis can the wisest decision be made. Unfortunately, some RV shops may not be equipped to provide such a detailed diagnosis. Look for a reputable truck chassis shop in your area. Ideally, they should have experience in troubleshooting motorhomes specifically. I can recommend a couple of shops in the Northwest if you are close by. But I wouldn’t throw some parts on there until you determine how best to address the problem.