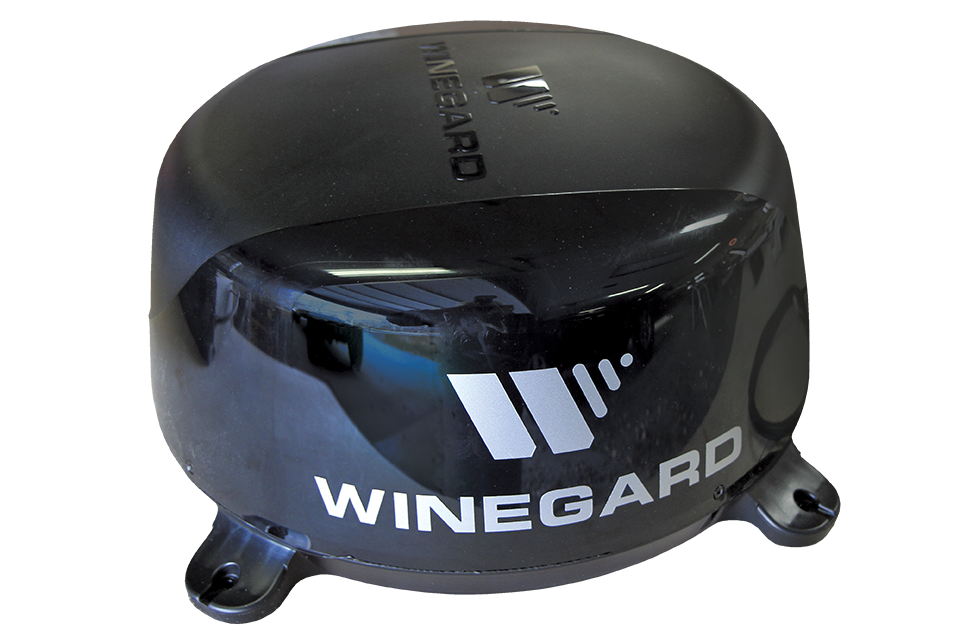
Winegard ConnecT 2.0 is engineered to boost your internet connection, whether you use Wi-Fi or a cellular service signal.
By Mark Quasius, F333630
November 2019
A two-conductor power cable connects to the Winegard ConnecT 2.0 and runs to the RV’s interior.
RVing is touted as a way to get away from it all, but many of us still want access to texting, email, and the internet. In fact, because of heavy demand from RVers, many campground owners now consider Wi-Fi access as the fourth utility.
To stay connected, an RV owner needs either a cellular service signal or campground Wi-Fi. In most cases, once access is obtained, a router rebroadcasts a Wi-Fi signal over a local network within the RV so that the occupants can wirelessly connect to the internet on their laptops, iPads, or smartphones.
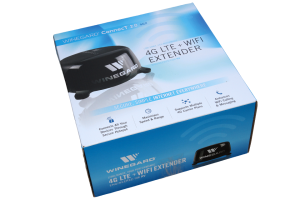
The Winegard ConnecT 2.0 is an all-in-one solution that accepts either method of access. It also has an internal router to create your own Wi-Fi network. It’s important to note that model WF2 is limited to Wi-Fi, but this article focuses on model 4G2, which includes 4G LTE cellular access as well as a Wi-Fi extender. Only the 4G LTE option provides coverage while the RV is in motion. The 4G2 has a manufacturer’s suggested retail price of $369.
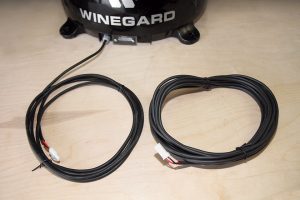
An extension cable is provided if needed for installation.
Overview
The Winegard ConnecT 2.0 is totally enclosed within a dome mounted on the RV roof. Unlike a satellite dish that has movement inside the dish, the ConnectT 2.0 components and antennas are stationary beneath the dome. The dome houses a Wi-Fi booster, a cellular modem, an antenna, and a router to rebroadcast the signal on your private Wi-Fi network. Setup and access to the unit happen wirelessly via a web browser from a Wi-Fi-enabled device, such as a computer, tablet, or smartphone. Or, the setup and control of the router can be handled by the Winegard Connected App.
The Winegard ConnecT 2.0 is a major improvement over the earlier Winegard ConnecT 4G1 model, which featured a roof-mounted pad with a number of antennas that pointed up in the air. The 2.0 version keeps everything under a protective dome that prevents damage from objects such as low-hanging tree branches.
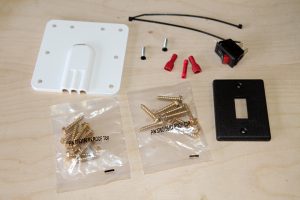
The Winegard ConnecT 2.0 comes with everything necessary for assembly.
The older unit also required the purchase of a cellular access plan from Winegard. The 2.0 version still allows you to use Winegard’s data plan, called FreedomGO, but it also includes a slot that accepts SIM cards from other cellular service providers. Initially, AT&T and Verizon SIM cards are accepted; other providers are expected to be added, and no hardware modifications to the ConnecT 2.0 will be needed.
Installation
Installation is fairly easy. Basically, you screw the unit to the roof, run a power cable to the interior of the RV, and connect it to the power switch, which is in turn connected to a 12-volt power source. A few parameters must be followed when choosing where to mount the unit. The unit must be on the centerline of the roof, or at least parallel to it. The side of the dome with the SIM card and power cable entrance must face the rear of the RV, and the dome must be at least 12 inches from the edge of the roof and adjacent devices.
I opened the ConnecT 2.0 box and set the dome on my workbench. I laid out the included components — a power extension cable; a 12-volt rocker switch and bezel; a rooftop cable-access cover plate; and a number of fasteners, cable ties, and wire terminals. Other than some tools and sealant, everything was provided.
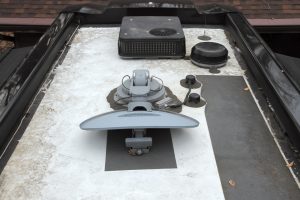
An air conditioner, an off-air antenna, and a satellite dish filled the front portion of the author’s motorhome roof, prompting him to find another area for installation.
I positioned the unit on my workbench so that I was facing the rear of the dome. Using a #2 Phillips screwdriver, I removed the plastic cover of the SIM card slot and installed my Verizon SIM card. I replaced the cover. (Note: Typically, you’ll need to contact Verizon or AT&T and provide information about the ConnecT 2.0 before getting a Verizon or AT&T SIM card.)
I installed the ConnecT 2.0 in the spring, so my next step was to give the roof a good cleaning to remove all the dirt and gunk that had accumulated during the fall and winter.
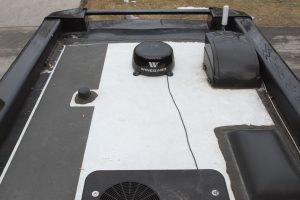
The Winegard ConnecT was placed 2.0 in the rear of the author’s motorhome roof.
I then set up my ladder and carried the 3.75-pound ConnecT 2.0 to the RV roof. I initially planned to mount the unit near the front of my motorhome, because I intended to put the power switch in the RV’s front area. But once I got on the roof, I changed my mind. The very front of the roof area was fairly well populated with the front air conditioner, a satellite dish, an over-the-air antenna, plus some rooftop access points with cables for solar panels that might be added. But the rear roof area had plenty of room, so I chose that location instead. I decided to run the power cable along my roof-mounted awnings to the RV’s front cap to access the power switch.
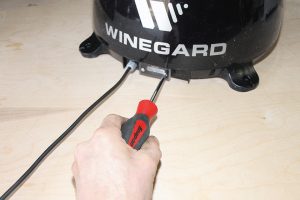
Screws that hold the SIM card cover in place are removed.
The dome most likely could mount easily and securely to a fiberglass roof with the four provided screws. However, I have an electronic stud finder, so I used it to locate the roof trusses, and I mounted the dome right to them for extra support. With the dome on the roof, I used an impact driver to partially install the self-drilling hex-head screws. I then removed the screws and the dome from that area, and I applied a dab of sealant to each screw location. I set the dome back onto these spots and reinserted the screws, fully tightening them this time. I then applied more self-leveling sealant over each mounting foot so that the feet and screw heads were fully covered. I wanted to ensure that no water ever intrudes into the coach interior.
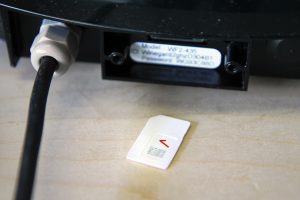
The SIM card can then be inserted into its slot.
Next, I ran the power cable over toward the side of the coach, using rubber-coated stainless-steel cable clamps to fasten it securely to the roof. I continued forward along the inside edge of the awning housing until I ran out of cable. Because I mounted the dome at the rear of the RV, at the opposite end of my cockpit power switch location, I needed to use the extension cable that came with the ConnecT. I plugged in the extension cable and continued going forward. When I reached the back side of the front cap, I retraced and applied sealant over each of the cable clamp screws. The power extension cable has a polarized connector, so it just snaps into place. Most applications put this connection inside the RV; however, the rooftop method was best for my motorhome, so I sealed up that connector to make it watertight.
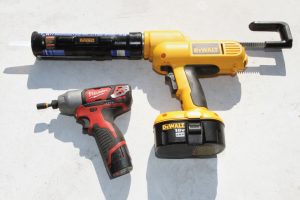
A cordless caulking gun and a ¼-inch hex impact driver were used to mount the ConnecT 2.0.
I previously had installed on my motorhome a cellular signal booster with an external antenna at the rear of the coach. A coaxial cable ran forward to the back side of the front cap, where it entered the vehicle’s interior through a cable cover plate. I decided to run the ConnecT’s power cable through the same area, so I removed the existing access cover and scraped off all of the old sealant. I ran the dome’s power cable next to the cell booster’s coax, and I mounted the new ConnecT access cover (which has notches for two cables). Then I sealed everything up.
I had mounted the cell booster’s interior unit in the front cabinet over the driver’s seat, so I decided to place the dome’s
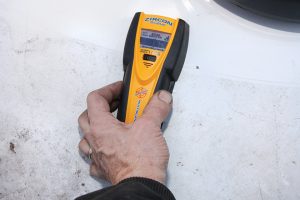
A stud finder was used to locate a roof joist so the unit could be secured to it.
power switch in that area also. Using a hole saw, I drilled in the back side of the cabinet. To that area, I ran a ground line and a fused 12-volt hot power line fed by the house battery bank. I connected the switch in the hot line to the dome and then connected the ground wire. That completed the hardware installation. All that remained was the software setup.
Software Setup
Following the ConnecT 2.0’s instructions, I entered the IP address into my web browser. (Or, you can use the Winegard Connected App.) A login window appeared, and I entered the default username and password that came with the unit. I then changed the username and password to something that I would remember, and I continued with the setup.
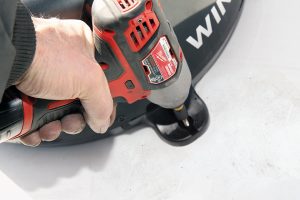
Once the location of the ConnecT 2.o was determined, mounting screws were partially installed using an impact driver.
Next, I followed the directions on the screen and set up Verizon as my cellular service provider. Available Wi-Fi signals also appear on the screen, so you can switch between Wi-Fi and cellular anytime.
Then I set up my local Wi-Fi network. I entered the name of the network (the SSID), the access password, and the security method. That was basically it for setup.
At any time, I can use any wireless device with a web browser to access the unit and change parameters as needed. Another screen shows the model number, serial number, and toll-free access to Winegard’s tech support line. More advanced settings are available, but they aren’t necessary for most owners
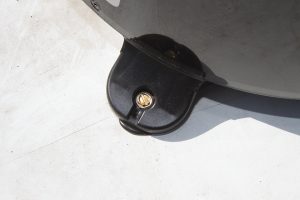
The screws were removed, self-leveling sealant was applied over the holes, and the unit was secured to the roof by the screws.
When I was finished, I was able to access the internet immediately. I didn’t need to go up on the roof to view the diagnostic LED on the back side of the dome, but I was curious, so I did. The LED is red while the system is booting up. It blinks fast green when initializing, and turns to a fast blinking orange if the system is up but waiting for an internet connection. Once connected, the LED turns to a solid green. That’s what mine displayed, so everything checked out just fine.
Using The Connect 2.0
Firing up the system from a cold start is easy. Just switch on the 12-volt power to the unit at the rocker switch; it takes about a minute for the system to boot up. Then, open your computer or smartphone’s wireless access screen and choose the network name that you have assigned to the ConnecT. Enter a password, if required, and you will have full internet access and email. It’s also possible to access the ConnecT 2.0’s functions using the free Winegard app, which is available for iOS and Android.
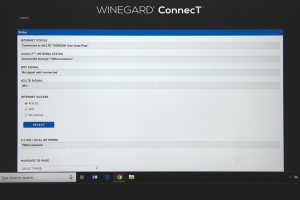
Users set up cellular service provider on their computer or smartphone.
The local network is powerful and easily can reach outside of an RV to your patio area. So, you have the option of going online while sitting outside at a picnic table.
It’s easy to switch from your cellular plan to campground Wi-Fi, or vice versa. Just access your setup page from a web browser.
Given the ease of use, the uncomplicated DIY installation, and the ability to use your own cellular service plan or Wi-Fi signal, the Winegard ConnecT 2.0 should be a popular choice for many RV owners.
More Info
Winegard
(800) 288-8094
www.winegard.com/connect

