
Professional inspections are key, but DIYers also can take steps to keep their LP system burning safely.
By Steve Froese, F276276
December 2019
In most RVs, the propane setup is one of three primary systems, along with plumbing and electrical. While not all RV appliances rely solely on propane — also referred to as LP gas, or liquefied petroleum — it is a very important system.
Propane is an extremely efficient and relatively low-cost fuel. But even though propane is extremely safe when handled responsibly, it can cause damage, injury, or even death if it is not respected. This article discusses propane (and butane) and basic propane system maintenance.
The most important factor is to have your propane system professionally inspected annually, or as soon as possible if you suspect a problem. Identifying an RV service provider with the special knowledge and tools required to perform a proper inspection is fundamentally important. While you may be able to perform some RV maintenance tasks yourself (such as checking exterior sealants), do not assume you can do the same for the propane system. Keep your family safe and your propane system running smoothly by having it professionally inspected and serviced.
In fact, many states and provinces require licenses for the technicians and the facilities that maintain, install, or repair RV propane components. If you don’t live in such an area, identify a reputable service center with technicians who are well trained and experienced. Among the things an RV technician will check for are leaks and correct operating pressure. These fundamental tests require special tools. Never check for propane leaks with a match, candle, or other flame or heat source.
Although an annual professional inspection of the propane system is important, you can do some things yourself to save money and keep your RV safe and maintained. In the process, you will become more familiar with your system. As always, don’t attempt any of these procedures without fully evaluating your own DIY skill and experience. The steps outlined in this article are fairly simple, and rate a 2 out of 5 on my DIY difficulty scale, which means most RV owners without specific DIY experience or special tools can perform the tasks. Having said that, never loosen or remove propane lines or components during the course of your RV maintenance, as this can lead to propane leaks if the connections become damaged or are over- or under-torqued (the exception: disconnecting a fitting in order to change out a propane tank).
Propane Gas
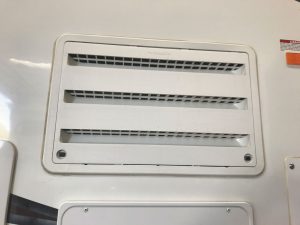
Many propane vendors supply pure propane, but it is not uncommon for them to dispense a mixture of propane and butane, or even pure butane, especially in southern parts of the United States. Whether an RV has butane, a propane/butane mixture, or pure propane is largely academic, except for one key point. Before I discuss this, look at the accompanying chart, which shows some properties of propane and butane.
 First, take note of the boiling point — the temperature at which the liquid vaporizes, or turns to gas. This is important, since RV appliances utilize propane vapor. Notice that propane has a much lower boiling point than butane. Therefore, if you purchased butane or a propane/butane mixture, you likely will have to consume it, safely flare it off (burn it) using a high-Btu torch, or at least dilute it with pure propane if you plan to travel to a colder climate, especially in the winter. Put another way, butane will not vaporize at temperatures below approximately 30 degrees Fahrenheit, so if you are traveling to a location with freezing temperatures, your appliances will not work.
Propane is a much better choice for cold-weather travel, as it vaporizes at minus 44 degrees Fahrenheit. If you are a winter camper, make sure your container always stays at least 50 percent full of propane in cold weather. In basic terms, the energy required to vaporize the liquid propane comes from heat in the air touching the portion of the container filled with liquid propane. An adequate area of this “wetted surface” is required to ensure complete vaporization at temperatures near the boiling point. Ensuring your container stays at least half-full should do the trick.
The chart also shows heat of combustion, a measure of how much energy is created per pound. Propane and butane are basically the same in this regard. To help understand this value, think about a 20-pound propane cylinder, which is a typical size on a travel trailer. Each container can produce 21,660 x 20 = 433,200 Btu of energy. If you have a 20,000-Btu furnace, it could run constantly for almost 22 hours before running out of propane, although we know the furnace does not have a 100 percent duty cycle.
The final entry in the chart lists the specific gravity of propane and butane. This value tells us that both propane and butane are heavier than air when in the vapor state (the specific gravity of air is 1). This is why propane alarms are mounted near the floor. Note that moving air causes propane and butane vapor to mix with air and dissipate, although floor-level alarms still will be effective.
Appliance Maintenance
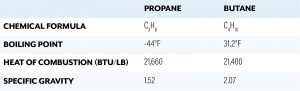
A vent covers the exterior lower refrigerator compartment.
It is important to keep all RV appliances — particularly gas-burning ones — clean and in good working order. This helps fend off breakdowns and/or hazardous situations, which may include propane issues such as leakage. Malfunctioning appliances also can create carbon monoxide (CO) gas, an odorless, colorless, tasteless potential killer. CO gas usually is caused by incomplete or improper combustion by a propane-burning appliance. Monitor all appliances for proper operation as specified in the owners manuals, and pay close attention to the condition and status of your CO, smoke, and propane alarms.
Appliance maintenance generally should be performed with the appliance off and cool, except in specific cases. Should you find anything amiss with your appliances, be sure to have them serviced by a professional RV service center as soon as possible.
Open the lower exterior compartment occasionally to clean the area.
Refrigerator: A burner tune-up, which is beyond the scope of this article, should be part of annual refrigerator maintenance. The following tasks don’t require that level of technical knowledge.
The door seal can be checked using the “dollar bill” test. Take any denomination of U.S. paper currency (Canadian bills don’t work properly) and slip it between the door seal and the refrigerator frame. Close the door and pull the bill out. You should encounter some resistance. Be sure to perform this test on all edges of the door seal, including the freezer compartment. If at any point the bill slips out easily without resistance, the door seal is letting warm air in, and the refrigerator must work harder.
Keep the interior clean. Take advantage of the times your fridge is turned off or in storage to perform a deep clean, including the freezer compartment. Open the lower exterior compartment and clean there as well. If you have access to compressed air (including canned air), carefully blow the area behind the fridge, including the burner area. At the very least, you should keep the rear access area clean by wiping and/or vacuuming. You may find debris, spiderwebs, or even critters in the ancillary spaces of an appliance. Insects like the smell of propane, but their presence can cause damage or cause appliances to operate less efficiently.
Finally, ensure that the refrigerator’s combustion system is completely isolated from the RV’s living area, with no openings for gas to infiltrate.
Furnace: Don’t block furnace registers with area rugs or other obstructions. Carefully blow out or vacuum the exterior vent. Make sure the interior access area where the furnace is installed is kept clean, including the furnace housing itself, and do not store anything in that area.
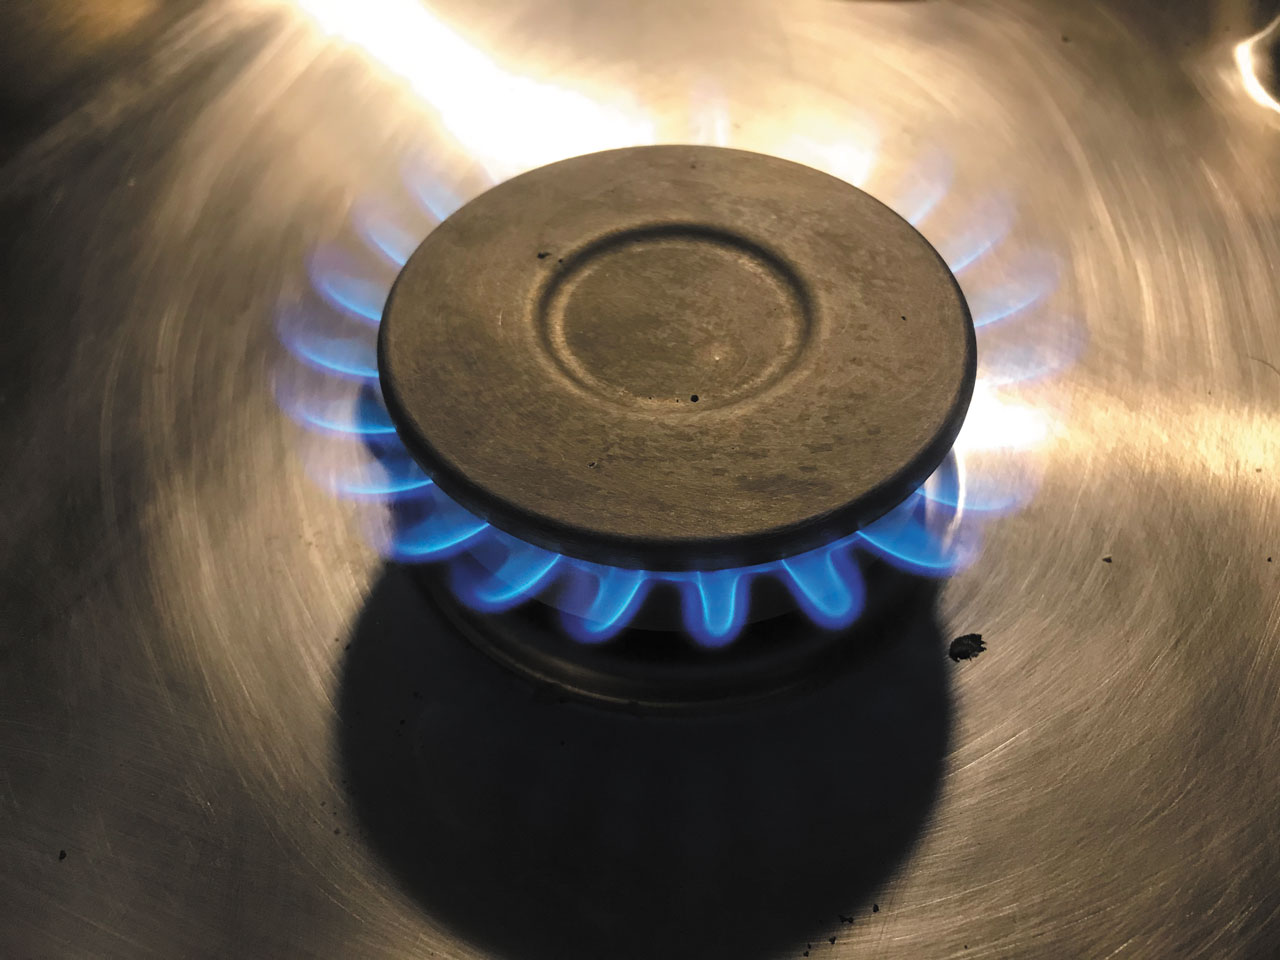
Stove/range/cooktop: As with other appliances, keep the surface and interior clean. Consider lining the base of the cooktop and oven with aluminum foil to act as drip trays. Be sure to replace them when they get dirty or greasy. Burner flames should have a blue center cone; orange or yellow flame tips indicate incomplete combustion. Keep the burners clean, and be careful not to clog the burner ports. If ports become clogged and do not support a flame, use a toothpick to carefully clean them. If the cooktop utilizes a pilot light, lift the cooktop cover and ensure that the pilot ignites properly and maintains a strong flame. Do the same with the oven pilot.
Water heater: As with the refrigerator, open the outside access panel and blow out or vacuum the back of the appliance. In the case of the water heater, you can blow air through or vacuum the burner tube to remove debris, but when using compressed air, keep your body out of the direct line of debris exiting the tube.
Check that the water heater’s pressure and temperature (P&T) relief valve is not dripping water; a leak may indicate the hot-water tank has lost its air pocket at the top.
Inspect the pressure and temperature (P&T) relief valve to make sure it’s not dripping water. If it is, the likely cause is that the hot water tank has lost the air pocket at the top. Generally, you can restore the air pocket by turning off the source of fresh water (city water or pump), opening the hot water faucet closest to the water heater, and then opening the P&T relief valve handle until the dripping stops. Be careful not to scald or burn yourself. When the water stops, let go of the handle, making sure it snaps closed. Close the hot water tap you turned on previously. Turn on the water source to make sure the dripping has stopped. If the drip persists, repeat the process. Occasional dripping is normal, but if it drips significantly or constantly, the P&T relief valve may need to be replaced.
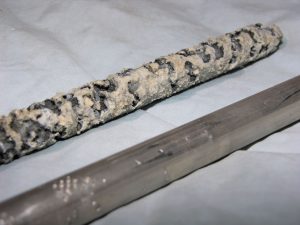
In a Suburban water heater, the anode rod should be replaced when it is reduced in size by 75 percent.
If your water heater has an aluminum tank, such as those manufactured by Atwood, inspect the plastic plug for signs of leaking. If it is leaking, tighten it with a 15/16-inch wrench or socket. Try to avoid using vice-grips or pliers, as this will damage the plastic head. Also avoid using metal drain plugs such as steel or brass. Galvanic corrosion will occur, which can lead to the threads rusting together. This makes the plug very difficult to remove. Replace the plastic plug with a new one when it begins to show signs of wear.
If your water heater has a steel tank, such as a Suburban, inspect the anode rod each season, most conveniently when you drain the hot water tank for storage. Replace the rod when it has been reduced in size by 75 percent. Fire up the water heater and make sure the flame is strong without any “roaring.” A loud flame is likely in need of adjustment or a burner/orifice cleaning. Similarly, signs of soot around the burner or outside an appliance indicate an adjustment is required.
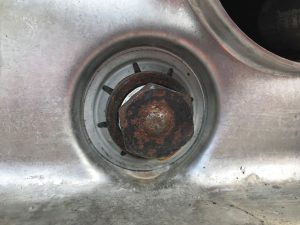
An installed anode.
Other propane appliances: Follow manufacturers’ recommended procedures.
Your RV service center will perform the checks and inspections noted above when you have your propane system serviced. I can’t stress enough the importance of having the system professionally inspected and serviced annually.
If you smell propane, or more accurately, the ethyl mercaptan added to propane to give it the rotten-eggs smell, take the following steps:
*Extinguish any open flames, pilot lights, and smoking materials.
*Do not touch electrical switches, as they could create a spark.
*Shut off the gas supply at the tank valve(s) or gas supply connection.
*Open doors and other means of ventilation.
*Leave the area until the odor clears.
*Have the propane system inspected and correct the leakage before using the RV again.
Propane Containers
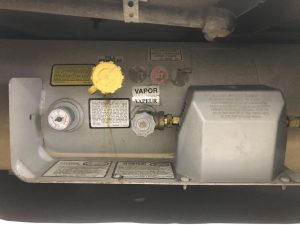
A motorhome’s propane tank is mounted permanently.
Propane tanks are permanently mounted containers such as those found on motorhomes. Propane cylinders are portable containers such as those carried on travel trailers. Tanks are regulated by the American Society of Mechanical Engineers (ASME), while cylinders are under the jurisdiction of the U.S. Department of Transportation (DOT) or Transport Canada (TC).
If your RV utilizes propane cylinders, DOT mandates they be recertified after 10 years, and then every five years thereafter. Under TC regulations in Canada, cylinders must be recertified every 10 years.
Qualified and responsible propane suppliers will check the certification date stamped on the cylinder ring before filling the cylinder. If the date stamped on the cylinder is older than the age requirement, or damage or rust is evident, the attendant should refuse to fill it, and you will have to purchase a replacement. Fortunately, prefilled reconditioned propane cylinders are available at many retailers. In many cases, trading in an old cylinder for a reconditioned one is comparable in price to a fill anyway. Check the certification date on your cylinder(s) so you know when they “expire.” As this date approaches, consider swapping the cylinder for a reconditioned one.
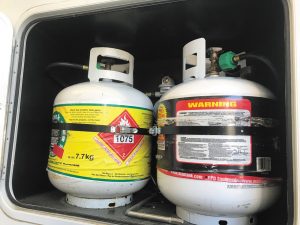
Propane cylinders, such as those used in travel trailers, are portable containers.
ASME tanks do not have a recertification requirement, but they should be visually inspected regularly for signs of damage, rust, etc. Often, small amounts of surface rust can be cleaned and painted with white rust paint. More severe rusting or damage should be referred to an RV dealer or propane dealer.
Whether you have a propane tank or cylinder(s), the service valves are similar. Always make sure the valve can be opened fully and closed properly without the sound or smell of a leak. In the case of a tank, ensure that the yellow protective cap on the fill valve is in place. Replace a missing cap so no debris can enter the tank or damage the internal mechanisms.
Make sure RV cylinders are secured properly to the trailer at all times. Any cylinders stored separately, such as barbecue grill cylinders, should be transported upright with the service valves closed and dust caps covering the outlets. Never use a plug in the outlet, as it could depress the plunger inside the service valve. Keep propane containers out of direct heat, and never store them inside the RV. They can be stored in outside compartments, as long as they are secured to keep from falling over or sliding around and are not subjected to heat or flame sources.
As with other components of the propane system, have your propane container(s) professionally serviced if you suspect a problem.
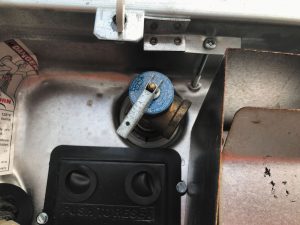
Propane Regulator
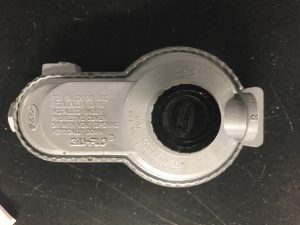
An RV propane regulator must be serviced by a trained RV service technician.
Propane regulators on RVs are required to be the dual-stage type, which means two separate stages of pressure reduction are required. The first stage reduces the container pressure, which can be 250 psi or more, to about 10 psi. The second stage further reduces the pressure to approximately 0.4 psi, usually expressed as 11 inches water column. The regulator is serviceable only by trained RV service technicians, who can check it for leaks, functionality, and proper operating pressure.
The regulator incorporates a vent to the atmosphere; regulations require it to be pointed within 45 degrees of vertically down. You should occasionally inspect this vent for dirt, debris, moisture, insects, etc. If the vent is blocked, the regulator will not function properly. The regulator may be protected by a plastic cover, which must be removed to inspect the vent. The cover helps keep the regulator clean and dry, so be sure to put it back when you finish your inspection. Clean off debris that may cover the regulator body or block the vent. Ensure the regulator is fastened securely to its mounting system. Inspect any neoprene hoses connected to the regulator (such as pigtails), and look for cracks, kinks, cuts, abrasion, or other damage. Damaged or worn hoses should be replaced. If you are diligent in having your system inspected annually, the service technician should spot these worn components and inform you.
Propane Alarm Inspection
Test your propane alarm before each trip and every six months. An alarm’s test button checks only the electronics, not the sensor itself. A good way to test the complete system is to hold a butane lighter about 4 inches from the alarm. Open the butane gas trigger on the lighter, but do not light it, allowing just the gas to flow out. Do not hold the lighter right against the alarm or closer than about 4 inches or you could saturate the sensor, damaging it. The alarm should sound after several seconds. You also can purchase commercial test kits for this purpose. Ideally, this test should be performed weekly, or whenever the RV is taken out, whichever occurs first.
Propane alarms also can be triggered by factors other than a propane leak, including combustibles such as alcohol, deodorants, perfumes, adhesives, lacquer, kerosene, gasoline, glues, cleaning agents, and aerosol propellants. However, most of these substances are lighter than air, so they should not sink down to your alarm unless the RV is sealed and a buildup occurs. Still, air movement within the RV may cause the gasses to mix with air. Therefore, you may experience false alarms from time to time. But never assume an alarm is false or take it for granted without checking out the source.
Propane, CO, and smoke alarms should be replaced according to manufacturers’ recommendations, even if they appear to be working properly. Also change the batteries twice per year. If Daylight Savings Time is observed where you are, it’s good to change the batteries when you set your clocks forward or back.
In summary, while propane troubleshooting, inspection, and repair should be left to professional RV service technicians, proactive maintenance will keep your system and appliances running safely and reliably, and should minimize repair costs when you do take your RV in for a checkup.