By Steve Froese, F276276
I have always been a strong advocate of RV owners performing their own maintenance and repairs. However, this comes with a major caveat: Never perform a repair you are not comfortable with, and don’t try to fix anything related to the propane system.
If you are a competent do-it-yourselfer, carefully evaluate what needs to be done before you embark on a repair, and make sure you are confident you can handle all the required steps. You also should consider to what level and quality you can perform the repair, so you don’t end up with a fix that doesn’t look good and/or function well. If you are not handy with tools, let a professional, a neighbor, or a friend do the work.
One area likely to crop up at some point during RV ownership is a plumbing leak involving either the fresh-water or waste-water system. Plumbing leaks often are marginalized in RV discussions, because the focus tends to be on water leaks that result from rain entering the vehicle. This is understandable given the extensive and expensive damage rainwater entry can do, including delamination. However, a plumbing leak, especially one that goes unnoticed or is neglected, also can cause serious damage. It is easy to ignore a small drip coming from a water fitting, but not correcting it can lead to issues that may be only slightly less troublesome than a roof or sidewall leak. As an RV technician, I have had to replace large sections of a floor and a wall because of plumbing leaks.
This article addresses leaks in the fresh-water system. Plumbing leaks can be difficult to identify, because much of the piping is not immediately accessible or visible. Most water system leaks occur at fittings rather than within the pipes themselves. It is rare for a water pipe to develop a hole or other damage, unless it has been abraded or punctured somehow, which is generally not the case. Water leaks usually result from damage caused by freezing, impact, or vibration.
Although a water leak may go unnoticed, two telltale signs often indicate a leak. One is the water pump cycling occasionally when no water is being drawn, and the other is the presence of unexplained water on the floor, the carpet, a shelf, etc.
Leaks ordinarily are easy to repair, unless they occur in an inaccessible area. It is important to gain access and fix the leak, since neglecting it can cause serious damage to the RV.
Modern RV fresh-water systems generally utilize polyethylene cross-linked (PEX) tubing, but depending on the year and make of your RV, you may find other materials, such as polybutylene (PB), chlorinated polyvinyl chloride (CPVC), or even copper on very old units. PEX is the most commonly used because of its versatility and flexibility. Thanks to available conversion fittings, it is possible to use PEX tubing to repair plumbing systems that have CPVC and copper pipes,
As with any other repair procedure, it is important to plan the process and to obtain the required parts and tools before starting the work. This could mean the difference between disaster and a quality, functional repair. I always keep tools and a set of common spare parts in my RV. As an RV technician and engineer, my tools and parts crib likely is more extensive than most.
We generally use our motorhome year-round, but a couple of years ago, we didn’t use it much over the winter. During our first shakeout trip of the next season, we discovered a large water leak. Upon investigating the source of the leak, I found that one of the water heater bypass valves had developed a large crack. Unfortunately, this affected our onboard and our city water system, and we were unable to use water at all. A fairly serious leak soaked the basement storage area. Fortunately, as part of my tool arsenal, I carry a length of CPVC tubing, glue, and several fittings. Therefore, I was able to have us back up and running in short order.
The remainder of this article will outline the basic steps involved in performing a fresh-water system repair on an RV, using my leak as an example.
First, make sure you know what type of piping your RV uses. As I mentioned earlier, many RVs use PEX tubing. Sometimes manufacturers use color-coded tubing in blue for cold water and red for hot water. However, this is not always the case. If your water tubing is flexible, it is likely PEX, as both CPVC and PB are semirigid. Tubing also will have identification stamped on it, so be sure to match tubing type and size prior to purchasing the replacement.
As mentioned, you may also choose to use PEX to repair a damaged section of PB, CPVC, or copper tubing. This requires push-to-connect (PTC) fittings specifically designed for the tubing types you are using, so shop carefully.
Also note that one particular method of cross-linking the PEX commonly is referred to as type A. This specific type of PEX tubing, unlike the less expensive B and C types, can be repaired by heating the tubing with a heat gun, or even a hair dryer. Type A tubing allows you to seal small holes or even rebend the tubing into a radius. The cross-link will regenerate with heat.
Decide what type of repair fittings you want to use. If you are converting to PEX from a different type of tube, PTC adapter fittings are you best bet. Note that RV plumbing typically is 3/8-inch or ½-inch, sometimes measured as outside diameter (OD), and sometimes as inside diameter (ID), depending on the tubing type. However, this usually is not an issue, since purchasing fittings matched with the tubing type will ensure a good fit. If you are simply repairing a section of tubing, you have a few options, again depending on the type of tubing your RV has.
For PEX, you can use PTC, crimp, or compression fittings. For CPVC, you also can use glue-on fittings. PTC fittings are often the best solution, but they are more expensive than the other options. Even if you do not currently have a leak, it is a good idea to examine your RV to see what type of tubing you have and purchase some spare tubing and extra fittings, such as unions, elbows, and valves.
I also recommend tubing cutters. You can use a regular hobby knife to cut the tubing, but special tubing cutters make a much cleaner cut and are not expensive, typically costing less than $15. If you decide to go with glue-on fittings, make sure you also purchase some primer and cement.
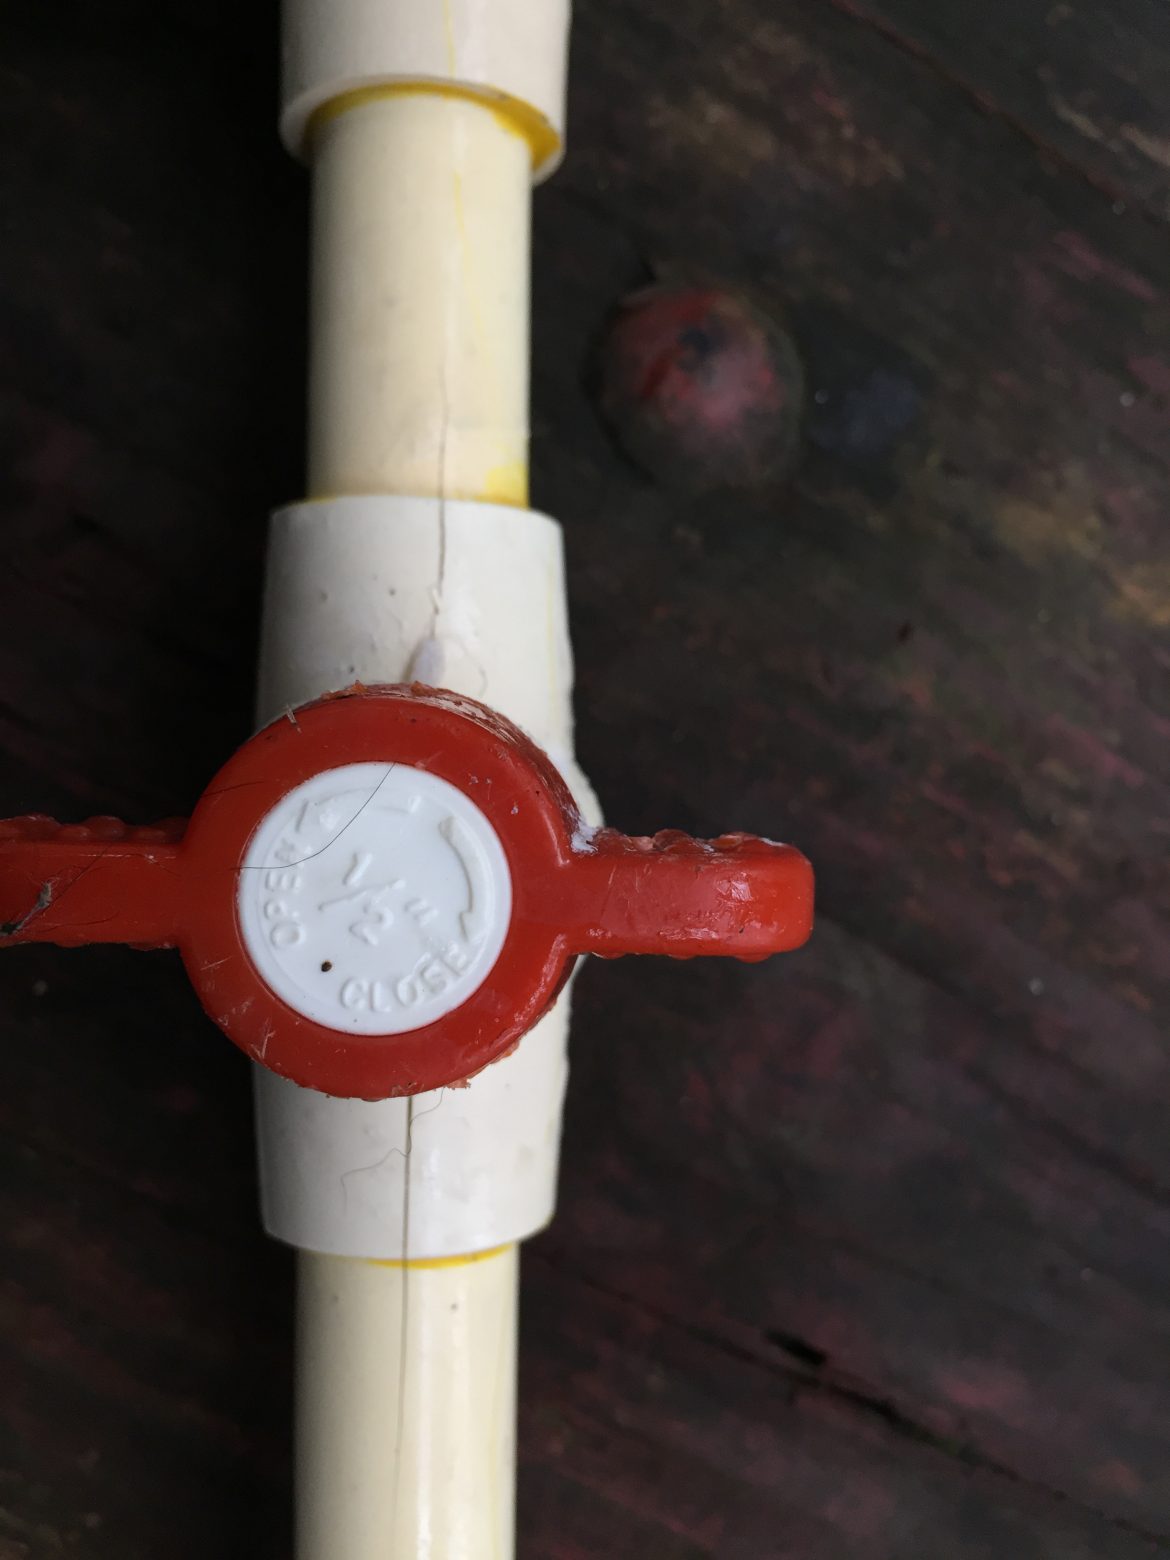
I knew that I had a cracked bypass valve, as shown in Photo 1. Although I had plenty of spare tubing to the right of the valve, I realized that even if I cut the tubing to the left immediately against the valve, I might not have enough tubing to allow sufficient overlap for the PTC replacement valve. Upon further examination, I also identified a leak in an elbow fitting. I decided the easiest solution would be to replace the entire section of tubing to eliminate both leaky fittings with a single repair.
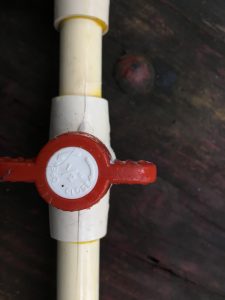
The section I decided to replace is shown in Photo 2. My water heater bypass utilizes a three-valve setup, so by removing this section, I needed to replace two of the valves. The elbow shown at the left of the assembly, plus the valve, were leaking. The other fittings did not have enough excess tubing to effect adequate repairs, so removal of this entire section seemed to be the most logical choice. When you are evaluating your plumbing damage, be sure to consider the most logical section(s) to remove to perform a proper repair, factoring in accessibility. I was fortunate that the leaks in my system were highly accessible, notwithstanding having to crawl into my coach basement.
My system consists of CPVC tubing. I happened to have low-cost glue-on fittings on hand as spare parts, so I opted to use them for the union, elbow, and tee fittings, and I used PTC for the valves. One of the benefits of flexible and semirigid tubing is that you usually don’t have to get the lengths exactly correct on the replacement parts; the tubing will allow for lots of movement, although you may have to temporarily remove any securing clamps in the area. However, always get the lengths as close to original as you can, and carefully plan when installing replacement fittings to allow for differences in fitting lengths, etc.
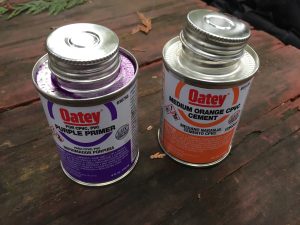
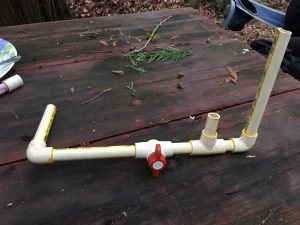
Photo 3: If using glue-on fitings, be sure to purchase the proper type of solvent and cement. This set is appropriate for a CPVC repair.
If you are using glue-on fittings, be sure to purchase the proper type of solvent or cement. For CPVC, you need to have a two-part system consisting of solvent for cleaning and priming, and cement for adhesion. Most home-improvement stores sell these in sets in a convenient size and price (Photo 3).
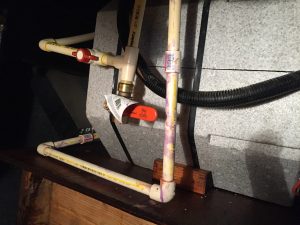
Photo 4 shows the almost completed repair. At the bottom left, almost behind the water heater, you can see the glue-on connector dividing the original section of tubing from the new section. Similarly, vertically down the center of the photo, you can see the glue-on union fitting dividing the other end of the repair. The surviving original bypass valve is shown at the top left, and the first of two PTC replacement valves is shown in the center of the photo. Looking closely, you can see that the replacement valve is snug against the glue-on tee fitting above it, but the compression ring is fully extended. When I cut off the original valve that was in that location, the remaining tubing was just of sufficient length to allow for installation of the PTC replacement valve. The remaining steps were to cut the bottom section of tubing and install a tee and valve on that section, and then run a new piece of tubing from the tee to the bottom of the new valve in the photo.
Once the repair was complete, I turned on the water and checked for leaks. For glue-on fittings, be sure to twist the fitting about 1/8 turn after applying the glue, whenever possible, in order to properly seat and seal the fitting. This is not always possible, especially after making the final glue connection. For PTC fittings, make sure to push the fitting onto the tubing as far as you can, and then pull on the fitting to ensure that it’s seated. Be sure the release ring is fully extended and is not restricted by adjacent fittings. PTC fittings seal very well as long as they are fully inserted onto the tubing. I recommend PTC over glue-on fittings, because of PTC’s ease of use and their ability to be removed. However, as mentioned previously, they are much more expensive.
Plumbing leaks should never be ignored, as they can be just as damaging over time as roof and sidewall leaks. If your water pump occasionally (or frequently) cycles when no taps are turned on, or if you have water where it isn’t supposed to be, you may have a plumbing leak. Take the time to investigate water leaks in your RV, as they are easy to fix, and eliminating them as soon as you notice them can prevent serious water damage down the road.

