
Sadly, this marks the final column provided by RV Doctor Gary Bunzer before he lost his battle to COVID-19 in April. A tribute to Gary begins on page 22 of this issue.
By Gary Bunzer, Technical Editor
July 2020
Lithium-Ion Batteries
In the January 2012 issue, you wrote about the proper way to configure a motorhome’s multiple deep-cycle house batteries (“The Balance Of Power,” page 46). I’d love to hear your take on how best to configure lithium batteries and your opinion about their worth. It looks like they mostly come as 12-volt batteries, so if I want two of them, I’d have to wire them in parallel. I’ve heard that batteries connected in series won’t draw each other down like parallel batteries will. Does this still apply for lithium?
— Larry Davick
Via email
Lithium-ion technology certainly has made a dramatic initial impact on RVs. It seems everyone is jumping on the lithium bandwagon. But despite the plethora of information out there, I still see some misconceptions and inaccuracies.
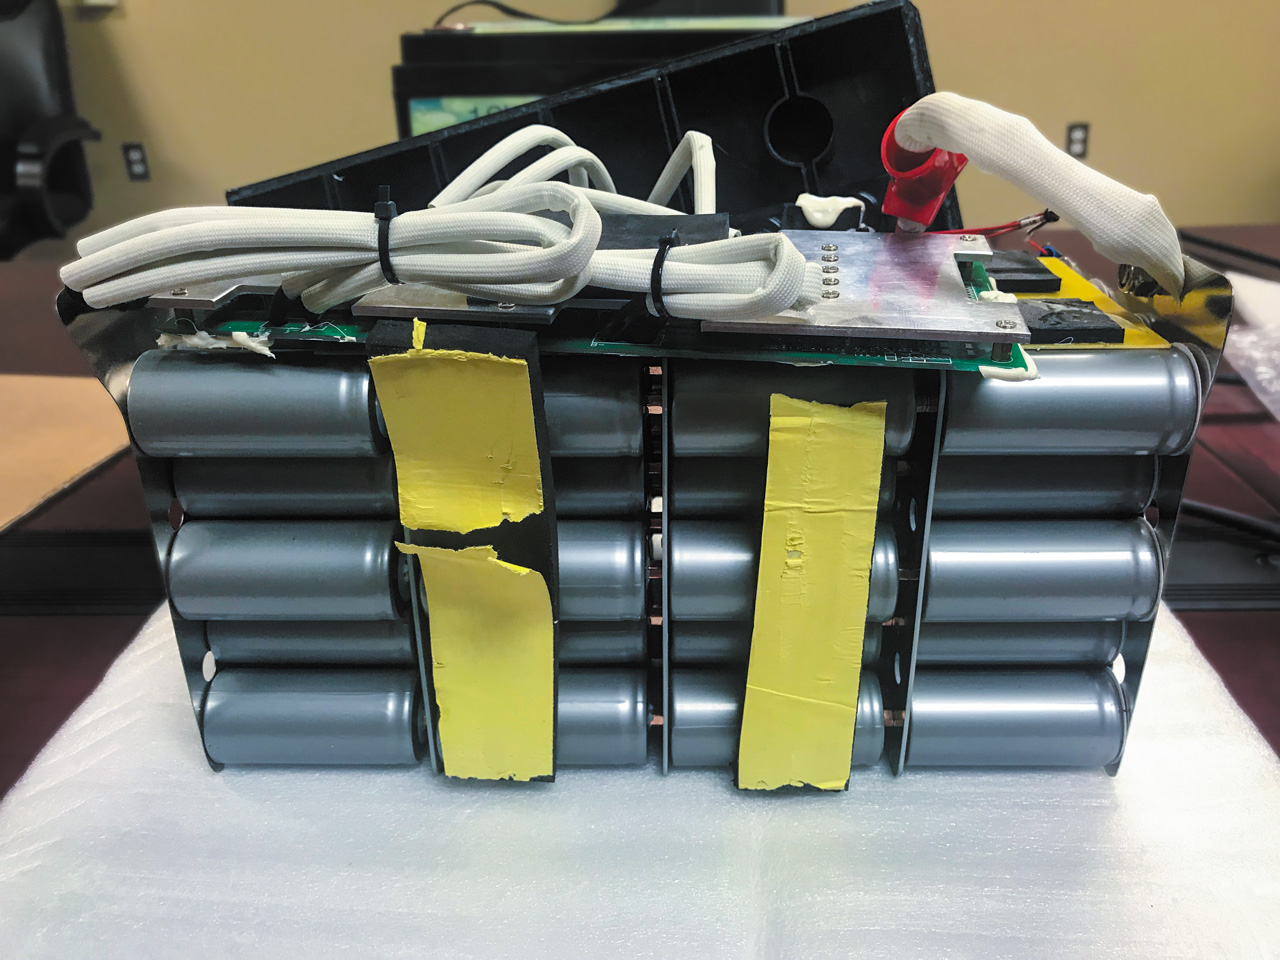
A lithium-ion battery with cylindrical cells bolted together. Output leads are soldered.
First is the misconception that an RVer simply can replace any existing battery (or battery bank) with a lithium-ion battery. In order to take advantage of lithium technology’s multiple benefits, a completely new charging algorithm is required. In my opinion (and that of lithium experts), it is not feasible to expect any typical RV battery charger to be able to maximize lithium-ion’s potential. Though the proper charging elements (voltage and amperage flow) are relatively similar for lead-acid and absorbed glass mat (AGM) batteries, lithium technology is a different animal altogether. Therefore, it is para-mount that a lithium system be outfitted with proper lithium-type battery chargers, including the engine alternator of a motorhome or tow vehicle; the charge controller of a solar array; and the converter/charger and inverter/charger, when so equipped.
Remember, as RVers, we typi-cally have multiple methods of charging the house battery bank. Some systems are being marketed with the proper charger, yet I still see marketing materials describing a lithium battery as being a simple “drop-in replacement.”
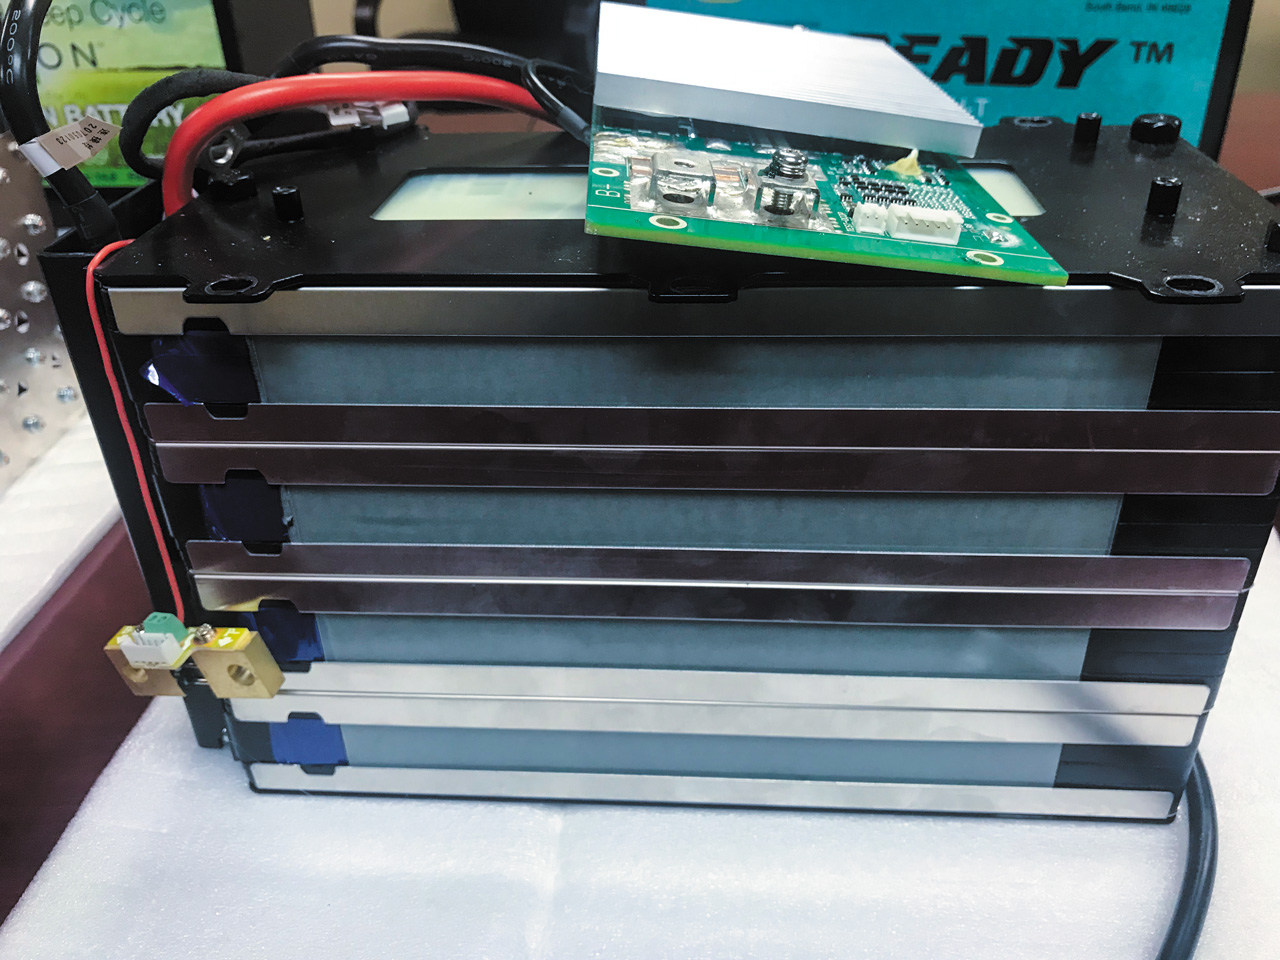
Looking inside the lithium products available today, I question whether some of the batteries being offered can withstand the rigors of life aboard an RV. In some sealed lithium batteries that have been cut open for evaluation, what’s been found is a prevalence of weak solder connections, heat sinks left to rattle around inside, and stacks of lithium cells mechanically bolted together and prone to loosening from vibration. My advice: Buy quality if you are considering moving to lithium in an RV. I do not recommend buying by price alone. As you may know, I am a fan of the lithium system offered by Briter Products (which has partnered with FMCA and offers a discount for members).
Back to your question. When configuring multiple lithium-ion batteries into a bank, the battery connections outlined in “The Balance Of Power” article still apply. However, because lithium batteries can be drawn down much lower than lead-acid or AGM systems (almost twice as deep), typically, one 100-amp-hour lithium-ion battery can replace every two Group 27 lead-acid batteries in a given bank. Connecting multiple 12-volt lithium-ion batteries in parallel is identical to connecting any other 12-volt batteries. It makes little sense to obtain 6-volt lithium batteries and wire them in series. Your best bet is to obtain 12-volt units.
Is the leap to lithium-ion over lead-acid or AGM worth it? Only you can answer that question, but it is my opinion that within the next five years, lithium-iron-phosphate will be the overwhelming battery bank choice for serious RVers. More RV manufacturers are jumping on board right now. Some are equipping their units with lithium straight from the factory, and others are offering lithium-ion as an option. Once the initial price comes down a bit, I think you’ll find lithium-ion in the vast majority of RVs.
Dump Valve Bolt Pattern
Do all 3-inch dump valves have the same mounting pattern?
— Lavern Patten, F66008
Valley Center, California

All 3-inch termination valves, regardless of the make, have the same bolt pattern.
All termination valves of a given size have the same four-bolt pattern so that replacement valves of any brand can be installed. So, all 3-inch valves have the same bolt pattern for that size of valve; the bolt pattern for all 2-inch valves is the same; and the bolt pattern for all 1½-inch valves is the same. Solid-waste holding tanks always are equipped with 3-inch valves, but a liquid gray-water holding tank can have a 1½-inch, a 2-inch, or a 3-inch valve, depending on the manufacturer.
Toilet Talk
I have a Winnebago Sightseer motorhome. The Thetford toilet has a water valve on the back. Must the toilet be removed from the RV if there is ample space behind it for foot pedal removal? Does the lower seal need to be replaced? And should the vacuum breaker also be replaced?
— Doug Lampert
Via email
If you have the room and the proper tools to work behind the toilet, have at it. My philosophy is to make any repair as simple as possible. But are you asking about replacing the water inlet valve, or simply removing the foot pedal? For either, a lot depends on the Thetford model you have.
Some water inlet valves are positioned higher up at the back, closer to the top. Some of the earlier Thetfords have the valve down closer to the floor. A robust spring holds that foot pedal in place on those models. Plus, the complete flushing assembly needs to be removed when replacing the pedal. For those models, I do recommend removing the toilet from the RV. For the water inlet valve, two screws hold that valve in place, and it might be quite difficult to remove those with the toilet standing upright. Also, with the toilet out of the RV, you’ll have ample opportunity to inspect the condition of all the seals, linkages, and other components.
Besides, it’s not that difficult to remove the toilet from the RV. Refer to the owners manual for the individual steps. Just remember, first turn off all water sources and relieve the pressure on the fresh-water system.
As for the vacuum breaker, replace it only if it leaks during the flushing cycle. And always replace the flange seal located directly underneath whenever the toilet is removed. I recommend a spongy rubber seal rather than a wax seal. The nice thing about RV toilets is that most brands package the replacement parts in kits, including new seals, gaskets, detailed instructions, etc. As distasteful as working on a toilet can be, I’d suggest taking a very close look and replacing anything questionable. Then simply follow the proper maintenance and winterizing procedures, and you should be good to go.