By Steve Froese, F276276
No matter what age or type of RV you have, regular maintenance is a must. Arguably, one of the most important jobs is roof maintenance, as failure to look after your roof seals can lead to catastrophic results from a financial perspective. While this article focuses on roof maintenance, any mention of sealant inspection should be extended to other areas of the RV as well.
Voids or cracks in sealant can allow water to penetrate the framework of the RV, which eventually causes delamination, wood rot, mold, and other nasty problems. Because most of these issues occur between the outer and inner walls of the RV, they can be hard to detect and expensive to fix. On several occasions I have provided structural repair quotes that exceeded the value of the RV itself. It is important to note that with work like this, the damage may extend beyond what is first perceived, which can quickly drive the cost up well past any initial quote or inspection. The moral of this story is that a little proactive and inexpensive labor can prevent serious damage and an enormous repair bill down the road.
In this article I will provide some DIY tips for helping avoid this painful scenario. While the task of sealant inspection is itself a simple job, rating a 1 out of 5 on my difficulty scale, climbing a ladder and/or working on the roof may be a bigger challenge for some. Carefully evaluate your comfort level with mounting the roof of your RV, and if you are not able or comfortable doing so, take your coach to an RV service center.
The main RV roofing materials are fiberglass, rubber (TPO or EPDM), and aluminum. These substances require different sealants to maintain compatibility and ensure optimum adhesion and leak protection. Therefore, refer to your manufacturer and/or service center to ensure you are using the correct type in the correct area, as roof and body sealant specifications may differ. Many of these sealants typically cannot be found at your local home improvement store.
Inspect your roof at least annually, although more often is better, especially if your RV is stored outside. Start your inspection on the inside of the coach, removing a few screws from lights, vent shrouds, or speakers, and look for signs of rust, water, or corrosion. If you find any signs of water, remove the entire vent shroud or speaker to gain access to the area above the ceiling. Feel around to verify the presence of moisture. If the area is wet, remediation may be required, as discussed later (it is possible for condensation to collect above the ceiling, which would result in a small amount of moisture). Telltale signs such as a stained or sagging ceiling indicate an advanced state of water intrusion, so hopefully this is not the case. Include the walls and floor in this inspection, as water may flow to the edges of the roof and run down the walls. You may want to invest in a pinless moisture detector and keep it in your rig. Although I faithfully maintain the sealants on my coach, I keep a moisture detector handy and run it around the ceiling and walls once in awhile.
If your RV has a ladder, you can be fairly sure the roof will support your weight, and you can use the ladder to mount the roof. If your RV does not have a ladder, refer to your owners manual or manufacturer to determine whether the roof can support your weight safely. If not, you can inspect the roof from a ladder or other elevated platform. Exercise extreme caution on ladders, platforms, and roofs. CAREFULLY and SAFELY mount the roof of your RV, but do not do so if it is raining or otherwise slippery.
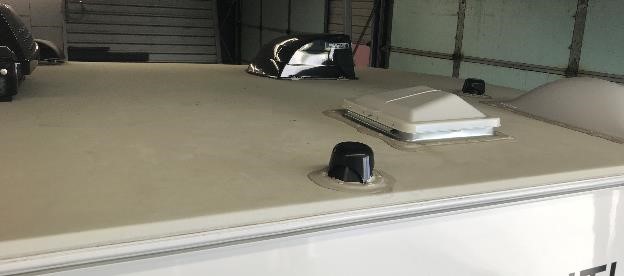
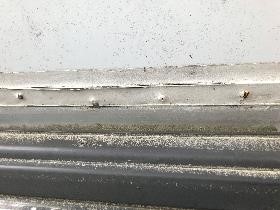
Crawl around the entire roof, carefully inspecting all seals, including perimeter and accessory sealants. Look for cracks, voids, failure or lifting of the sealant, or any other defects that may affect the sealant’s ability to keep water from penetrating. Remember to check the ladder mount and roof-rack seals, as well as clearance lights, air horns, vents, skylights, antennas, etc. Also check for depressions, softness, bubbles, or any other deformity or defect in the roof membrane itself. If these exist, avoid walking or crawling on the damaged area, as they likely indicate a weakened roof deck. This should be checked and repaired by a professional. If you found signs of moisture during the interior inspection, pay particular attention to the roof around the area of the water intrusion, although water can propagate quite a distance and change course several times, so the entry point may be a distance away.
If you find any cracks, voids, holes, or other sealant damage, in most cases you can thoroughly clean the area and apply new sealant over it. A stiff plastic-bristle brush can be used to etch the old sealant that is to be repaired. Use only a water-based cleaner such as Dawn-brand dish soap on a TPO or EPDM roof. Rinse well and allow plenty of time for it to dry. Do NOT use a petroleum-based cleaner on these types of roofs. As mentioned, be sure to use the recommended sealant for the given material. You may find the original sealant has been covered with a noncompatible substance such as silicone sealant. In that case, thoroughly remove the offending sealant and clean the original sealant before applying new sealant over it. Denatured alcohol generally should be used to clean old sealant.
If you have a rubber roof, always use a plastic scraper, never metal tools. Be extremely careful not to tear the rubber as you scrape sealant. In the case of an aluminum roof, metal roof repair compound commonly is used and available at RV parts centers. This material can be brushed or rolled over metal seams or tears as directed in the instructions.
Should you discover an existing roof leak or damage to the membrane, such as a soft spot or deformity, or a stained ceiling, you should contain and/or repair the damage. The repair can be temporary or permanent. Containment could involve tarping the damaged area (or the entire RV) or even a temporary fix of duct tape. In the case of the latter, do not leave it on too long, as duct tape is not waterproof over time and becomes increasingly difficult to remove the longer it is left. A more permanent repair could involve applying a roof repair product such as Eternabond or rubber-roof coating. Have any roof damage beyond your ability to patch or repair evaluated and fixed as quickly as possible.
The importance of regular and rigorous roof inspection cannot be understated. An hour or so spent on this task is well worth the time to avoid a potential catastrophe later. Whether you are a new RV owner or a seasoned veteran, do not succumb to any temptation to disregard RV maintenance.


