
Reduce heat loss and cold drafts from those exposed areas with a simple DIY winter installation.
By Bruce W. Smith
November 2022
If you have spent any time living in an RV during the winter, no doubt you’ve lain in bed or sat in the living room and felt the cold creep in from the slideouts. Single-pane windows do little to keep out the cold, and neither do the thin walls of most RV slideouts.
Cold drafts and heat loss from those drafts can be reduced with the right shades, curtains, or even special coverings applied directly on the inside of the windowpanes. RV slideouts can be winterized by temporarily attaching rigid foam board insulation over the exposed exterior walls and floor.
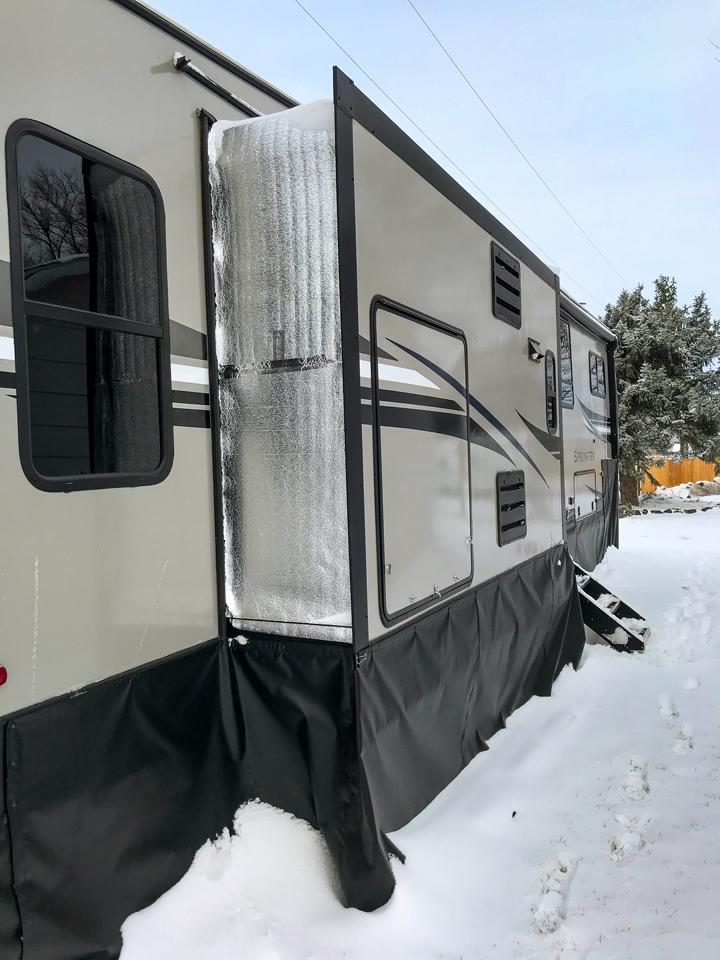
That’s what I did to the four slideouts on my 39-foot Sprinter fifth-wheel while wintering in Idaho. I used 4-foot-by-8-foot sheets of Owens Corning’s Foamular 250, which I purchased at a local home improvement center. The 1.5-inch-thick polystyrene rigid foam insulation, with an insulation value of R-7.5, fit under the cables on my Sprinter’s slideouts. This material normally is used to insulate crawl spaces and foundation walls of homes and garages. It works just as well to reduce the cold penetrating through the walls of slideouts and into your RV — and to prevent the heat from exiting.
I topped off the rigid foam board with 24-inch-wide, double-reflective Reflectix roll insulation to keep the foam board from being directly exposed to snow, water, and sun. The roll insulation also added another level to the overall R-value of the slideout insulation. Both the rigid and roll insulation were attached to the slides using HVAC-grade 2-inch aluminum foil tape. This makes it easy to remove all the insulation when springtime comes, or when it’s time to retract the slides.
Installing rigid foam board is a simple, straightforward process: Measure and write down the width and length of the top, sides, and bottom of each slideout. Then use a felt-tip marker and a straight edge (or a piece of wood) to mark where you want the sheet cut and score it with a razor knife. Once scored, the thick foam board easily snaps apart.
Lay the cut rigid foam boards over the top first, then the slideout walls, slipping each piece under the support cables. If windows are involved, fit the rigid foam board around them — or, as I did in the bedroom slide, let the insulation cover them. Then connect the side pieces to the top and bottom pieces using the foil HVAC tape.
Roll out a single piece of the reflective insulation to cover the top and side foam boards on each slideout and over the slide cables. Secure the reflective insulation to the RV and slideout edges with the HVAC tape.
The entire insulating process requires nothing more than a ladder, a helping hand if it’s windy, and a couple hours of time. The cost for the materials is minimal, and the benefits are noticeable. And when spring arrived, it took no time at all to remove the insulation materials, which had been numbered to make it easier to reuse them next winter.
The Installation
Step 1. After you have the slideout wall and roof measurements, transfer them to the sheets of rigid foam board insulation using a felt-tip marker. A 2×4 works well as a straight edge.
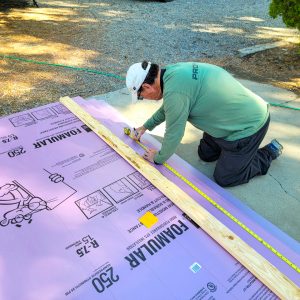
Step 1
Step 2. Use a sharp utility knife to score the foam board. I scored both sides of the 1.5-inch-thick Formular 250 sheets.
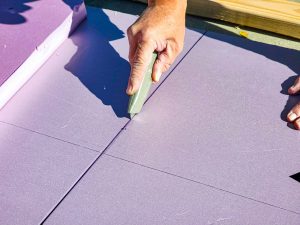
Step 2
Step 3. Rigid foam insulation breaks apart easily after scoring. Use a 2×4 to hold the board down when breaking the length of a sheet.
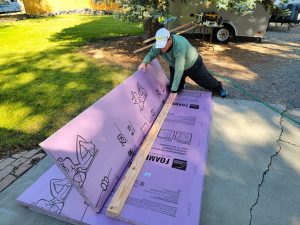
Step 3
Step 4. Fit the cut sections of the rigid insulation into the slideout. The foam board weighs almost nothing, so it’s easy to set in place.
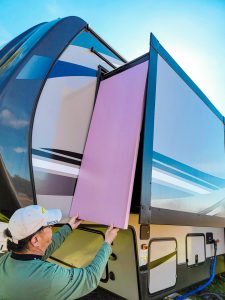
Step 4
Step 5. HVAC-grade foil tape secures the foam board sections to each other and to the outer lip of the slideout. My RV had slide cables, so the foam board had to be slid underneath them to provide the best insulation.
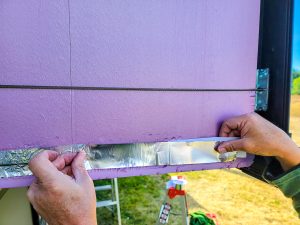
Step 5
Step 6. After the rigid foam insulation is in place, cover it with 24-inch-wide double-reflective double-bubble roll insulation to help keep sun, snow, and rain off the foam. Applying a singlepiece of the roll insulation that runs up and over the slideout is better than using multiple pieces. Tape securely in place.
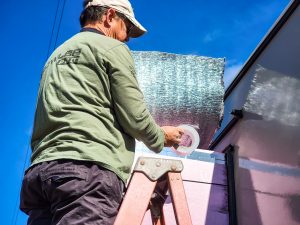
Step 6
This temporary insulation can be removed easily when springtime arrives.