
Is it time to replace your city water fitting? By following these steps, you might just save yourself a wad of cash.
By Steve Froese, F276276
December 2022
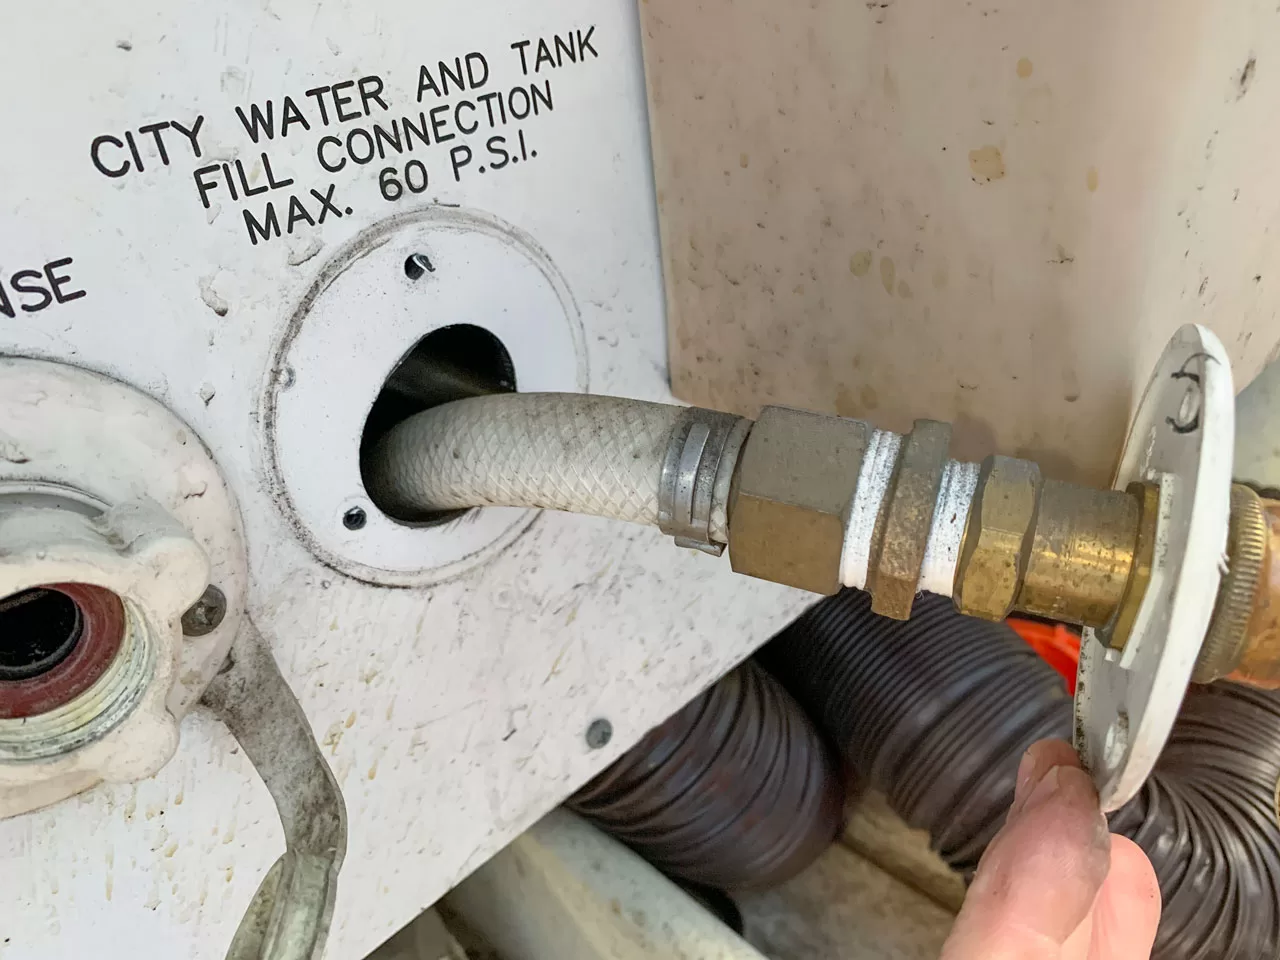
Carefully pull the old fitting away from the RV.
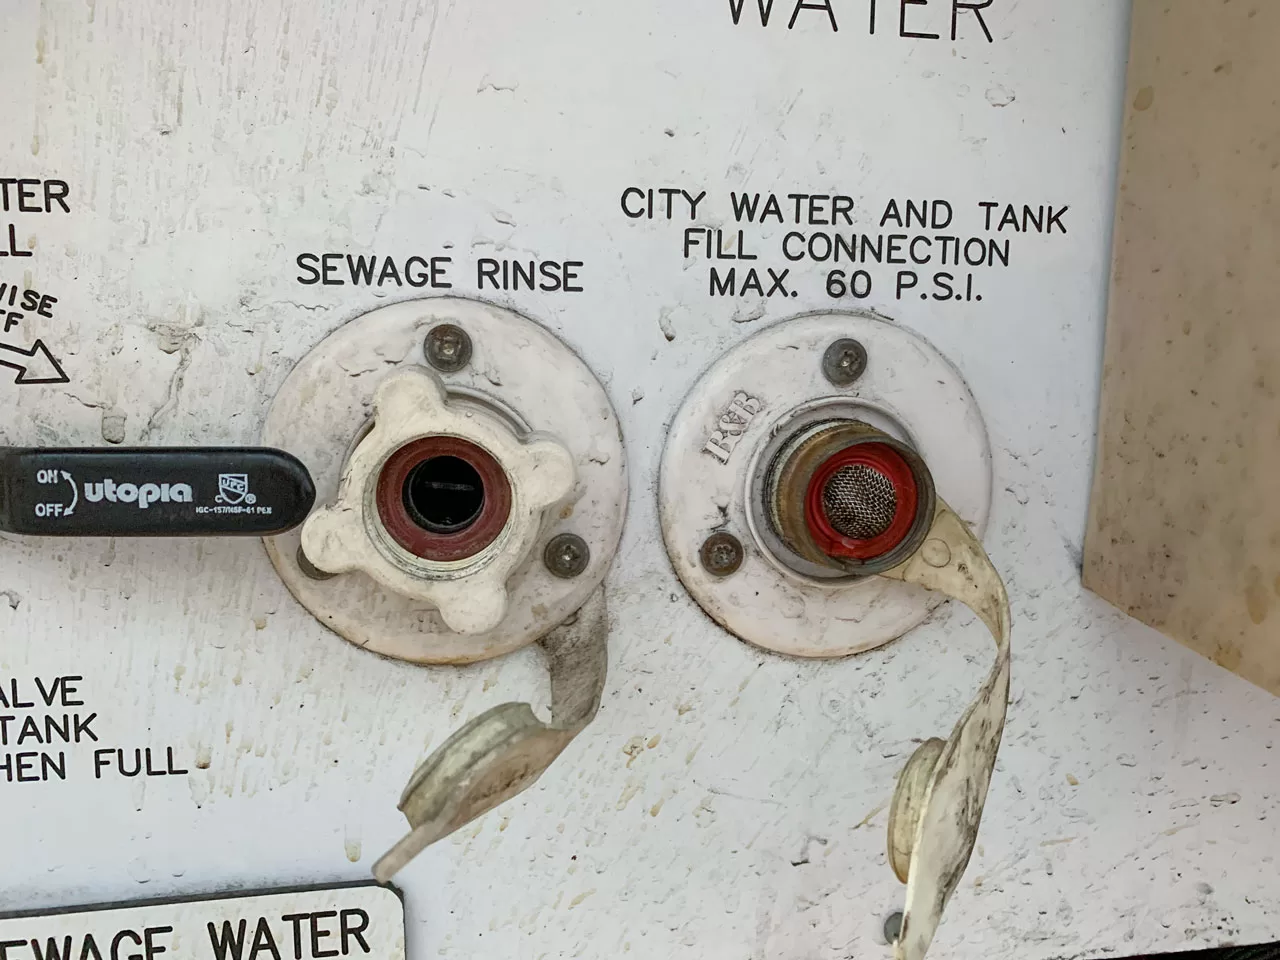
As your RV ages, there is a good chance your city water fitting will start to leak at some point. Inside the fitting is an inexpensive check valve, and because the fitting is teed directly into the high-pressure line by the water pump, it is easy for the check valve to fail. While repairing the city water fitting is fairly easy, doing so can result in additional leaks. Because of this, and since city water fittings are relatively inexpensive, I recommend against repair. As such, I will not cover that procedure in this article. I rate the replacement of the city water fitting as a one out of five in technical difficulty.
The check valve plunger can be seen behind the washer and/or strainer that should be installed in the hose bib on the water fitting. One frequent cause of valve failure is when the check valve plunger is manually depressed while the water line is pressurized from the water pump. This often occurs when the RV is being winterized and the plunger is depressed in order to force antifreeze into the city water line. Other factors can cause the check valve to fail as well, but they are almost always due to displacement, wear, or damage to the internal O-ring. The leak may manifest as anything from an occasional drip to a major flow of water. If the RV is connected to city water, the leak will not be noticeable, because a water hose is connected to the hose bib.
The leak may be severe enough that water flows out of the city water fitting even when the water pump is not turned on. In this case, water siphons out of the city water fitting. If you still have the hose bib cap for the city water fitting, it can be placed onto the bib to eliminate or slow the drip. A full failure or displacement of the check valve O-ring generally results in a full flow of water out of the city water fitting whenever the water pump is turned on.
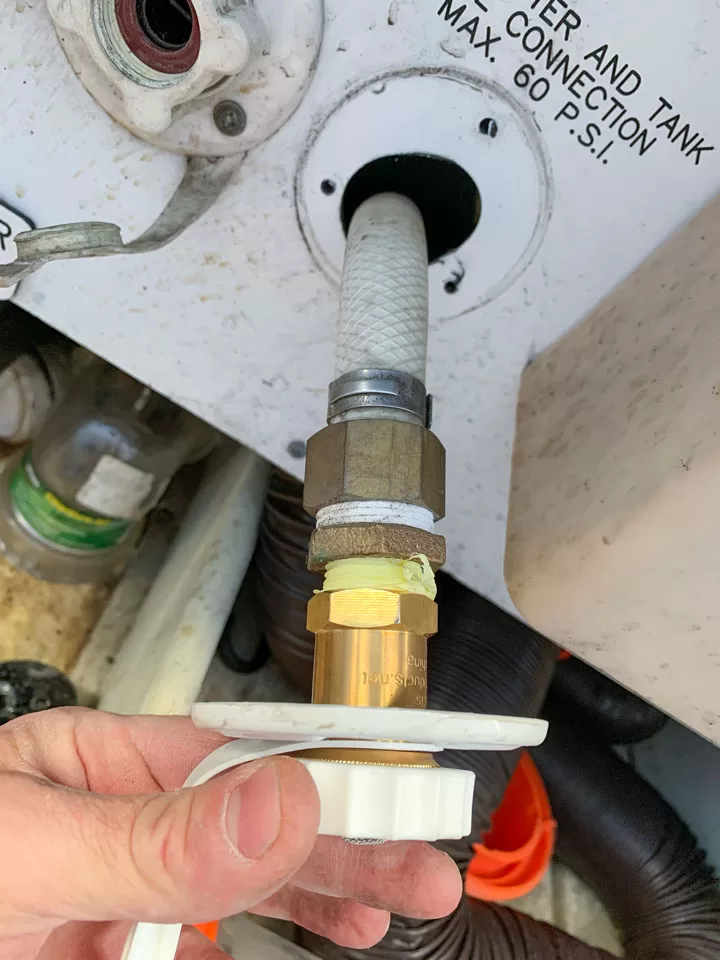
Identify whether it has male or female threads on the back.
City water fittings should cost less than $20 and can be obtained from online sellers or RV parts stores. Three main features must be identified prior to purchasing the fitting: color, material, and thread type. Fittings are available in both black and white, plastic and metal, and with male or female hose threads on the inside. Note that the outside of the city water fitting (the side that goes on the exterior of the RV) is always a ¾-inch garden hose fitting. The fitting must be removed from the RV in order to identify the thread type, although it is usually male.
If you currently have city water attached to the fitting, turn off the water and remove the hose from the fitting. Ensure that the water pump is turned off. Prepare for the area under and around the city water fitting to get wet. Check for sealant around the city water flange, and if there is any, carefully remove it using a plastic tool or scraper. Remove the four screws securing the flange to the RV; slowly and carefully pull the fitting away from the RV. There may be putty between the flange and the RV. In that case, as you pull the fitting away, use a plastic tool to remove the putty.
The water line connected to the city water fitting may be PEX, in which case you may not be able to pull the fitting too far away from the RV. Once you do get the fitting away, identify whether you have male or female threads on the back of the fitting. As mentioned, most city water fittings have male threads.
In addition to determining what color fitting and thread type you need, I recommend purchasing a fitting with a metal flange. With basic city water fittings, they are all interchangeable in terms of size and screw mounting.
Using wrenches as necessary (two may be required), loosen and remove the city water fitting from the main water line. Be prepared for water to pour out of the main line once the fitting is loosened. Thoroughly clean any sealant or putty from the RV surface using a plastic scraper and denatured alcohol.
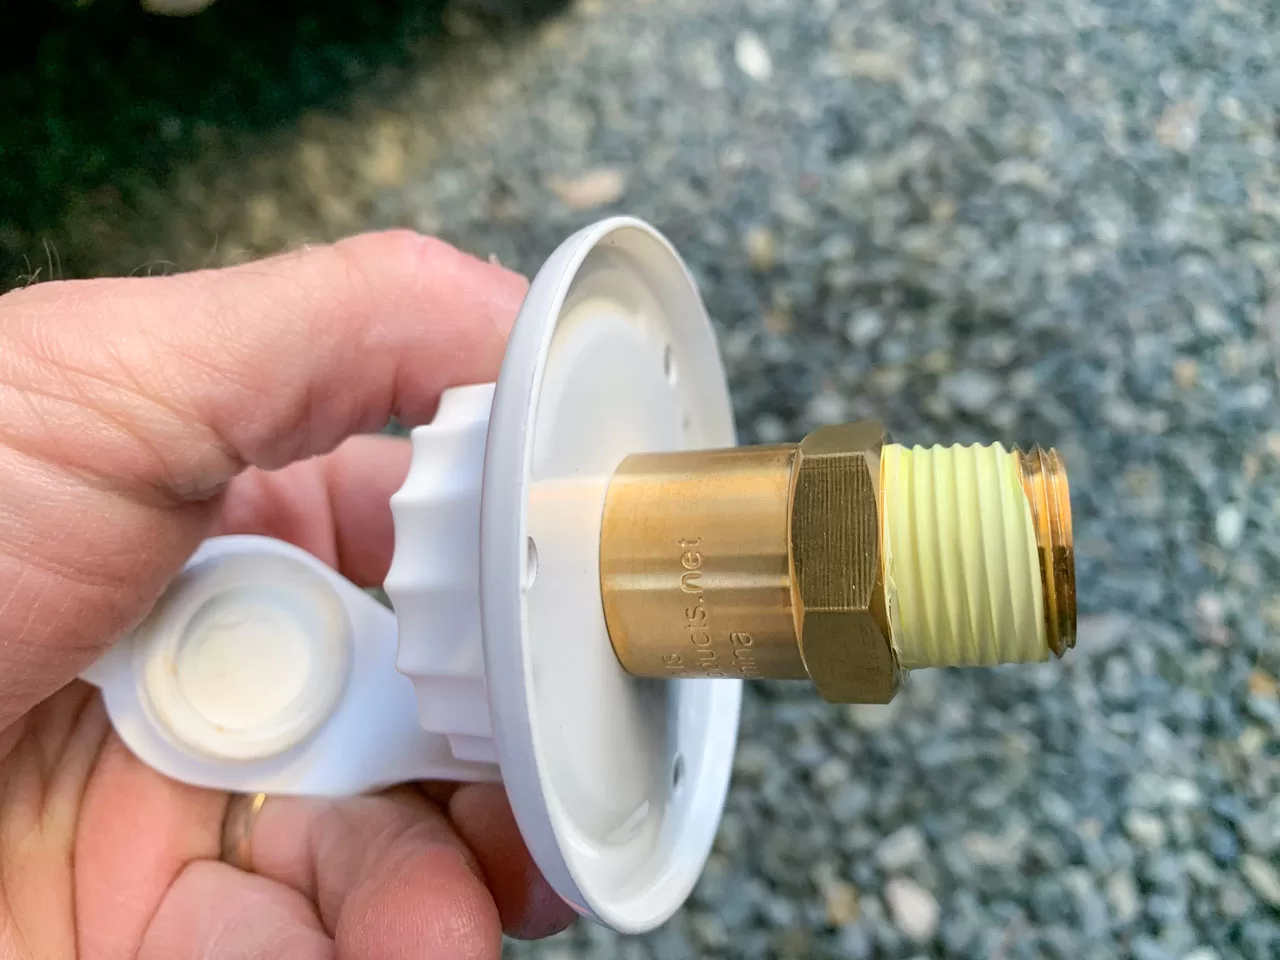
Apply PTFE tape or liquid sealant to the male threads on the new fitting.
Apply PTFE (polytetrafluoroethylene) tape, such as Teflon brand, or liquid thread sealant to the male threads (either the city water or main water line fitting), and loosely hand-thread the city water fitting onto the main water line, being sure not to cross-thread the fitting. Continue to tighten the fitting until it no longer can be tightened by hand. Use wrenches to further tighten the water fitting until it is snug; this should require no more than an additional half-turn.
Turn on the water pump (ensure there is water in the fresh tank) prior to reinstalling the fresh-water fitting onto the RV. Carefully inspect the fitting for water leaks, both on the outside as well as around the inside threads where the fitting interfaces with the main water line.
If the original fitting had putty applied to the back of the flange, be sure to apply a new layer. Also insert RV sealant into the original screw holes to provide additional protection against water intrusion. Putty tape and sealant can be purchased through your local RV parts department. Rotate the flange so the screw holes line up with the original holes in the RV. You may have to slightly tighten or loosen the fitting on the main water line in order to get enough rotation of the flange to align with the original screw holes. Carefully thread the screws until the flange is snug against the RV, but do not overtighten them. You may find that some of the screws are stripped and will not tighten. If this occurs with more than one screw, you may choose to slightly rotate the flange and make new screw holes in the RV. Do this only as a last resort and take care to not strip the holes in this case. Also be sure to insert sealant into the new holes.
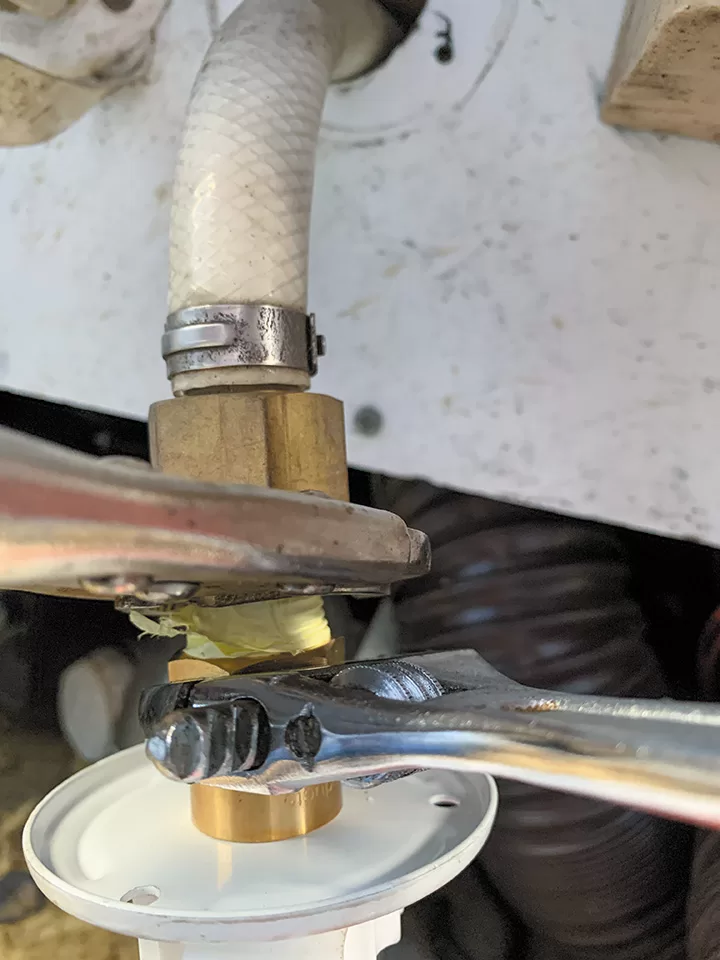
After tightening by hand, use wrenches to snug it up.
Scrape any excess putty from around the flange and apply new sealant if it existed prior to the repair. Perform a final leak check by making sure there is no water coming through the hose bib on the outside of the RV.
Failure of the city water fitting is fairly common, but by following the simple procedure outlined in this article, you can save a fair amount of money in repairs. To help prevent repeat failures of this type, never remove the hose washer and manually depress the check valve plunger.
Send your troubleshooting questions to Steve Froese at techtalk@fmca.com. The volume of correspondence may preclude personal replies. Not all responses will apply in every instance. Some situations may require a visual inspection and hands-on testing. If you choose to follow any procedures outlined in this column, first satisfy yourself that neither personal nor product safety will be jeopardized. If you feel uncomfortable about a procedure, stop and make an appointment with an RV service facility.
You may also want to consult the FMCA Forums (https://community.fmca.com) to see whether your question has already been addressed or, if not, to post it.