
All it takes is imagination and a tape measure.
By Kate Doherty, F499712
January 2023
After you’ve been on the road for at least six months, you might realize your RV has more storage space than you thought, and it begs to be filled. For instance, I’m guessing you’re like many of us and have shifted dry or canned goods from one cabinet to a taller or deeper one, thinking, “I can put more stuff in there.”
When you open any cabinet, pantry, or closet and you see ample unfilled vertical space, it’s time to use your imagination and make plans for it. One caveat to remember: Think through the placing of food and supplies, considering the need of accessibility, frequency of use, and proximity to the area where you’ll be using them. For example, you wouldn’t place milk or cream in the back of your refrigerator, because it would cause you to move other items every time you pulled it out to pour into your morning coffee. And another thing to keep in mind: If you’re adding items to the RV, make sure you have ample weight capacity to do so.
Are you ready? Grab the tape measure, think outside the box, and be prepared to shuffle things around.
Many of us remember the famous ad slogan: “M&M’s melt in your mouth, not in your hand.” Well, chocolate shouldn’t melt in your cabinets, either! After a day of four-wheeling in the southern Utah heat, we returned to our motorhome at six o’clock to find mushy chocolate bars in the cabinet we had just stored fresh fruit and veggies in earlier that day. Excessive heat will cause perishables to spoil — a dilemma we had to fix. We placed the chocolate in the freezer so we could eat the candy bar and not its wrapper.
Lining cabinets with foil-faced bubble wrap can help to keep the heat outside and away from food items.
Although our coach was a comfortable 74 degrees inside, we needed to reduce the radiant heat from outside. We chose to start by gluing foil-faced bubble wrap material to the back wall in each cabinet. Why foil-faced bubble wrap? It is lightweight, easy to cut, and fit in the cabinets. If that didn’t sufficiently reduce the inside cabinet temperature, we were prepared to replace it with aluminized plastic foam sheets (e.g., Styrofoam) or add half-inch Styrofoam sheets over the foil-faced bubble wrap. If we did so, however, we would lose slight cabinet depth.
The worst part of the project was the unloading and reloading of each cabinet. The project took just under five hours to complete. As I write this, it’s been 18 months since we insulated the cabinets. There’s a minimal temperature difference inside the cabinets compared to the rest of the coach, so fresh fruit, vegetables, or chocolate are not affected when stored in them.
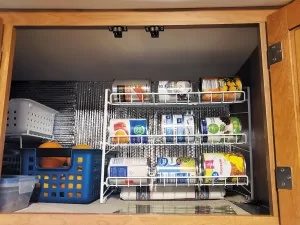
Next, we tackled canned food storage, as stacking cans in cabinets only works when you’re parked. The taller the stack, the harder it will fall when there’s movement. A horizontal rack stores multiple cans of various sizes and makes for easy access. The channel widths are adjustable to accommodate slim tuna cans or chubby fruit cans. And there’s room under the rack for slim bakeware, placemats, towels, and other things. When traveling, we secure the rows of cans with small bungee cords.
In the same space, we use stackable open-front bins for fresh fruits, vegetables, and snacks, eliminating boxes and bags. We also use various sizes of square plastic bins under and on top of a lightweight wire shelf to occupy vertical space. These square and rectangular bins are easily transferable into the refrigerator if needed, and they nest well when not in use. We diligently cut up and recycle all cardboard boxes as often as possible by resituating fresh food, snacks, and dry goods in the open-front stacking and square bins.
Repurpose Snack Containers
When your sweet tooth needs satisfying, go ahead and indulge with those large-quantity snacks pack-aged in the square, screw-top plastic containers. Don’t throw them away. Instead, give them a second life as repurposed dry-goods containers. We use ours for storing extra single-serve coffee pods and bulk dry goods. Placing the plastic containers on their side maximizes the space above the cookware on the shelf below. If you’re guessing, pull out that tape measure. Don’t be shy about moving a shelf to maximize the vertical space. The back row of containers holds infrequently used bulk dry goods like artificial sweetener, brown sugar, or flour. The front-row containers are daily-use items. But these repurposed snack containers are not just for food. We use them for storing everything from dry detergent to zip ties. They have become a value-added storage container.
Storing canned goods horizontally saves space and allows room for other items.
And a quick tip: Instead of keeping them stored in a drawer, we chose to pull out our silicone oven mitt and potholders and hang them.
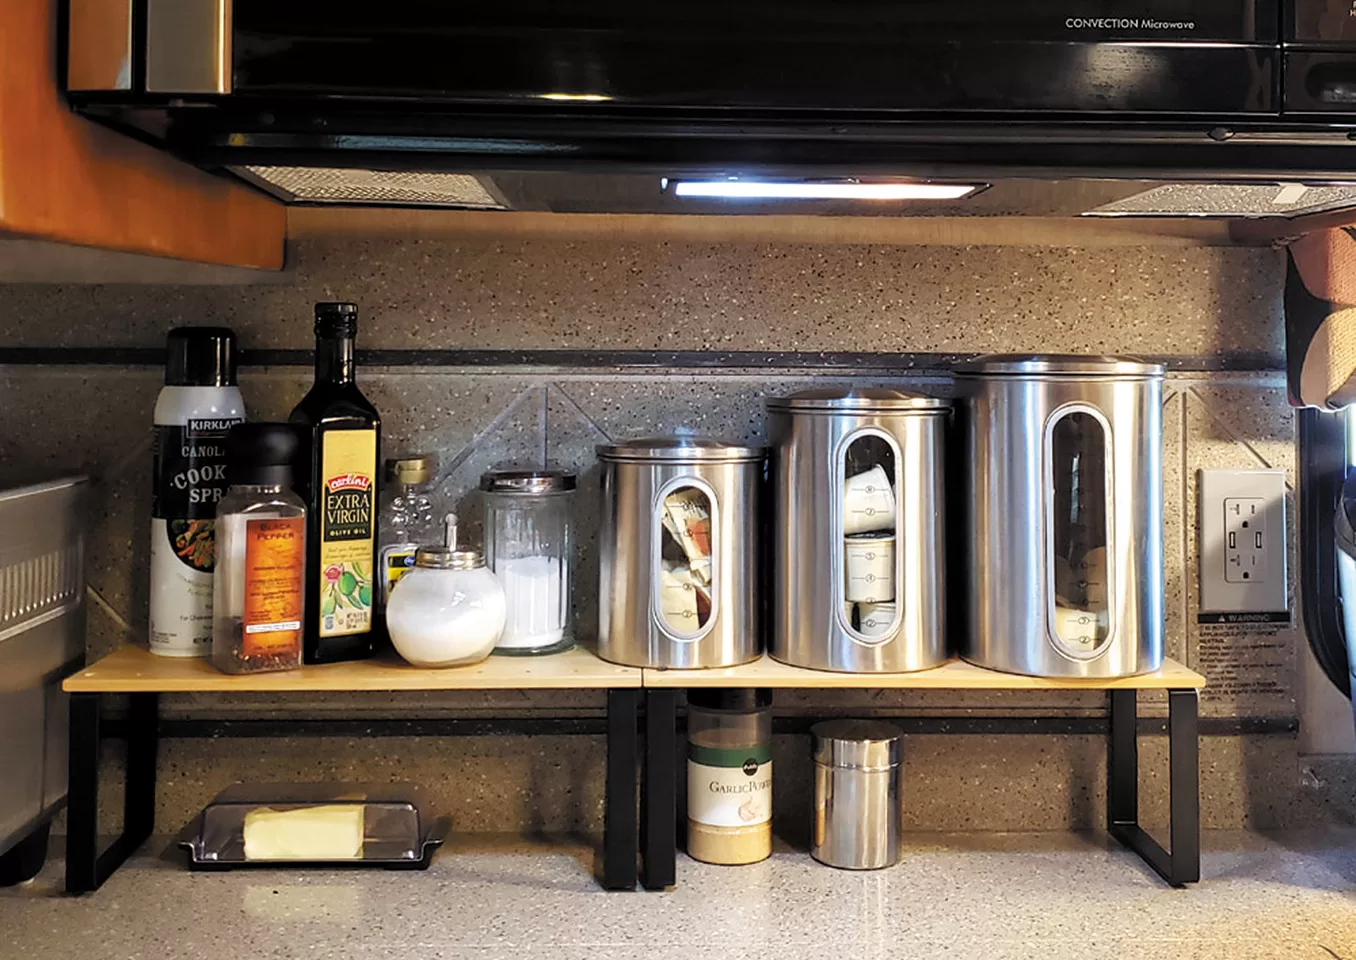
Need More Counter Space?
If you like to cook, then having more space for food, utensils, and work area tops the list. Counter workspace is a premium in many RVs, even those with a pull-out peninsula. If you’re a breakfast person or enjoy baking, you need space to place the small containers of ingredients as you prepare the culinary delight. We increased our workspace immensely by adding two 6-inch-by-6-inch shelves. We use them side-by-side on the counter, but they are free-standing and can be stacked. After I knocked over the olive oil before placing it back in the cabinet, my spouse asked, “How about two small shelves?” Darn it! Why didn’t I think of that? These shelves do the job — so much so that we rarely pull out the countertop extension.
Cookware Eating Up Cabinet Space?
If you enjoy baking cookies, consider using silicone baking sheets instead of bulky bakeware. Silicone sheets typically withstand temperatures up to 480 degrees Fahrenheit and keep cookies from burning, unlike some metal pans. They’re terrific for reheating pizza in your convection-microwave oven — definitely a plus, as they can go directly from the freezer to the oven or the microwave. Some metal cookie sheets are hard to store in slim-opening RV cabinets, whereas you can lay the silicone sheets flat or roll them up for storage in any cabinet. In addition, silicone baking sheets are not slippery and can be used to keep items on your counter from sliding. And to protect counters and/or eliminate that bulky cutting board, try plastic cutting sheets, which also store easily in any cabinet.
For those hard-to-access cabinets, such as under our pull-out dining table, we added an adjustable, stand-alone shelf for pet food.
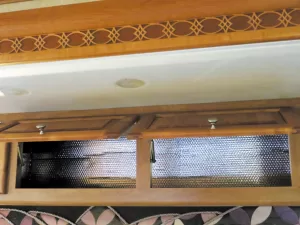
If you’re handy, consider crafting your own bathroom shelves, customized to fit your needs.
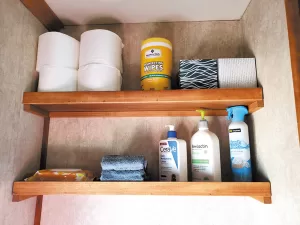
Multiplying Bathroom Storage
Adjacent to the bedroom, our bathroom sink cabinet didn’t have enough storage for toiletries. One must get creative around drainpipes, because they impede maximizing the space in these cabinets; often, you can’t use the larger stackable drawers. We measured the inside dimensions of the cabinet and found slim stackable drawers that we squeezed in next to the drainpipe. To the right of the drawers, we placed a square liquid-hand-soap bottle to feed the pump soap dispenser in the counter, which created more counter space. We use three in-counter soap dispensers daily — one in the kitchen and one each in the bathrooms — eliminating the sit-on-top dispensers.
Under our half-bath sink, we added the largest three-drawer container that would fit, in which we stowed bandages, first-aid supplies, and personal items. To maximize vertical space, we stacked additional supplies on top of the drawers around the drainpipe.
The original liquid-soap bottle for the in-counter dispenser, to the right of these drawers, was too large, so we swapped it for an empty soft-drink bottle. It fit perfectly in the back corner, feeding the pump soap dispenser. I also wanted more shelf space above the towel rack in this half bath. So, my spouse went to a woodworking shop and crafted two narrow-depth shelves for hand towels, tissue, toilet paper, and things that won’t break if they happen to fall while traveling.
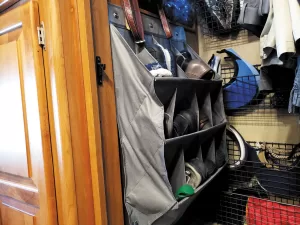
A hanging shoe rack allows you to bring footwear for almost every occasion.
First, we measured the closet. We chose wire baskets and attached them to the back wall to hold items that were overflowing in pop-up bins. To eliminate shoe clutter, we chose to use a metal-reinforced canvas shoe rack and attached one to each side wall of our closet — “his” and “hers” shoe racks.
Our coach has a Freightliner chassis, and the bedroom closet has a built-in step to accommodate the rear radiator and engine. It took some searching, but we located pop-up bins that fit perfectly on the closet floor, plus slim baskets for the narrow back wall shelf. We vacuum-pack and store the bulk of winter clothes under our bed. None of these additions added much weight or bulk. The trick is to measure that empty space and locate the appropriate storage bins, shelf, basket, rack, or drawers to fit your needs. We searched and found many items online and learned new tricks in the process!
As we discovered, there’s a solution out there for every storage situation. It just takes determination and a little creativity.