
You can carry a multitude of items in your RV toolbox, but needs vary based on your individual skill level.
By Mark Quasius, F333630
June 2024
A recreational vehicle is essentially an assemblage of moving parts that serve as a mobile dwelling. These parts occasionally seize up and fail to move, and sometimes the parts that are supposed to remain stationary loosen and move anyway. An RV experiences stress caused by the roads on which it travels, which tends to vibrate all sorts of things loose. RV service work and maintenance are facts of life. When something happens, you’ll either need to take your RV to a service center and pay for a repair or fix it yourself if the repair is within your capabilities. Of course, you won’t be able to perform any repairs unless you have some tools on hand when traveling.
A few basic tools will go a long way in covering most repairs. The important thing is to match the tools to your level of expertise. For instance, there’s no sense carrying a torque multiplier if you don’t intend to recheck the torque on your lug nuts or change a tire yourself. However, most anyone can take care of little things that pop up. An example might be a cabinet door that falls off; a quick twist of a screwdriver may be all it takes to refasten it. For tasks beyond your scope of ability, the tool you’ll need is a credit card for when you call road service or pull into an RV service center.
Let’s look at what you may want to consider packing based on your knowledge and skill level.
LEVEL ONE – BASIC
Locking pliers

Screwdriver

Pliers
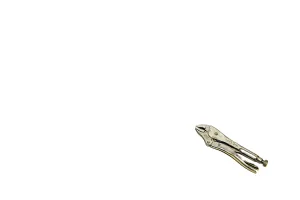
Locking pliers
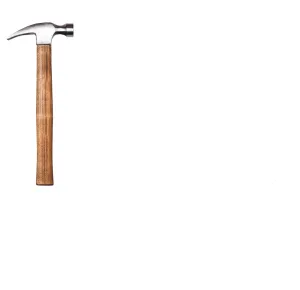
Hammer
Tire pressure gauges
I recommend that every RV owner carry a basic set of tools. Simple repairs can alleviate many annoying issues, some of which could even sideline your trip. A quick repair may result in a permanent fix or just a temporary one that enables you to get back on the road until the issue can be properly addressed.
The most common tool is a screwdriver. A wide variety of screw head styles can be found in RVs: slotted, Phillips, Torx, socket head (also called Allen), or Robertson (square drive) screws. Rather than carry multiple screwdrivers, I recommend one with replaceable bit tips designed to be inserted into a magnetic holder, which helps prevent the screw from falling off the tip. These sets usually come in a plastic case that holds the driver and a wide selection of ¼-inch hex bit tips. Some of these drivers are available as ratcheting screwdrivers, which makes them easier and more comfortable to use.
The case usually has room for extra bits, so you can add bits, sockets, and adapters that didn’t come with the kit. A drill adapter allows you to use bits with a cordless drill or impact driver, which makes jobs faster and more effortless. I also carry a small right-angle ratchet that accepts those bits, which allows me to get into areas where a regular screwdriver is too tall.
Wrenches are mandatory. Combination wrenches with both open and box ends give you the ability to use either end on a bolt head or hose fitting. You don’t need to buy the largest set, because most repairs will require the ¾-inch or smaller sizes. Add a 12-inch adjustable wrench for odd or larger sizes or for when you need a second wrench of the same size.
Socket sets are another must-have item. For a basic set, a ⅜-inch drive combination set with both metric and fractional sockets in standard and deep well sizes will cover the majority of your needs.
Pliers are often misused in situations where wrenches should be employed. Incorrect tool usage can, for example, damage fasteners by rounding off the heads, making them difficult to remove. A good pair of locking pliers, such as Vise-Grip brand, can grab a bolt with a rounded-off head, turn a pipe, or bend a metal tab. Large tongue-and-groove pliers, such as Channellock brand, can be used on seized garden hose fittings or other larger items that need some grip. Needlenose pliers can be employed to hold small objects.
Basic tools such as hammers and pry bars are also necessary. If you are only going to carry one hammer, make it a large one. A good four-pound hammer probably is your best choice. You can always hit lightly with a big hammer, but it may be difficult to hit with enough force when using a light hammer, so skip the smaller ball-peen hammers. Crowbars can be useful for prying up leveling jacks that are slow to retract or for anything else that needs a little nudging.
Since a large majority of issues are electrical, and you can’t tell what’s wrong unless you do some diagnostics, a simple multimeter should be in every RV owner’s toolbox. It can be used to check for 120-volt AC at the campground pedestal or to test for dead electrical circuits in the RV. It can be utilized on 12-volt-DC circuits to determine whether a switch or fixture has power, or to check battery voltage. A multimeter also can test resistance; measuring the ohms of an item (such as an electric heating element) can help to determine its condition. In addition, a multimeter can be used to test fuses or to verify continuity in light fixtures or other devices. Then, a handful of crimp-style connectors and a multipurpose wiring tool can be used to correct the problem.
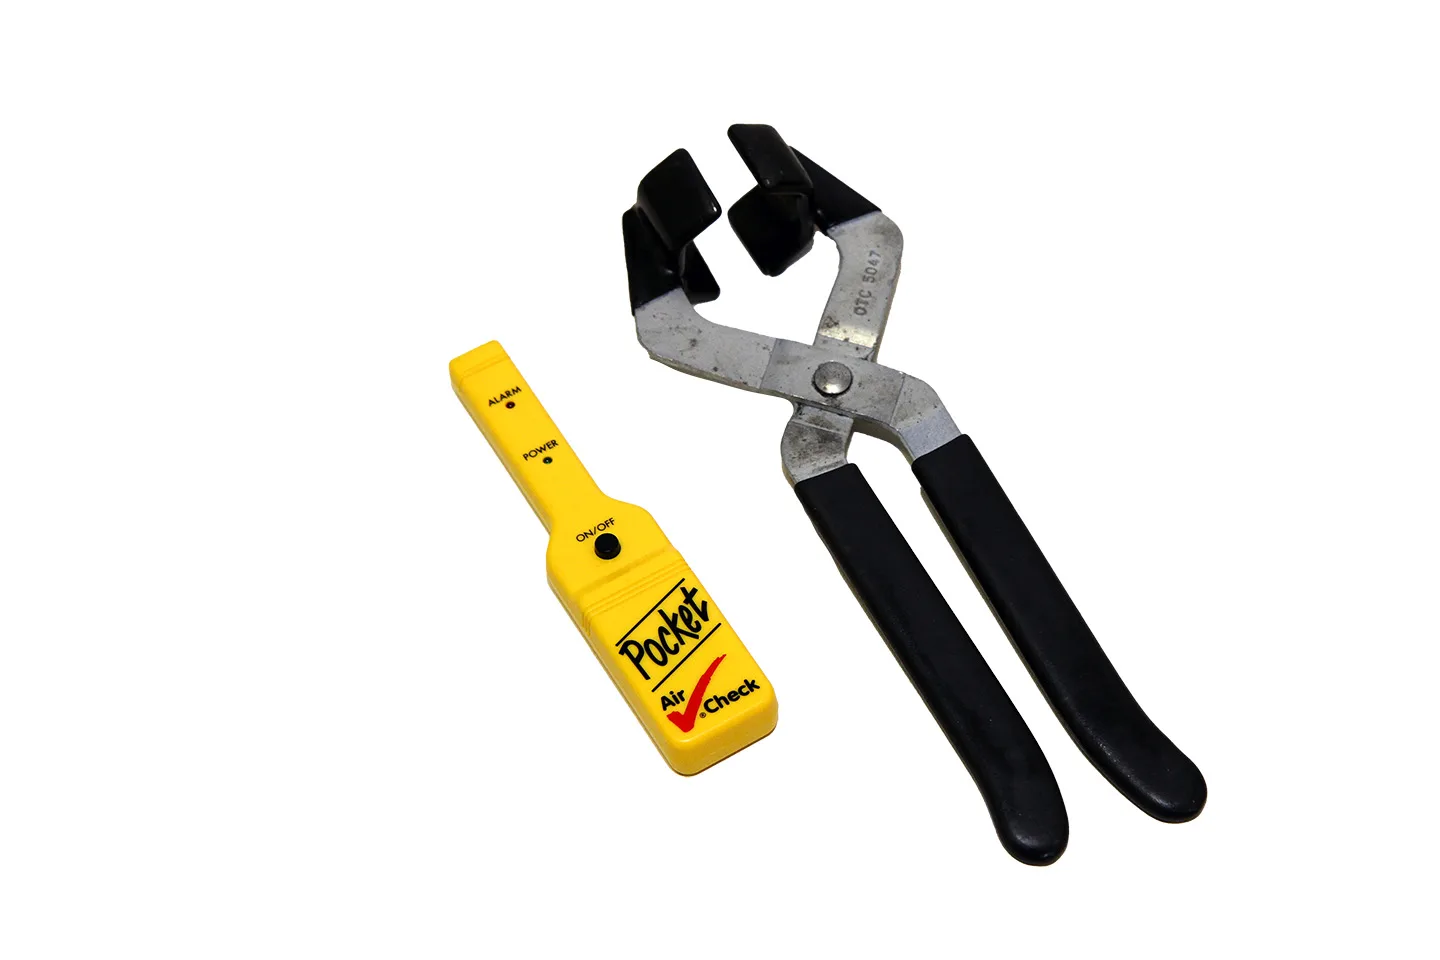
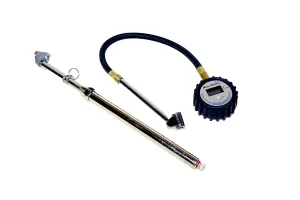
Any basic tool kit should have a tire pressure gauge. Checking your RV’s tire pressure is one of the most important tasks you’ll be doing on a regular basis, so be sure to invest in a high-quality unit. Consider one with the trucker’s foot if you need to reach inner duals.
You probably won’t be changing your own oil when traveling, but owners of diesel motorhomes run the risk of picking up a batch of bad fuel with water in it. If that occurs, you may need to change the fuel filter. It’s always a wise choice to carry a spare fuel filter along with you, but you will also need to carry a filter wrench with which to replace the filter. Filter wrenches come in various sizes, so be sure to buy the correct one to fit your filter.
A good retractable utility knife is handy to have on hand, too; don’t forget the extra replacement blades.
LEVEL TWO – INTERMEDIATE
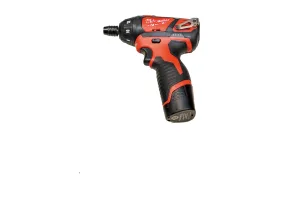
Cordless screwdriver
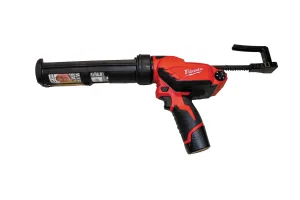
Cordless caulking gun
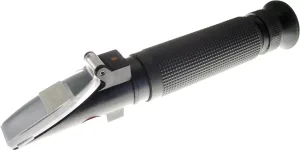
Refractometer
This level is for anyone with a bit more of a DIY attitude — someone who wants to go beyond performing basic repairs and thus may require extra tools.
You can start out by adding more sockets. The basic ⅜-inch drive set mentioned earlier is a good start, but if you want to handle smaller nuts, like those in the cockpit area, you’ll need a ¼-inch drive set (if it’s not already in your basic kit). Motorhome owners who plan to work on the chassis will want to consider a large ½-inch drive set. You’ll also want to add more combination wrenches. Keep in mind that you may need duplicates in the common sizes, such as 7/16, ½, 9/16, and ¾, so that you can remove hose fittings or hold a bolt with the same size nut.
At this point, adding power tools is also a good idea. A cordless drill and drill bit set is necessary and can also be used to drive your screwdriver bits or small sockets. Cordless impact wrenches can complete repair tasks much faster and with less effort.
Better wiring tools are also a big help. After all, electrical issues are generally the biggest gremlins that occur in an RV. It may be faster and easier to just grab a 12-volt test light to check a fuse or circuit rather than bring out the multimeter. Carry a small assortment of wire terminals. For higher-quality repairs, replace the multipurpose crimper/stripper/cutter with a good barrel crimper and wire stripper. For connections that need to be sealed against the elements to prevent corrosion, heat-shrink tubing and a heat gun will help. Diagonal cutters are easier to use than a multipurpose wiring tool for cutting wire and can also be used on nylon cable ties.
Radiator coolant needs to be checked for freeze protection level, which can be done with an antifreeze hydrometer. If you have flooded batteries, you may need to check each cell’s specific gravity, so a hydrometer designed for battery acid is required. Rather than carry two hydrometers, I suggest you buy a refractometer. Hydrometers are bulky and can be easily broken because of their glass construction; a refractometer is compact and more accurate, because it doesn’t require temperature compensation. A refractometer also is less apt to be broken, and it can handle battery electrolyte levels and coolant freeze levels while taking up less storage space than a hydrometer. Note that some of the newer hydrometers are made of flat plastic and more durable than their predecessors.
Finally, it’s wise to also carry a caulking gun, tubes of silicone, and self-leveling caulk. If a leak appears, you can reseal it correctly rather than reach for the duct tape. Don’t forget to include a scraper to remove the old sealant as well. Still, I’d recommend packing duct tape and EternaBond roof and leak repair tape in case.

Torque multiplier
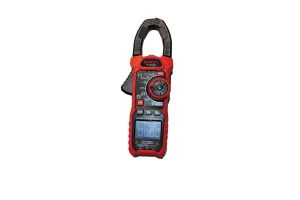
Clamp-on ammeter
LEVEL THREE – ADVANCED
You’ll need even more tools if you really enjoy getting your hands dirty (and you’ll want to add some good waterless hand soap to the list). At this point, the law of diminishing returns comes into play. These tools are going to cost more and will be used less often than your basic tools. But if you want to be able to perform whatever task they are designed to do, you’ll need to have them along.
For example, to properly tighten lug nuts on a Class A motorhome, around 475 pound-feet of torque most likely will be required. Once the lug nuts have been in place for a while, it’ll take even more torque to remove them. A person who can apply 100 pound-feet of torque per foot of leverage will need a wrench with at least a 5-foot handle to accomplish that. Instead, a torque multiplier can be used by those who have the expertise to do so. This tool will increase your input torque, generally in the 4:1 to 6:1 ratio. This makes it possible to exert between 80 and 110 pound-feet of input torque to achieve those 475 pound-feet on the output end. You can use a standard ½-inch drive torque wrench to properly tighten lug or an 18-inch breaker bar to break them loose when removing them. Just don’t use an impact wrench on a torque multiplier or you will damage its gears.
A clamp-on ammeter will show you how many amps are passing through a given electrical circuit by clamping the probes around the conductor. You need to clamp the jaws around a single conductor, so be sure to get a breakout adapter for testing 120-volt-AC power cords.
Other tools to consider include a propane leak detector (unless you have an all-electric RV), a pliers tool that can safely remove plastic trim caps over lug nuts without scratching the plastic chrome finish, and a plastic welder to repair stripped screw holes in instrument panel housings or to fix cracked plastic trim or brackets. A pop riveting tool and a selection of rivets can also be handy to carry.
SELECT WHAT’S RIGHT FOR YOU
The main takeaway is to match the tools to your ability to handle repairs and your desire to perform them yourself. Eventually, it may be time to call the professionals and let them handle the task, but that point varies with each individual and the severity of the needed repair.