
Tips for replacing RV vinyl graphics when the time comes and how to care for them to extend their life.
By Chris Dougherty, F263059
July/August 2024
If you’re like me and have an older RV that lives outdoors, you’ve likely witnessed firsthand how the sun’s ultraviolet rays play havoc on its exterior plastics, including vinyl graphics. This degradation makes the unit look old and worn.
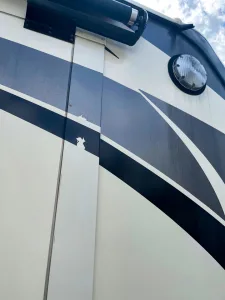
This slideout needs vinyl replacement after damage from a pressure washer and staining from a roof coating job.
While vinyl graphics have improved over the years, they still have a finite lifespan when constantly exposed to the elements. There are ways to protect them, but sometimes they reach the point where replacement is the best option. In this article, I’ll review how to remove and replace vinyl graphics, where to obtain new graphics, and some maintenance steps to help them last as long as possible.
RV graphics may consist of simple cut vinyl material or may be printed on blank material with intricate digital designs. Little difference exists between some of the graphics installed on our RVs and full vehicle wraps, commercial signs, and even billboards. The distinction tends to be the grade of the material and the adhesive.
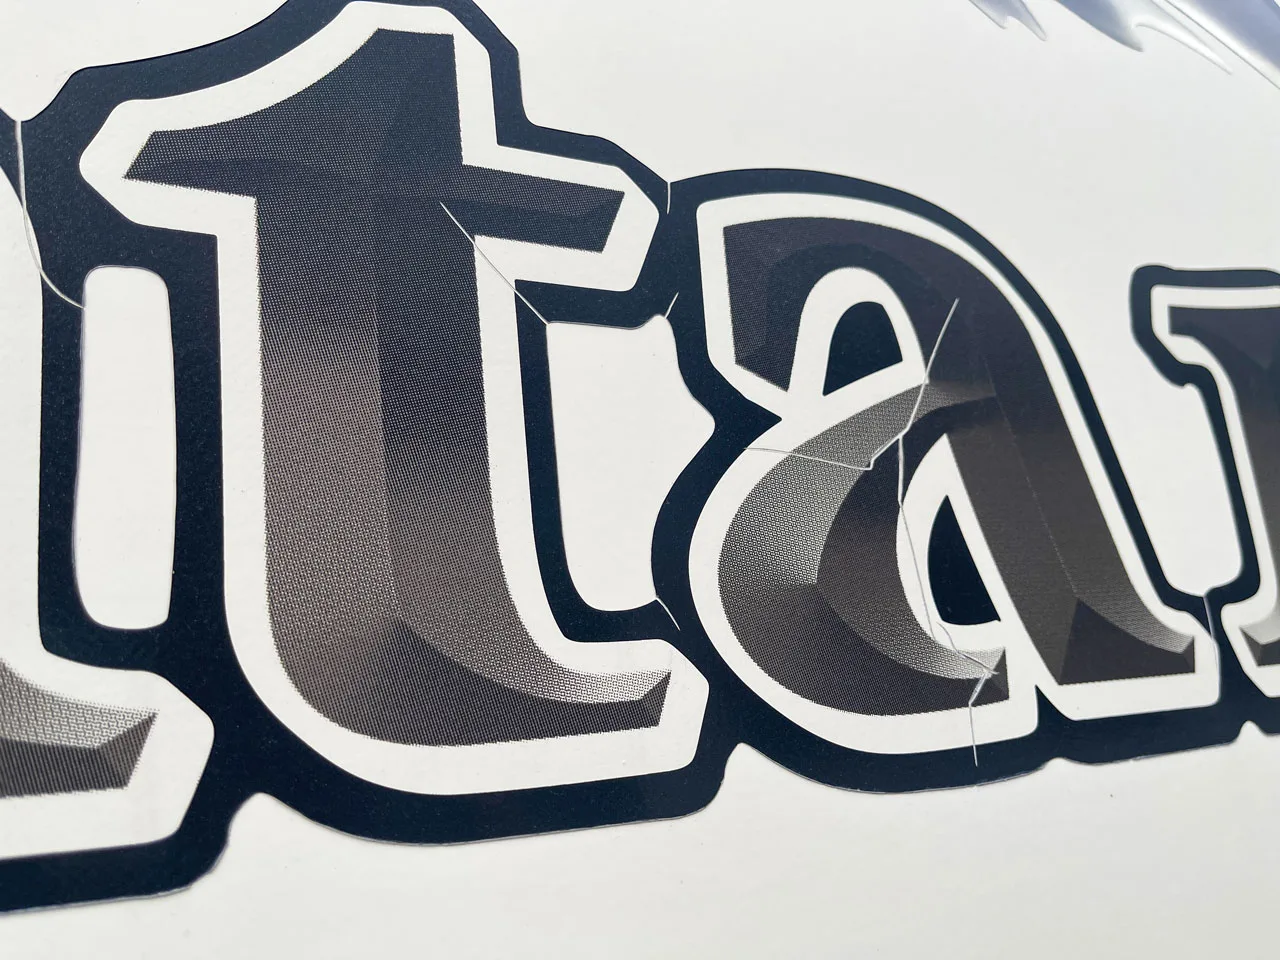
The first step is to determine which graphics you need or want to replace and whether you should redo the whole unit. As the graphics fail, they will crack and then peel. If they are peeling, they need to go. However, if they have only a few small cracks, you can match the color with touch-up paint and fill in the cracks, buying some time.
While replacing the “stickers” may seem like a pretty straightforward process, it is anything but. It takes time and patience. In the case of an RV with fiberglass-reinforced plastic (FRP) siding, you may need to restore the gelcoat before applying new graphics. This will avoid unwanted shadows where the original gloss — preserved under the graphic — contrasts with the` oxidized surface.
Believe it or not, the color of the vinyl material often affects adhesion to the side of an RV. Darker vinyl can be harder toremove, especially if it has baked in the sun for a long time. Others may peel off easily with just a little heat carefully applied via a heat gun.
The removal and application of vinyl graphics also differs depending on whether you have an FRP- or aluminum-sided RV. The aluminum siding pattern (Diamond, Mesa, Yoder, Fleetwood, etc.) makes it more challenging to apply the vinyl smoothly. If you’re changing graphics on aluminum siding, the paint under the graphics will often be protected, as is true of fiberglass. Still, the paint may not be as restorable as fiberglass gelcoat generally is. Care also must be taken not to dent the aluminum.
THE PROCESS
Determining whether replacement graphics are available for your RV, and from where, is a logical next step. The RV manufacturer can be a source when it comes to newer RVs. As the RV ages, finding suitable replacements may become very expensive. The manufacturer can sometimes source replacement graphics from the original vendors, but the cost tends to be high. The benefit of going this route is that it will ensure that the vinyl colors match as precisely as possible. Many manufacturers produce automotive vinyl, including 3M, Avery Dennison, TeckWrap, Argotec, Arlon Graphics, and Hexis Graphics, and they all have their own color palettes.
Several companies can manufacture replacements or sell you an entirely new graphics kit for your RV. These include the RV Graphics Store, RV Decals Direct, and Graphics RV, among others.
Burlington Graphic Systems’ BGS Custom Wraps division in Elkhart, Indiana, frequently makes custom wraps for RVs, boats, and cars. The parent company, located in Racine, Wisconsin, creates graphics kits for many RV manufacturers. If your RV is older and BGS still has the file, the company may sell the file to you so you can have a local sign shop cut new graphics for your RV. BGS has files going back to 2005, but they are hit and miss, according to Ellen Damron, RV account manager and application specialist for BGS. “It’s a competitive business, with many players,” she said.
Speaking of local sign shops, you may find one that can make graphics for your RV. However, Damron said that if they don’t have access to the original design file, it’s difficult to make exact replicas. “They’re like puzzle pieces, and you want to ensure the material size, color, and shape is right.” So, without a file, it may be easier to start off with a whole new design.

3M Strip Off Wheel
VINYL REMOVAL
Removing graphics can be tedious; if you’re not careful, you can damage the substrate, so take your time. If you’re replacing exact graphics, first document where the graphic is so you can match the old one to the new one. You might want to use a fine-tip grease pencil to mark critical points on the original graphic to help place the new one as precisely as possible. Compare them before you start the installation to make sure you have the right one!
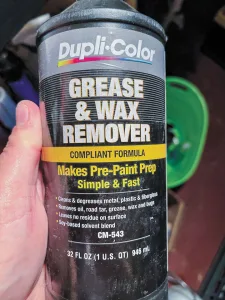
Dupli-Color Grease & Wax Remover
The easiest removal method is to use a heat gun to carefully warm the graphic and then scrape it with a plastic razor blade or scraper. If you are removing the graphic from fiberglass, be sure not to overheat the decal; otherwise, you could damage the fiberglass or substrate glue. Once you get it started, the rest of the graphic may pull off. For larger graphics, you’ll likely have to remove it in sections. If glue is left behind, use a high-quality adhesive removal product such as 3M Adhesive Remover, available through automotive paint shops and online. This stuff is industrial grade, as are most 3M products, so employ all necessary personal protective equipment and use the product carefully.
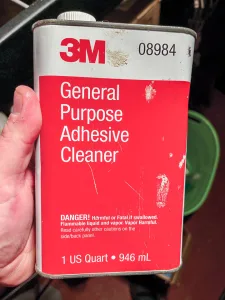
3M General Purpose Adhesive Cleaner
If the graphics still don’t want to come off, 3M’s Stripe Off Wheel vinyl decal eraser is the way to go. I have used it successfully on really old graphics where heat threatened to melt the fiberglass before the vinyl would release. Mounted to a drill motor, this $35 tool saves a lot of work. After removing the vinyl and glue, clean the surface with an automotive grease and wax remover that is safe for the surface material.
This would be the point in the process to restore the substrate if necessary to remove weathering and degradation.
APPLYING GRAPHICS
Once the surface has been prepped, use masking tape to hang the unpeeled graphic on the side of the RV. A fine-tip grease pencil can be used to make sizing and placement marks. If only a part of one graphic needs replacement, it may be possible to cut the graphic and overlap a patch piece.
Two application methods exist: wet and dry. The wet method tends to be more forgiving but won’t work for some new products. Follow the detailed installation instructions provided by the vinyl supplier. 3M, for instance, has a detailed tech library for its vinyl and wraps.
You will need special vinyl graphics squeegees, a new razor blade, a plastic razor blade and holder, a 3M Stripe Off Wheel decal eraser, a drill motor, and hand and power tools to remove hardware on the RV as needed. Be sure to remove and clean off sealants that are in the way and replace them after the new vinyl is in place. You will also need personal protective equipment, including eye and skin protection. A respirator is recommended when using solvent-based products.
VEHICLE WRAPS
Another option is to remove all the graphics from your RV and install a custom-designed wrap. This avoids the need to do a surface correction, as long as it is not too beat up. Plus, you can work with designers to create something no one else has. You can do partial wraps or wrap the entire vehicle.
At about $12 per square foot of covered surface, a wrap is not inexpensive, but it is cheaper than full body paint by more than half in some cases. The price includes everything from design through finish. For example, covering all sides of a 40-foot fifth-wheel would cost about $10,000 (800-900 square feet times $12 per square foot).
I contacted Mike Leman, vice president of paint operations for Patrick Paint Group in Indiana. The company has five RV paint operations that do work for RV manufacturers and owners alike. He told me that an aftermarket full paint job on the same size RV would cost $23,000 and up, depending on the condition of the RV and other factors.
BGS’ Damron said vehicle wraps consist of two layers: a printable adhesive surface on the bottom and a UV and physical protection layer on top. According to Damron, wraps last about six or seven years, after which they start to become worn and can be prohibitively difficult to remove. The vinyl cut graphics typical on RVs last about 10 years, depending on how they are cared for and their environment. After that, they’ll start to crack and peel. Of course, exposed gelcoat or aluminum paint will oxidize by then.
VINYL CARE AND MAINTENANCE
Interestingly, RVers commonly are advised that waxing the RV is an essential part of maintenance, and yet that very wax, depending on brand and makeup, may be damaging the vinyl graphics.
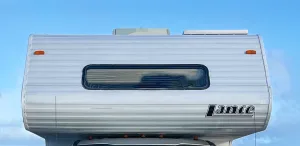
Before: The paint failed on this 2005 Lance camper.
Damron said to stay away from petroleum/citrus/mineral spirits-based products and heavy cleaners when caring for an RV with vinyl graphics. She noted that these products shorten the life of the vinyl. Upon further investigation, I found that recommendation across manufacturer and installer guides.
It turns out that many vehicle waxes contain these chemicals. Carnauba wax uses petroleum distillates to keep it soft for application on the vehicle, after which it flashes off, hardens, and dries so it can be wiped off. Citrus cleaners and waxes are available for sale, and cleaner waxes have mineral spirits.
So, what should one do to protect the RV and the vinyl graphics?
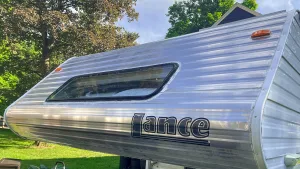
After: The old graphics were removed, and the front and sides were painted; a new graphic was sourced from eBay.
As it turns out, there are protectants available for vinyl. Chemical Guys offers their Wrap Detailer quick detailer and protectant for vinyl wraps, which, company literature states, safely cleans vinyl graphics of any kind and provides additional UV protection.
Triple S solution from P&S Detail Products is used to install, clean, and preserve vinyl wraps. It provides enhanced UV protection, which should help the graphics last longer.
303 Automotive Protectant is a well-known product in the RV space. Company info says it is “Safe and effective for vinyl, gel-coat, fiberglass, carbon fiber, synthetic or natural rubber, plastics, and finished leather.” Available in sprays or wipes, the product is free of solvents and silicones. Therefore, it requires extra buffing for a good finish and should be reapplied every 30 to 45 days.
This is not to say the remaining, non-vinyl-covered parts of the RV shouldn’t be waxed. 3M’s Scotchgard Marine Liquid Wax provides UV protection to fiberglass and is a reasonable consideration. Meguiar’s, Griot’s Garage, Glidecoat, 303 Products, Presta Marine, and others have similar products.
Keeping the RV covered or stored indoors will help preserve all the plastics, including the vinyl. The outside environment is harsh on all materials, and while slathering an RV with UV protection won’t completely protect it, it will help extend the life and appearance of the graphics on your home on the road.
PAINT, GRAPHICS, OR WRAP?
As with real estate, this is mainly about location, location, location. Aside from the cost, applied vinyl has a shorter life in hotter, sunnier climates than in cooler, cloudier ones. Both 3M and VViViD have shorter vinyl warranties in the former locations versus the latter. For instance, if you spend most of your time in the desert Southwest, paint, or even a partial paint job, may be a better solution for you. The decision comes down to what you want your RV to look like and how long you plan to keep it. Consider a cost-benefit analysis for your RV to help narrow the decision.
COLOR CHANGE WRAPS
Did you know it’s possible to completely change the color of your RV or vehicle using specialty wraps? 3M Wrap Film Series 2080 non-printable vehicle wrap film allows full personalization of your vehicle with nearly 100 color choices, including metallics, and textures. The company’s 1080 Color Flip films change color with different lighting angles.
3M officials suggest that when professionally installed, these wraps are durable and will last. They come with an eight-year warranty on vertical installations and a three-year warranty on horizontal installs.
VViViD Vinyl has an online store with a similar selection of wrap vinyl and application tools.
As with most applications, installation must be done precisely; detail is critical. With an RV, a lot of exterior equipment and some sealants must be removed before application.