Learn how easy it can be to keep your DC electric-powered equipment operational.
By Mark Quasius, F333630
January 2014
As the owner of a motorhome, you likely will encounter some type of electrical malfunction in your vehicle over time. Solving electrical problems is the most common repair in motorhomes, and when you consider the complexity of a typical motorized RV, it’s easy to see why. Electrical wiring is run almost everywhere in your RV, and corrosion, chafing, or poor connections can sideline your motorhome and ruin a trip. Fortunately, most electrical repairs aren’t difficult to identify and correct, but they do require a bit of education in order to perform a permanent repair. Most RV owners can perform minor repairs with minimal tools and a bit of education. This article will address only low-voltage direct-current (DC) wiring. High-voltage alternating current (AC) requires a slightly different approach and can have serious consequences if not done correctly.
To perform basic electrical repairs, you will need a voltmeter; a good set of wire cutters/strippers; hand tools to include screwdrivers, wrenches, and a socket set; a tape measure; cable ties; and electrical tape. Depending on the job, other tools may be required.
Wiring
Wiring is the backbone of your motorhome’s electrical system. It conducts current from the power source to the destination equipment or device when needed. It is comparable in design to a plumbing system or pipeline. When designing a plumbing system, it’s important to use the proper size of pipe, because the water flow rate requires a minimum-sized pipe in order to be able to pass the water through to the destination. If the pipe is too small in diameter or too long in length, the flow will be restricted and the pressure will drop. Electricity flows in the same manner. If the wire gauge is too small for the desired current flow, which is measured as amperage, the voltage (pressure) will drop and your electrical devices won’t operate properly, if at all. Excessive length also plays a role here, and it will be necessary to increase the wire gauge size if the length exceeds the specifications for that particular current flow.
 For a given length of wire run, a typical 15-amp circuit may call for 14-gauge wire, but increasing the current to 20 amps would require larger, 12-gauge wire. Always check a wire gauge chart to be sure that the wire being used is not undersized for the particular current flow. When consulting a wire gauge or amp chart, consider the total length of both positive and negative wiring used. While they often will be the same, there are instances when the motorhome chassis may be used for the ground.
Wiring is available with different insulation types as well. The insulation does not affect the current-carrying capacity of the wire, but it does affect the voltage rating as well as the ability to resist damage. Most low-voltage wiring is available in GPT or GXL types. The less-expensive GPT wire insulation is a PVC jacket that is good for interior wiring and is rated at a maximum of 176 degrees Fahrenheit (80 degrees Celsius). GXL insulation is a cross-linked polyethylene jacket that is rated at 257 degrees F (125 degrees C) and has better resistance to abrasion, heat, and oil. GXL wiring can be used in the engine compartment as well as for interior wiring. Both versions are rated at a maximum of 50 volts, so they should not be used for high-voltage wiring.
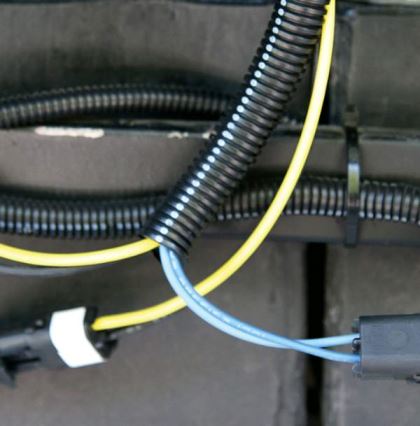
While the insulation provides some protection against abrasion, any wire that constantly rubs against another item eventually will develop a perforation in the insulation and short out if given enough time. Using nylon cable ties to hold the wire firmly in place will minimize abrasion, but the best way to protect wires is to bundle them inside a protective sleeve. Convoluted nylon split wiring loom is available in a variety of diameters and is rated up to 300 degrees F (149 degrees C). The split allows for easy wire insertion into the loom, and the corrugation provides excellent protection against abrasion. Be sure to use quality electrical tape at the ends and cable ties along the length to secure the loom in place.
Overcurrent Protection
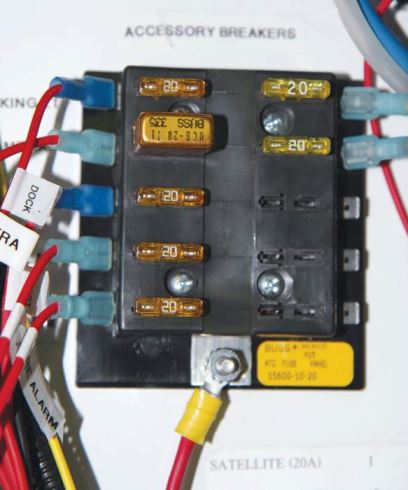
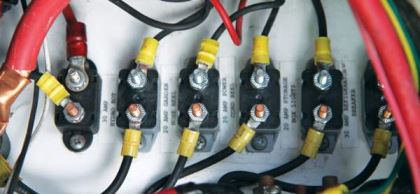
 Overcurrent protection consists of adding a fuse or circuit breaker that will shut off power to the circuit if the rated current flow is exceeded. If a wire is run from a hot power source to a switch that controls a device such as a fan or a light, that circuit is not protected. Should there be a short circuit along the path, the current flow will spike and the wire will get hot. An overheated wire could potentially spark a fire that could result in the loss of the motorhome, or worse. The use of some type of overcurrent protection device will prevent this from happening by disrupting power to the circuit to protect the electrical system should an overcurrent condition or short circuit develop. The advantage of using a circuit breaker is that it is reusable, whereas fuses are throwaway replacement items. Automotive type I circuit breakers automatically reset once they cool down, while type III breakers have a reset button, which must be pushed manually to reset the breaker and restore power to the circuit. Whichever method is chosen, the fuse or breaker should be located close to the power source’s positive terminal in order to protect as much of the circuit as possible. Placing the fuse or circuit breaker farther down the line leaves the unprotected portion of the wire exposed to overheating should a short circuit develop in that area.
Connections
Using the best wire in the world doesn’t mean anything if it’s not properly connected to the power source and the destination equipment or device. Connections are more apt to fail than the wire itself, because they are exposed to corrosion and the elements. Wrapping the bare end of a wire around a screw isn’t a very good way to make a connection, so wire terminals with a ring end typically are used. These terminals are available in various ring sizes and barrel shank sizes to fit a wide selection of wire gauges and screw or bolt diameters.
The most common terminals are the crimp-style connectors that have color-coded nylon or PVC insulation surrounding the barrel. This insulation helps protect the terminal and identify the proper wire gauge recommended for that particular terminal. Connectors with yellow sleeves should be used on 10-gauge or 12-gauge wire. Connectors with blue sleeves are designed for 14-gauge or 16-gauge wire, while the smaller red-sleeved terminals are designed for use with 18-gauge or 20-gauge wire. If you insert a smaller-gauge wire into a larger terminal, the crimp won’t hold tight and the connection will fail. If you try to insert a larger-gauge wire into a smaller terminal it won’t fit and strands of wire will need to be removed, reducing the current-carrying capacity. Be sure to use the correct terminal for the particular wire size you’re working with.
A good crimping tool such as the SG Tool Aid 18900 or the Paladin PA1308 also will be needed to make good crimps that don’t fail. Splices to repair a break in the wiring or to lengthen the existing wiring can be soldered or crimped with butt-style connectors. In either case, it’s important to make a good connection and to seal it up to prevent corrosion or deterioration of the joint.
If you plan to make battery or inverter cables, soldering is not recommended. Solder will melt when heated. If an inverter draws high current, the connection may fail as the solder melts, so a crimped connection is recommended for heavy 2/0 or 4/0 inverter cables. Large crimping tools needed for this type of work are expensive, so it’s best to let a truck service center make those crimp connections for you.
Many electrical issues occur simply because of a bad ground connection. Most circuits consist of a switched power feed to a light, fan, or other device, which then connects to ground to complete the circuit. If the ground connection becomes loose or disconnected, the circuit will fail. Most ground connections attach to a steel member that is welded to or otherwise connected to the motorhome’s chassis frame. Ground terminals need to be connected to a clean surface, free of paint or rust. One method of helping to achieve a good ground connection is to utilize star lock washers to help bite into the metal surface. If the connection is to a stud or bolt, a nylon lock nut is a great choice to prevent the fastener from loosening due to vibration over time.
Corrosion Protection
Passing an electrical current through dissimilar metals tends to create corrosion. Exposure to the elements, especially moisture, can cause rust to form on steel components. Rust or corrosion eventually will eat away at the metal and cause the connection to fail. Whenever possible, it is good practice to seal up any exposed wire or terminals to prevent this from happening. When making a splice in the wire, it’s hard to beat heat shrink tubing. This tubing slips over the joint, and when heated with a heat gun or hair dryer, shrinks to create a tight seal on the connection. Shrink tubing also can be used on wire terminals to seal up the barrel of the terminal with the wire. When making battery cables, it’s especially important to seal this area up because of the presence of corrosive gases that escape the battery during the charging phase. Adhesive-lined shrink tubing is available in both red and black colors and is perfect for that application. The adhesive helps to hold the shrink tubing in place and creates an airtight seal between the cable and connector.
 Top post batteries can be further protected by adding battery washers to the posts before connecting the terminals. These felt washers are impregnated with NOCO Company’s NCP-2 Battery Corrosion Preventative compound, which deters corrosion. NCP-2 is a red compound that also is available in aerosol cans and can be applied to ground studs and to circuit breaker and solenoid terminal connections. It does an excellent job of protecting against corrosion.
Taking the time to do the job right is important when performing electrical repairs and will help turn a temporary fix into a permanent repair that you won’t have to worry about again. A little bit of knowledge and the desire and patience to do the job correctly is all it takes to keep you safe and enjoying your motorhome.

