
This procedure can be accomplished with no tools, a few supplies, and due care.
By Steve Froese, F276276
March 2019
RV hydraulic leveling jacks tend to be reliable, but issues can arise over time, including failure of the springs. This article describes how to replace hydraulic jack springs. It also offers tips to help prevent premature failure of the jacks.
For the average RV do-it-yourselfer, the spring replacement method described below is considered an advanced level of difficulty. If you choose to follow the instructions outlined here, first satisfy yourself that personal and product safety will not be jeopardized. If you don’t feel comfortable performing the procedure, make an appointment with an RV service facility.
Preventing Jack Failure
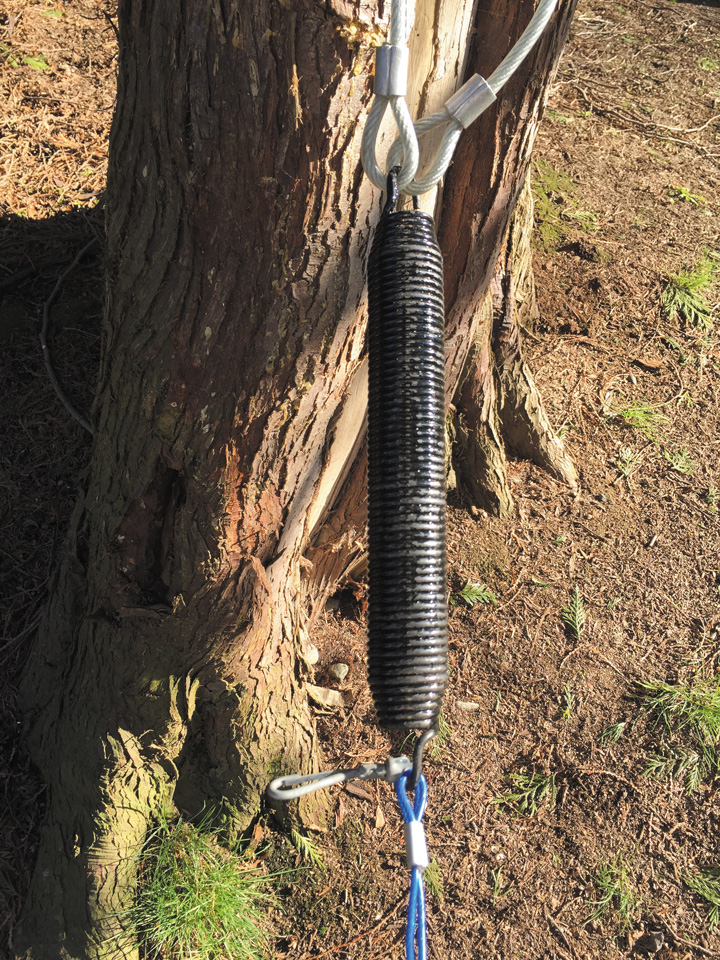
Replacing RV hydraulic jack springs via the author’s method involves using cables to attach one end of the spring to a tree or post and the other end to a vehicle and stretching it slightly.
As they age, jack springs can fatigue to the point of failure, but springs break for other reasons, too. To prevent premature spring or jack malfunctions, when extending the jacks be sure that the ground can safely support them. Avoid lowering the jacks into mud, ice, water, soft ground, or even cold ground. Extending the jacks onto anything but firm terrain runs the risk of burying the jack foot and/or causing the foot to get stuck to the ground. Since the jack foot is connected to the bottom of the piston only by the springs, retracting a stuck foot can cause the piston to separate from the foot. That can result in the foot pad becoming displaced from the bottom of the piston, and/or one or both springs breaking or separating from the jack.
Also, avoid raising the jacks when there’s a chance they could be frozen to the ground. If you plan to break camp in the early hours of a cold morning, consider raising the jacks during the warmth of the previous day. Just be sure to follow your RV manufacturer’s instructions in regard to retracting and extending slideouts. Procedures vary, but it’s more common for manufacturers to specify that the jacks should be extended before slideouts are deployed, and for slideouts to be retracted before raising the jacks.
Consider using jack pads if there are concerns about ground quality or uncertainty about whether the jacks may damage the ground (such as blacktop, especially on a hot day), or if you just need extra height on the jacks. Remember, though, never to jack the rear wheels of an RV off the ground. Because the rear wheels incorporate the parking brakes, jacking the wheels off the ground will compromise the horizontal stability of the vehicle, possibly allowing the unit to move forward or backward off the jacks.
Be Prepared
Replacing RV hydraulic jack springs via the author’s method involves using cables to attach one end of the spring to a tree or post and the other end to a vehicle and stretching it slightly.
Even when RVers take precautions to prevent jack spring failure, it can occur. You can be prepared by carrying a full set of spare springs for your make and model of jack. Springs are sold in sets of two, so be sure to replace both jack springs, even if only one fails. The springs are not expensive, especially when purchased online. You may choose to carry only a single pair of replacement springs. Or, you may purchase a full set of eight. I opted to do the latter, and I have replaced the springs on my two front jacks, as they both experienced failures over the past two years. I am ready with the necessary parts should any of my remaining jacks fail.
Little else is required to replace the springs. No tools are needed, but a few supplies are called for, including items that can serve as small wedges. I highly recommend you obtain 70 to 80 clothespins from your laundry room or a dollar store, and then disassemble the pins.
You also will need two sections of rope or cable with which to stretch the springs. I use a bicycle lock cable and an old dog tie-out to stretch my springs, as I find them to be safer and less prone to stretch than rope. However, rope is fine to use, especially paracord, which I suggest keeping on board for various projects. I highly recommend that you wear safety goggles during the stretching process; gloves also are a good idea.
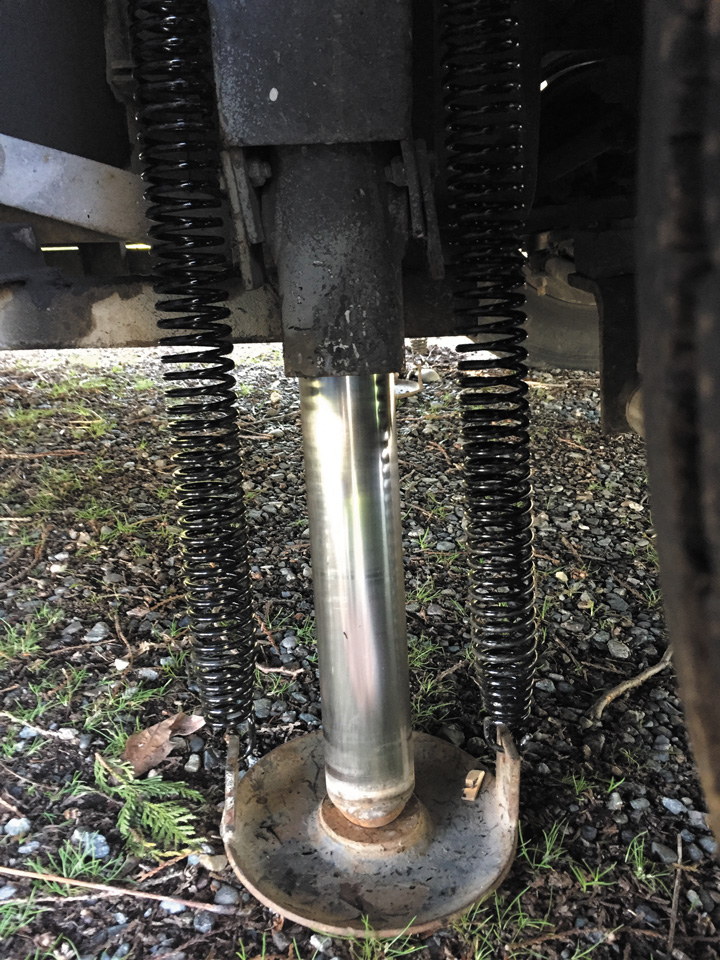
Before replacing the springs, ensure that the jack piston is fully retracted. With one or both springs broken or displaced, single-acting jacks will not retract. While it is possible to retract the jack using a long lever, many people will not have such a tool readily available, but there is a relatively simple way to retract the jacks.
First, be sure to open the corresponding T-handle at the hydraulic manifold. Refer to your owners manual for the proper solenoid valve. Failure to open the T-handle will block the flow of fluid, preventing the piston from retracting. Make sure the RV air bags are fully inflated, and place a solid object (or pile of objects) directly under the jack piston so there are several inches of clearance between the bottom of the jack piston and the solid object. Now dump the air bags until the jack is fully retracted from pushing against the solid object(s). Be sure to close the T-handle when the retraction is complete.
Replacing Springs
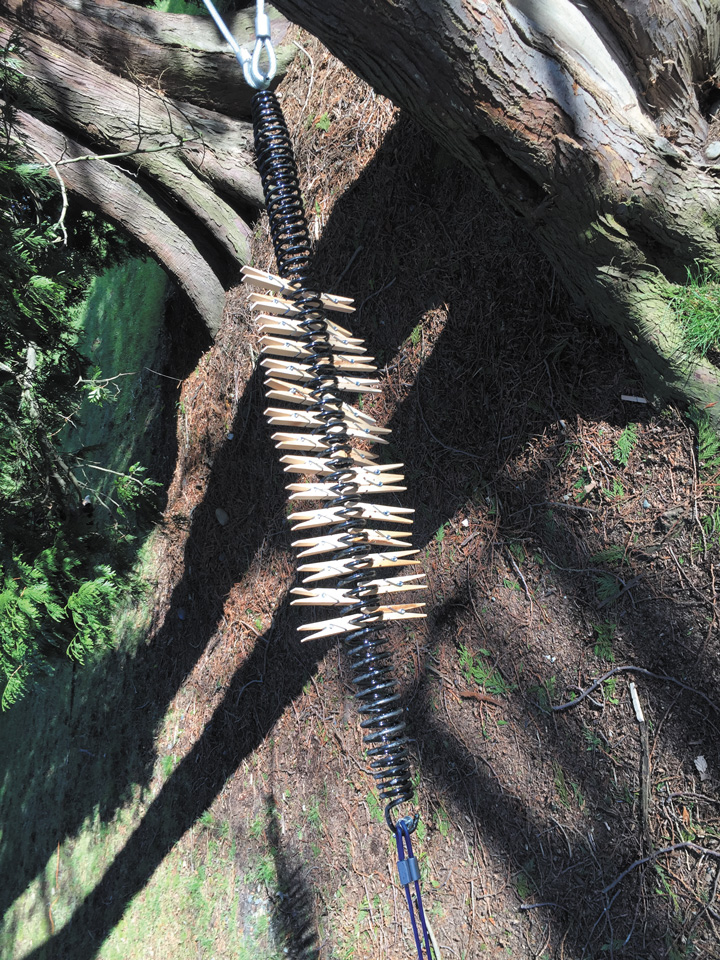
After the stretching process, clothespins are then inserted into the spring coils.
When people experience a jack spring failure for the first time, the tendency often is to simply try to replace the spring by hand-stretching it into place around the jack bracket and foot pad. Trust me when I tell you that attempting to replace the springs in this manner is an exercise in futility. It also can result in damage to coach components or serious injury caused by the springs releasing their energy as you lose control of them.
Another method of replacing the jack springs involves stretching them and then applying wedges between the expanded coils. This temporarily lengthens the springs, making them long enough to install easily on the jacks. There are two main methods of stretching. One is performed by hand; the other utilizes a mechanical advantage. I will briefly describe the first method, but this article focuses mainly on the second.
Stretching by hand involves bending the spring into an arc, placing wedges between the open coils, then reversing the arc and repeating the process. This method presents two problems. First, it is not easy to bend the spring, and thus not viable for anybody who lacks significant arm strength. Second, it can result in the spring not being stretched straight, mainly because it is difficult to wedge open symmetrical coils on both sides of the spring. A spring that is not stretched straight cannot be installed easily onto the jack assembly. Although it is possible to successfully stretch the springs using this method, it requires strength and patience.
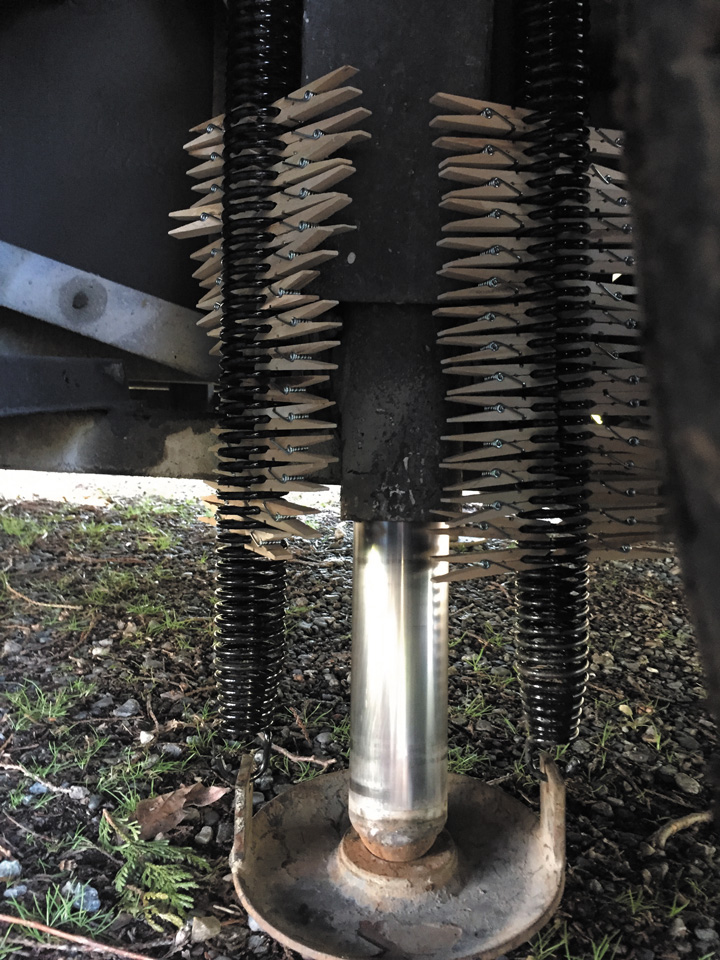
After reattaching the springs, check that adequate clearance exists between the bottom of the jack piston and the foot pad.
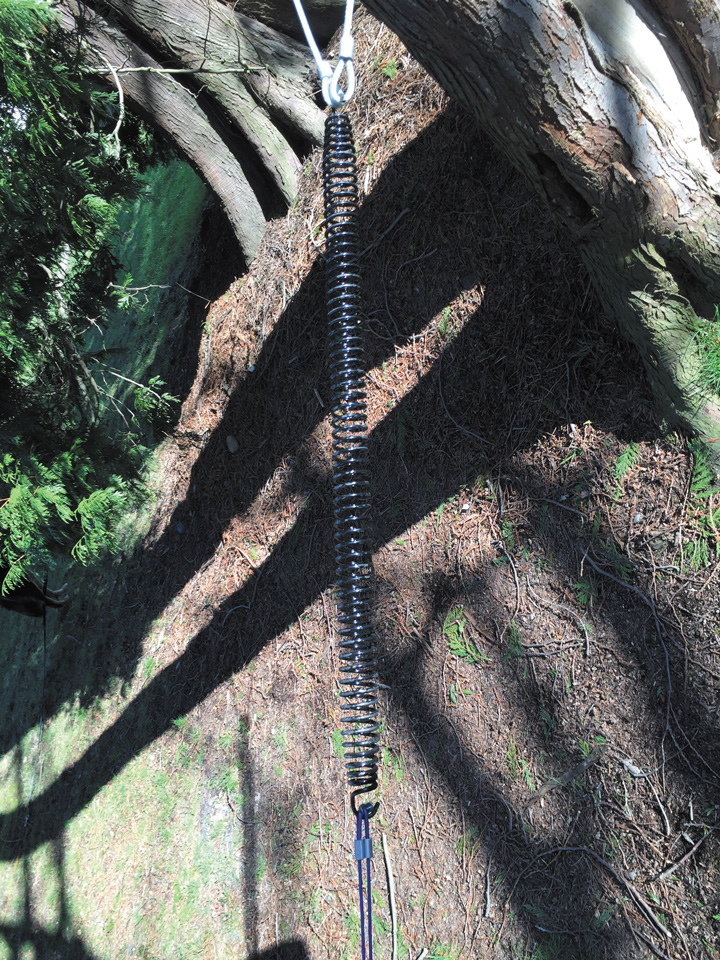
The following method is a quicker, easier way to replace failed hydraulic jack springs. Secure one end of the spring to a solid, stationary object such as a tree, post, etc. Attach the other end to a vehicle. As mentioned earlier, you can use rope or cable to attach to the spring. Make certain to use a spotter for the stretching process. Failure to do so can result in overstretching the spring, possibly to the point of failure. This can be very dangerous, so make sure the spotter stands clear and wears eye protection. Have the spotter guide you while you drive the vehicle forward (or backward, as the case may be) until all the coils are separated enough to insert the clothespins (or whatever you are using as wedges). Moving the vehicle a very short distance — perhaps a couple of feet — will achieve the required spring stretch.
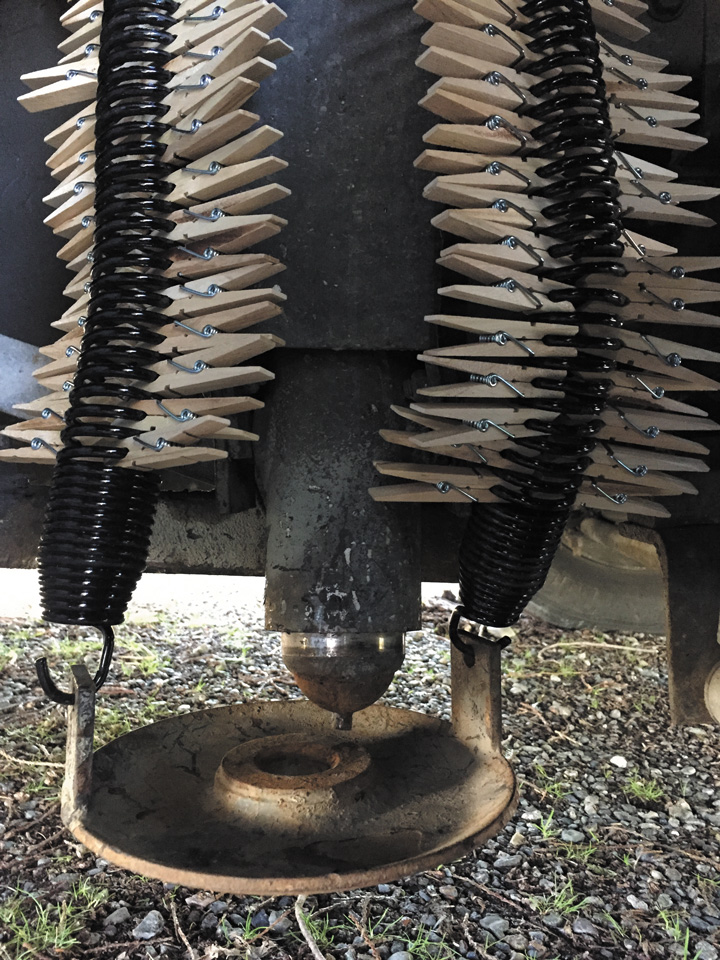
Once the spring is stretched, insert several clothespin pieces into the spring coils, starting in the center of the spring and moving out. The coils may have been stretched far enough apart to insert complete clothespins; if not, use disassembled pins. Be sure to place the same number of clothespins in the same locations on both the top and bottom of the spring. I found that 15 pins in the top and 15 in the bottom provided just enough extra length. You may have to experiment with the number of pins. If you insert too many, you may not be able to extend the jack enough to remove them.
Once the jack is fully extended with the jack foot centered under the piston, the clothespins can be removed.
After inserting the appropriate number of pins, move the vehicle back to remove the tension from the spring, and then detach it from the ropes. Check the spring for length and ensure it is straight. Repeat the process for the other spring. Hang both springs from the top jack bracket and attach the foot to the bottom of the spring. You should have enough clearance between the bottom of the jack piston and the foot pad such that the pad hangs clear under the piston. Ask a helper to extend the jack while you hold the jack foot in position — centered under the piston — until it is fully extended. Remove the clothespins. The jack now should be good as new.
This spring replacement process can be accomplished with no tools to speak of, few supplies, and very little technical skill, but remember that when springs are stretched, they can unleash tremendous energy. If you are not satisfied that you can perform the task safely, contact a professional RV service center for assistance.