
Screen Door Handle
The screen door on my motorhome can be opened only with the outside handle. So, whenever I’m inside and need to open it, I must first slide the clear plastic panel out of the way to get to the outside handle. The position of the handle in relation to the top inside step is so low that I had to bend over quite a ways to reach it from the inside. After going through this and finally opening the door, I’d have to reclose the slide panel once outside.
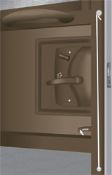
To solve this problem, I made a handle pull, which was inexpensive and easy to do. I began by drilling a 5/32-inch hole through the end of the screen door handle, and a 3/16-inch hole all the way through the screen door frame, approximately 4 inches below the handle. Through the holes in the frame, I installed two 3/16-inch aluminum rivets “” one through each side “” to create a sleeve through the frame. I used my Dremel tool to make sure there were no burrs or sharp edges inside the sleeve.
On the inside of the door frame, I drilled a 1/8-inch hole (not all the way through the frame) approximately at the top of the slide panel. I then threaded a 1-inch-long #8 screw through a plastic pegboard spacer with a larger hard plastic washer on top. Using a length of nylon string, I tied one end to the hole I had made in the handle, threaded it through the sleeve I had created in the door frame, and wrapped it once around the inside screw between the pegboard spacer and the large plastic washer. Tightening the screw ensured that the string held firm between the spacer and the washer. With the proper tension adjustment on the string, I now can open the screen door from the inside with a flick of my index finger on the string. I no longer have to slide open the panel and bend over to open the door from the inside. I have had to replace the string once in the year since I installed the apparatus, so keep a line of string with you as you travel.
Gene Schrader, F379457, Cody, Wyoming
TV Installation
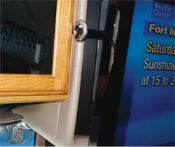 I wanted to install a flat-screen TV in the front of our motorhome. I also wanted to be able to open the cabinets on either side of the TV. So, I purchased a piece of 3/4-inch hollow bar stock and mounted it to the back of the TV. I then drilled and installed eyebolts in the stiles between the old TV compartment and the cabinet doors on either side. Now I can slide the new TV left or right to gain access to the cabinets. For travel, I simply slide the bar out of the eyebolts and store the TV. I did all of this for approximately $23 in materials.
Edward Morse, F305247, Concord, Ohio