
A step-by-step installation of a Total Vision system.
By Mark Quasius, F333630
June 2016
Many of today’s new motorhomes come equipped with a rearview camera. It’s an important safety feature that serves several purposes.
For one, the camera helps ensure that people and objects are not struck by a motorhome as it backs up. Yes, spotters with two-way radios are a good idea, but there’s always a chance of miscommunication.
A rearview camera also comes in handy at highway speeds. A driver can monitor the towed vehicle and take comfort in knowing that the tow bar remains connected. And when the motorhome passes another vehicle, the camera helps the driver to judge distances and determine when it’s safe to merge back into the nonpassing lane.
Camera Types
The cost has fallen for color cameras and monitors, which are an improvement over their older black-and-white counterparts. It takes a bit longer for the human brain to decode a black-and-white image compared to a color one. With a color image, therefore, the eyes can spend less time staring at the screen and more time looking at the road.
Camera resolution and quality vary. The images from a camera rated at 400 lines of resolution won’t be as sharp as those from a camera with 700 lines of resolution. Color rendition also varies; specifications don’t accurately define it, so everyone must judge with his or her own eyes.
Cameras also are rated in terms of field of view, both horizontal and vertical. A camera with a narrow vertical view angle — say, around 70 degrees — won’t see the hitch area. That makes it more difficult to back into tight spaces and to see beyond the towed vehicle to know when it is safe to merge. A larger vertical angle — in the 90-degree range or greater — shows the hitch and the area behind the towed vehicle far enough that it’s easier to judge distances. Similarly, the horizontal angle should be wide enough to see the entire towed vehicle, as well as some areas on either side of it.
Recently, side-mounted cameras have become quite popular. They can be mounted in small nacelles on the side of a motorhome or located in the mirrors. The cameras connect either to a video switcher box or directly to a dash monitor equipped with a built-in device that switches camera feeds in response to 12-volt inputs from the turn signals. When a turn signal activates, the image from the camera on that side appears on the rearview monitor in place of the rear-camera image. Once the turn signal is released, the monitor returns to the rear-camera view, after a brief delay. In some monitors, switchers split the screen between the side-camera and the rear-camera views. Other systems display all camera views in a quad-screen configuration. In either case, the images are much smaller and harder to see.
Side-mounted cameras aren’t perfect. They tend to show a narrow view along the side of the motorhome or a wide-angle view of everything, including areas on the side of the road. That’s largely because of where the cameras are placed. The view from mirror-mounted cameras is much better than that from cameras on the motorhome sidewall, but in any case, depth perception isn’t very good. Side cameras will never replace mirrors, but they do help to eliminate blind spots.
 My Existing System
My wife, Leann, and I bought a coach equipped with a three-camera system. It included a fixed rear camera mounted high on the rear cap, and side cameras placed in the blind-spot mirrors, which was as good a location as possible. All three cameras connected to a video switch box that communicated with the in-dash entertainment and navigation system. An auxiliary monitor beneath the head unit displayed the camera view. When turn signals were used, the video switcher activated a split screen showing views from the rear camera and the applicable side camera.
I didn’t like that system, because it minimized the views and made them harder to see. Thus, I spent more time looking at the monitor than I should. Furthermore, the camera quality was not very good, and the resolution and contrast were poor. The auxiliary monitor was very hard to read at an angle; it darkened substantially from the driver’s position and was virtually blacked out from the passenger’s seat. Plus, it went dark when I wore polarized sunglasses. We decided we needed something safer.
Leann and I had a chance to try out a Total Vision Products system when we spent time at Foretravel Motorcoach reviewing the 2016 Realm (FMC, October 2015, page 64). The motorhome has an excellent camera with a crisp, clear view. It’s motorized and can be aimed anywhere within a 180-degree horizontal sweep and a 115-degree vertical sweep. A handy dash-mounted control panel operates the camera via soft-touch keypad arrows. Two one-touch buttons are programmed for instant hitch views or road views. The unit is enclosed within a dome to keep it clean, and a fan prevents it from fogging up.
I determined that a Total Vision system would be the ideal solution for us, so I ordered one.
The system is found on many bus conversions and high-end Type A motorhomes. The version I saw at Foretravel was equipped with a 7-inch Mito Perimeter View monitor, so I ordered one from RVcams.com. I also decided to retain my existing side cameras, which were mounted in the Ramco convex blind-spot mirrors and offered good placement and a decent angle of view. Once everything arrived, I studied the instructions and began installing the system.
 The Installation
The system’s rear camera came mounted in a gimbal inside a plenum and was covered with a clear dome and rain shield. This unit had to be installed in the rear cap of the motorhome. A remote-control panel had to be mounted in the dash.
A small plastic enclosure contained the electronic control unit (ECU). The ECU’s circuit board had connectors for the cable to the camera, the six-pin power cable, and the ribbon cable to the remote-control panel. I also got a dealer setup kit with templates and levels that made it easy to install the camera unit properly. A microtester was included. It could be plugged into the cable end to test connections and to help with troubleshooting should something go wrong with the installation.
I began by replacing the existing auxiliary monitor connected to the dash entertainment system with the new Mito monitor. I temporarily connected the existing rearview camera to the RCA jack on the auxiliary input of the Mito to verify that the monitor was working.
I then started to run cable to the camera. The cable was 82 feet long and had 14 conductors. That might seem like a lot of cable, but it really wasn’t. By the time I wound it up and down and around to get from high up in the rear cap to the dash area of our 45-foot motorhome, I had just a few feet of slack left.
The 14 conductors are necessary, too, for providing power to the camera, sending video to the dash, and controlling the pan and tilt operation via servomechanisms. In addition, the defogging fan required extra conductors in that cable. The camera end of the cable came with the connector removed, but every conductor had a crimped terminal pin installed. The end of the cable was tucked inside a copper tube that was taped to the cable. That made it easy to pass the cable through tight areas or holes that had to be drilled. A 7/8-inch hole saw was the perfect size, and Total Vision provided plastic grommets to protect the cable from sharp hole edges.
I began at the dash and fed cable through the firewall where wire looms were located. I then followed the frame assembly to the rear of the coach and fed the cable up through the diesel engine compartment and into the rear cap. I used a foam gun to seal grommeted holes that I drilled. I followed recommendations to keep the cable away from hot exhaust system components and the alternator, which could create electromagnetic interference in the camera’s video feed.
Next I installed the remote-control panel in the dash. I found the perfect location in the center area near the monitor, so I used the Total Vision template, drilled four small mounting holes, and used a multi-tool power tool to cut out the rectangular center section for the control circuitry. I then mounted the controller with four small screws, plugged in the ribbon cable, and attached the faceplate.
The ECU circuit board was housed in a 3-inch-by-5-inch plastic enclosure. I plugged the 14-pin camera cable into the board, as well as the 14-pin ribbon cable from the remote controller.
Next I made the wiring connections on the six-pin power cable. I connected the red power wire to a 12-volt constant hot-fused power source and ran the black ground wire to a ground stud behind the dash. I ran a yellow wire to the parking lights circuit so that the panel could be dimmed during nighttime driving. I connected the blue wire to the backup lights circuit so that the camera would automatically come on whenever the transmission was shifted into reverse.
That would have been enough, but two more wires could be used to power the monitor itself. So, I relocated the monitor’s power and ground wires to the orange and green wires on the ECU’s power harness. Now the monitor turns on and off via the power button on the camera’s remote-control keypad, rather than with the ignition key switch. This allows the camera to be used as a pan-and-tilt security camera when the motorhome is parked.
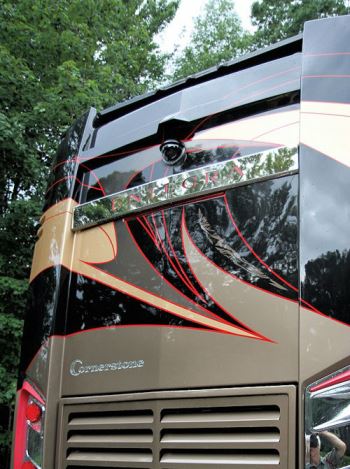
After I removed the existing camera, my next task was the most nerve-wracking. To mount the Total Vision camera and plenum, I had to cut a big hole in the back of my nice, new motorhome. The plenum had to be mounted accurately and perfectly vertical so it could look straight down at the hitch.
Fortunately, the dealer setup kit included a steel template that was equipped with a bubble level. I placed a small torpedo level on the sidewall of the motorhome and tweaked the leveling jacks so that the sides were perfectly plumb. I then used blue masking tape to mark the area on the rear cap where the camera was to be installed. I placed the template over this area and aligned the small bubble to ensure that the hole was level. I used a felt-tip pen to outline the hole, and I used a 1/4-inch drill to mark the corners of the hole to relieve any potential stress cracks. Then I cut the six-sided hole for the plenum using my multi-tool. I purposely cut an undersized hole, knowing I could always make it bigger but could never make it smaller if I made a mistake.
When I removed the tape and tried to insert the empty plenum housing, it didn’t fit. That was expected, so I got out my power file and hand files and trimmed and fine-tuned the hole until the plenum fit. I then pulled the camera cable out through the back of the plenum, removed the protective copper tubing, and inserted the wires into the Molex connector housing. Next I plugged in the small microtester, which contained a number of LEDs.
I then went back inside the coach and plugged the six-pin power cable into the ECU. I grabbed a pair of two-way radios so I could talk to Leann while she operated the control panel and I monitored the microtester at the rear of the motorhome. All of the LEDs lit in response to the buttons I instructed Leann to press, so the wiring was good to go. I removed the microtester and connected the camera. The camera was inserted into the plenum and held in place with a couple of screws.
Back inside the motorhome, I tested the camera’s operation; the RCA connector from the new camera was plugged into the auxiliary port of the Mito monitor. The camera fired right up and displayed an excellent picture. The camera panned and tilted, but it didn’t pan fully to the driver’s side, because I hadn’t tucked the cable into the plenum properly. After I adjusted the cable position, I had full 180-degree pan control. I then installed the clear dome and rain shield.
I made some adapters to connect the camera cables to the mini-DIN camera jacks on the monitor. I routed the turn signal inputs to a double-pole relay, and then to the monitor. A small rocker switch was placed in the dash so the relay could be activated. This allowed me to break the turn signal circuits to the monitor so that the automatic side-camera operation could be bypassed if I didn’t want to use it. I now have the option to retain my rear camera’s view on the monitor when performing a lane change or to select automatic camera sequencing mode with the rocker switch.
The end result: I get a sharp image from the rear camera, which I can manually pan and tilt. Or, I can press a keypad button for preprogrammed operation. I also can choose to have side-camera operation. The hitch-view button positions the camera to view the hitch and most of the towed vehicle. The rearview button positions the camera like a rearview mirror and shows the towed vehicle and an expansive area behind it. I can manually operate the keypad arrows to move the camera to almost any position. The automatic positions also are programmable so an owner can make adjustments. Another button controls the fan that defogs the camera, if necessary.
This is a complete system, but I do plan to add one more side-camera operation mode by utilizing a three-way rocker switch with a center “off” position. For this mode, a pair of time-delay relays would be added to send the side-camera view to the dash entertainment/navigation system’s auxiliary video input. (Time-delay relays eliminate the on-and-off cycling that would occur with a standard relay.) Then I could retain my rear view on the monitor at all times and temporarily interrupt my navigation screen with the appropriate side-camera view whenever that particular turn signal was active.
That would be the icing on the cake of an already great system.
More Info
Total Vision Products LLC
625 W. Plata St.
Tucson, AZ 85705
(520) 623-0790
RV Cams
(877) 378-2267